|
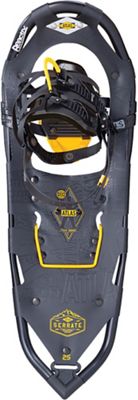
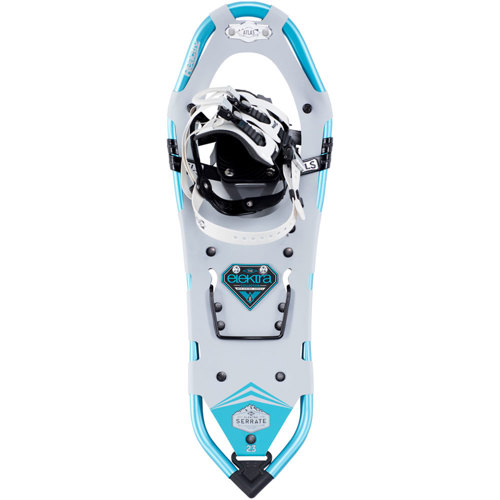
Atlas’ Serrate Snowshoes are teardrop-shaped, nylon-decked snowshoes with crampons and a heel lift designed for hiking and snowshoeing in mountainous terrain. They have a simple-to-use binding system that’s compatible with virtually any kind of winter boot or shoe, but runs a little on the bulky side when strapped to a backpack. That’s often the tradeoff with a user-friendly binding system and the Serrates aren’t unusual in that regard. 
Specs at a glance
BindingsThe Serrate snowshoes have a step-in binding that wraps around your forefoot and is closed when you pull on a single top strap, shaped like a handle. There’s a second rear strap that wraps around your heel and tightens with a buckle. The bindings are foot specific. It’s pretty easy to figure out which is which, but they’re also labelled with “RIGHT” and “LEFT”. That’s it. They’re fast to put on and provide a secure grip, without a lot of uncomfortable foot pressure. To release your boots, you simply pull on grey loop (below). 
To tighten, you pull on the black loop (below). The binding grips the sides of your boot and provides gentle top down pressure to keep your foot locked in pace, without any slippage. When you put your foot into the binding, you will want to keep a 1-2 inch gap between the nylon decking and the front of your foot, so your boot doesn’t catch on it when you walk forward 
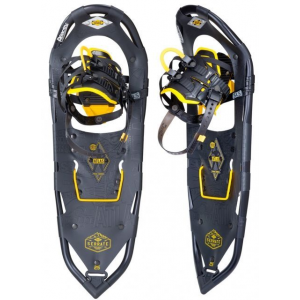
The rear binding strap uses the same identical toothed buckle that’s used on the Tubb Flex VRT snowshoes, which isn’t surprising because Tubbs and Atlas are owned by the same parent company, K2 International. The rear strap is non-intuitive, but works well if you simply pull on the end of the strap to lock it in place. I would have preferred a ratchet-style buckle, but they probably vetoed it on the basis of increased material cost. CramponsThe Serrates have an aggressive set of crampons under the binding (forefoot) and the heel. There’s also a right and left run of stainless steel teeth along the sides of the heel crampon to prevent slipping when you have to sidehill across a slope. Both the front and rear crampons have teeth that point forward and backward, the latter to prevent slipping backwards down a slope. They’re designed for use in icy and slippery mountainous terrain and perform wonderfully in sketchy conditions. 
The front crampon is hinged, so it rotates each time you take a step forward. There’s a stiff plastic strap that runs under the front crampon, what Altas refers to as a “spring loaded suspension”, which keeps the front teeth angled slightly forward, so you get optimal crampon purchase every time you take a step. It also lets the front crampon “float” laterally and rotate a bit if you hit uneven terrain or rocks, although the effect is pretty muted. This type of crampon system is optimized for use with a tear-drop shaped, decked snowshoe, but very different from the crampon traction you find on snowshoes that are rectangular or have a frame that is toothed and acts as a crampon itself, like the MSR Lightning Ascent. Snowshoeing in the Serrates in more like natural walking when snowshoeing in powder or on top of crusty snow, and less like trying to walk with rectangular boards strapped to your feet . Heel BarThe Serrate snowshoes have a flip-up heel bar under the heel that can be used when walking up inclines. It’s designed to reduce calf fatigue, by reducing the amount of stretch required by your calf muscles. It’s best used when you’re walking up a steep slope and not just a gentle incline. When raised, it also lets your heel exert direct pressure on the rear crampons, which provides significant traction when climbing icy slopes. When you reach a flat area, you can easily whack your trekking pole handles at the heel bar and it will drop back down again. 
The heel bar assembly is connected to the side traction bars that run along the sides of the heel crampon. It’s also one of the most robust constructions I’ve seen on a mountaineering snowshoe and unlikely to pop out or sheer, since the side rails are made with stainless steel. FlotationThe Serrate snowshoes provides excellent flotation in powdery conditions due to the snowshoe’s wide front and tapered body and tail. This shape, called a “modified bearpaw” in classical terms, is versatile across a wide range of snow conditions, both on trail and off. The big rounded and slightly upturned toe helps floats the snowshoe high in soft powder while the long and rounded tail provides a counter balance and makes it easier to back up or maneuver in vegetation. RecommendationThe Atlas Serrate Snowshoes are rugged snowshoes designed for traveling in mountainous terrain. Their teardrop shape and upturned toe provides excellent flotation in powdery snow, while their aggressive forefoot, heel, and side crampons provide superior traction over ice, frozen snow, and slab. While the Serrates are aggressive snowshoes, their best feature is the easy-to-use binding system. While somewhat bulky, it intuitive to use and stays on securely. If you want a high flotation snowshoe for mountainous terrain, the Atlas Serrates are an excellent choice. Compare 5 Prices
Last updated: 2018-12-31 00:17:20
Disclosure: Atlas provided the author with sample snowshoes for this review. Editor's note: Help support this site by making your next gear purchase through one of the links above. Click a link, buy what you need, and the seller will contribute a portion of the purchase price to support SectionHiker's unsponsored gear reviews, articles, and hiking guides.The post Atlas Serrate Snowshoes Review appeared first on Section Hikers Backpacking Blog. from https://sectionhiker.com/atlas-serrate-snowshoes-review/
0 Comments
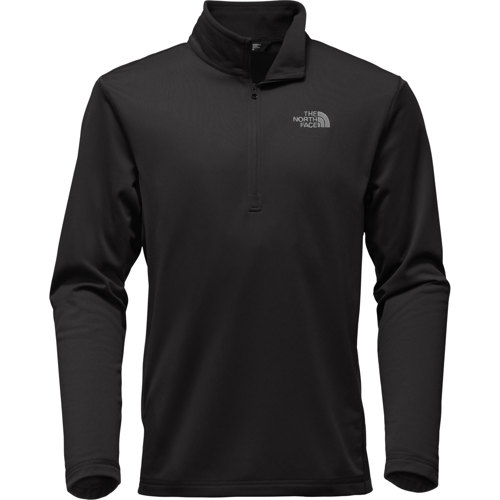
The North Face Tech Glacier 1/4 Zip Fleece Sweater is one of the most popular fleece garments ever made. It’s been one of the North Face’s most popular items for years, but it’s also a very respectable fleece pullover than can be used year-round for serious hiking and backpacking. Fleece 101I carry a 1/4 zip fleece sweater on every hike or backpacking trip I take and have done for the past 15+ years. While there are many types, weights, and textures of fleece pullovers you can buy, they all share a few properties that make them ideal as an insulating layer for hiking and backpacking. First off, fleece is a great insulator and will remain warm even when it gets damp or wet. It’s highly breathable and wicking, making it an excellent mid-layer under a rain jacket in cool or wet weather. Fleece garments are durable and long lasting. They are machine washable without needing any special care and can be dried in a clothes dryer without shrinking. Being synthetic, fleece is moth-proof and doesn’t require special storage when it’s not in use. I like wool sweaters as much as the next guy, but they’re not nearly as durable and easy to care for as fleece and don’t last nearly as long. Tech Glacier 1/4 ZipThe Tech Glacier 1/4 zip is a 200 weight fleece pullover with a smooth interior and exterior. It feels warm when you out it on but it’s highly breathable and dries quickly like all fleece garments. It’s cut with a relaxed fit, but true to size and available in a wide range of colors. The least popular colors are often marked down, if you’re looking for a bargain, and don’t care what color you get. 
The Tech Glacier has a collar which will cover the front and back of your neck when it’s fully zipped up. The zipper unzips down to sternum level and is a great way to vent extra heat if you’re feeling too warm. I wear mine year round, on cool spring and autumn days as an outer layer, or as a mid-layer under a rain shell or synthetic vest in winter. I almost always wear a fleece under a rain jacket because it prevents the conduction of body heat through a wet jacket. I bunch my fleece pullover up as a pillow when I’m camping or I’ll sleep with it on if I’m cold. In fact, I rarely travel anywhere without a fleece pullover because it’s such a lightweight and useful layer to carry. It even passes my 80 year-old mother’s inspection when I visit and need to dress up for a casual dinner. I’ve owned many different fleece pullovers over the years, in different styles, textures, weights, but none have lasted as long or been used as much as my basic quarter-zip fleece pullovers. If you’re looking for a flexible mid-layer garment that can also be used for insulation during the warmer months, you’ll be hard pressed to find a better value than The North Face Tech Glacier 1/4 Fleece Pullover. I own two of them and use them all the time. Compare 3 Prices
Last updated: 2018-12-27 20:42:43
Disclosure: The author purchased this item. Editor's note: Help support this site by making your next gear purchase through one of the links above. Click a link, buy what you need, and the seller will contribute a portion of the purchase price to support SectionHiker's unsponsored gear reviews, articles, and hiking guides.
The post The North Face Tech Glacier 1/4 Zip Fleece Review appeared first on Section Hikers Backpacking Blog. from https://sectionhiker.com/the-north-face-tech-glacier-quarter-zip-fleece-review/ 
A New Outdoor Industry StandardASTM International passed a new R-Value Sleeping Pad Standard (FF3340-18) last month that will be rolled out to consumers in 2020. It defines a rigorous and reliable methodology for measuring the R-Value of all sleeping pads, including air mattresses, self-inflating pads, and foam pads. I recently spoke with Brandon Bowers and Greg Dean, both from Therm-a-Rest, about the new R-value standard, and here’s a summary of our conversation. The questions were mine, but I’ve paraphrased their responses below for readability. Any errors in translation are my own. What problem does the new sleeping pad R-value standard address?While many manufacturers provide R-Values for their sleeping pads today, there’s never been a consistent way of measuring them so you can reliably compare the insulation value of pads from different manufacturers. The new standard addresses this issue. Those manufacturers who provide R-values for their sleeping pads already will need to test them again to bring their pads into compliance with the new standard. Pad manufacturers that only provide temperature ratings today will probably be required by outdoor retailers to start measuring them and publishing the results. For example, REI and MEC were instrumental in facilitating the widespread adoption of sleeping bag temperature ratings and educating consumers on how to understand what they mean. Both were involved in the definition of the new R-value standard as well. What are R-Values?R-Value measures how well an object resists the flow of heat from one side to another. The higher the R-value, the greater the resistance, and the better its insulating properties. When applied to sleeping pads, R-value measures a pad’s ability to keep your body heat from passing through the pad and into the ground. Sleeping pads aren’t designed to be warm, so much as to resist the transfer of heat. Highly insulated pads will usually feel warmer because they keep your body heat close. What is the new R-Value Testing Process?The test method measures the thermal resistance of sleeping pads using a two-plate apparatus. The pad is sandwiched between a hot plate and a cold plate and the R-value is measured in three different locations on the pad. The same test is run on three identical pads and the results are averaged together. Are there any automated testing tools for measuring the new R-values?Testing hardware for measuring R-values, as defined by the new standard, is already available from a company called Thermetrics. The R-value test methodology and calibration scheme was kept simple to make R-value testing affordable by smaller brands with fewer capital resources to purchase expensive equipment. Hopefully, they will also see the advantage of publishing standardized R-values for their sleeping pads. How much does a Thermetrics R-value testing machine cost?$50,000. Will independent testing labs be responsible for testing sleeping pad R-values or will that be left up to the manufacturers themselves?It’s too early in the process to know what will be required. The standard was just approved. KSU (Kansas State University), which is lab that does a lot of the sleeping bag temperature ratings for the outdoor industry, has opted not to do R-value testing for sleeping pads because they want to stay focused on their core competency and not dilute it. Why are R-values a better way to measure insulation value than temperature ratings?An R-value is a physical measurement that doesn’t require a lot of qualifiers to interpret. For example, don’t have to know whether a person using the sleeping pad is a man or a woman, whether they’re wearing long underwear, or wearing a hat when the test is performed. This makes it very simple for people to understand and compare two pads. Are R-values additive? Can you stack multiple pads together to create an insulation surface that is the sum of its parts?
Yes, the R-values of sleeping pads are additive, provided that there is no air gap between them.
Which will be warmer: an air mattress placed on top of a foam pad or a foam pad placed on top of an air mattress?Sleeping pad R-values don’t measure pad warmth, but their resistance to heat loss. As long as there isn’t an air gap between the pads, they’ll have the same additive R-value no matter how they’re stacked. Does the moisture in your breath, when you blow up a pad by mouth, reduce or alter the R-value of a Therm-a-Rest sleeping pad?It might have an effect over the long term in extreme temperatures, but it won’t have any effect in normal use. How does letting some of the air out of an inflatable sleeping pad affect its R-Value?It might reduce it by 5-10%, but that’s a guess. Are there any other factors that can reduce the R-value of a sleeping pad after extended use?Synthetic or feather insulation may compress over time. What are the different design variables that alter the R-values of Therm-a-Rest’s sleeping pads?The number of internal chambers, radiant layers, and fabric thickness. How well do the R-values of Therm-a-Rest’s existing sleeping pads correlate with measurements under the new R-value standard?Everything will change a little bit because our existing R-value ratings were done in a cold room, which is a different testing environment. But we’ve always used R-values to rate our sleeping pads and we already own a Thermetrics R-value testing machine. How will the R-values or temperature ratings of other sleeping pad manufacturers be affected by the new R-value standards?Some manufacturers will have to make major adjustments to their sleeping pad ratings. Is there agreement on how R-values will be communicated to consumers in manufacturer or retailer product listings? For example, the EN13537 sleeping bag temperature ratings are documented in a standard way across manufacturers and retailers.Not at this time. Therm-a-Rest will be undertaking a major consumer education campaign in 2019 to help consumers understand R-values and the new R-Value standard. Philip: Thanks guys. I appreciate the background information and think my readers will find it informative.Published: 12/2018. The post New Sleeping Pad R-Value Standard FAQ: ASTM FF3340 appeared first on Section Hikers Backpacking Blog. from https://sectionhiker.com/new-sleeping-pad-r-value-standard-astm-ff3340/
The Six Moon Designs Lunar Solo is one of the most popular ultralight tents available today. Made with waterproof siliconized polyester (silpoly), it’s a single wall trekking pole tent that weighs 26 ounces (740 g). It is a six-sided shelter, shaped like a half pyramid, with a side door and vestibule area that’s good for gear storage or cooking in rainy weather. The single side door is made of mesh for maximum ventilation and the tent is designed to be set up using a single trekking pole. For more details, see my recent Lunar Solo Gear Review. Deadline to EnterThe deadline to enter this raffle is Wednesday, January 2, 2019, at midnight PST. Rules
To EnterTo enter this random raffle for a chance to win a free Lunar Solo Tent, complete the short 5 question survey about hiking footwear by clicking on this link. Survey: Hiking Boots and Trail Shoe PreferencesThe post Raffle: Enter for a Chance to Win a Six Moon Designs Lunar Solo Ultralight Tent appeared first on Section Hikers Backpacking Blog. from https://sectionhiker.com/raffle-enter-for-a-chance-to-win-a-six-moon-designs-lunar-solo-ultralight-tent/
Winter backpacking tents need to be a good deal stronger than regular three season tents if you are camping in exposed windy terrain that is subject to heavy snow loads. The strongest and most wind resistant tents are wedge or dome-shaped and freestanding, so they are completely sell supporting. You still need to secure them to the ground to keep them from blowing away in wind, but freestanding tents can be set up on any surface including open rock ledges or climber’s portaledges, providing added flexibility and increased safety because you can get out of the weather more quickly. They also need to be more comfortable and spacious because you have to spend more time in them given the lack of daylight and shorter days that accompany winter weather. Added vestibule space is convenient for storing gear and keeping snow-covered items outside the living space to cut down on internal condensation, although they do weigh more. They can also be used for cooking and melting snow under cover when conditions outside are poor. Good ventilation is equally important, again to reduce internal condensation, and to vent dangerous gasses if you cook or fart inside the tent.
1. MSR Advance Pro 2
The MSR Advance Pro is lightweight, freestanding tent that weighs just 2 lbs 14 oz. Designed for high altitude mountaineering, its steep sides maximize interior room while shedding winds. Dual carbon fiber tent poles are anchored in sleeves and crossed overhead, providing the ability to handle heavy snow loads. In addition to the door, front and rear vents help remove moisture and reduce internal condensation, even in the harshest conditions.
2. Black Diamond El Dorado
Black Diamond makes several other freestanding tents that look like the El Dorado, but it is the roomiest, longest and strongest, designed for taller individuals and more gear. Weighing 4 lbs 8 oz, the El Dorado has two crossed aluminum poles which are secured in the tent’s interior. The walls are made with a breathable waterproof fabric to help vent condensation while front and rear top vents promote greater airflow. A separate front vestibule is also available, but it is not freestanding.
Check for the latest price at: 3. NEMO Tenshi 2
Weighing in at 3 lbs 14 oz, the NEMO Tenshi 2 is a single wall, four season tent made with a waterproof/breathable fabric to vent internal condensation. It has roof vents, a front and rear window that provide excellent ventilation, and is available with an optional vestibule with a transparent front window for gear storage and cooking in challenging weather. External DAC poles provide a strong shelter while over-sized guy loops let you anchor the tent with backcountry skiing or mountaineering gear instead of stakes.
4. Hilleberg Soulo
The Hilleberg Soulo is a one person double-wall freestanding tent designed for 4 season use. It has a large front vestibule that provides access and ventilation and can be used for cooking or gear storage in poor weather. Weighing 4 lbs 7 oz, it is tremendously strong and can be pitched just about anywhere. The inner tent can hung inside the outer rain fly after it has been set up, a desirable feature to keep the inner tent dry if it is raining during setup. Most Hilleberg tents have this capability.
5. Black Diamond First Light Tent
The Black Diamond First Light is a wedge-shaped two person tent with a single front door. It’s fast and easy to set up with two internal crossing poles. An optional front vestibule is also available. Weighing just 2 lbs 13 oz, the First Light is a single wall tent made with a water-resistant and breathable fabric with two covered vents for internal ventilation. Read our First Light Review.
Check for the latest price at: 6. Hilleberg Unna
The Hilleberg Unna is a 1-person dome-style freestanding tent that weighs 4 lbs 7 oz. It is ideal for trips in any season where low weight is a high priority, but where the terrain makes for tricky pitching conditions. Rather than a vestibule, the Unna has a spacious interior that easily accommodates the occupant and gear. The corner of the inner tent can be detached to create a large protected area to cook, pack, or store gear.
7. The North Face Assault 2
The North Face Assault 2 is a rugged, single-wall expedition tent with a pole-supported ventilation system for increased stability. Sized for two, the 3 lb 4 oz Assault 2 is made with a breathable laminate to vent moisture, with a font door and rear escape hatch. Crossed poles make setup fast and easy. Dual top vents increase breathability, while ample ceiling tabs allow for hanging a stove, gear loft, or drying lines.
Check for the latest price at: 8. Rab Latok Mountain 2
The Rab Latok Mountain 2 is a single wall tent made with breathable 3 layer eVent fabric. It has two internal crossed poles for strength and is easy to set up in poor weather. A rear vent provides additional airflow and internal humidity reduction. Weighing 4 lb. 1 oz, the tent can be guyed out for use with skis and mountaineering tools, while a 70 denier nylon floor is provided for enhanced durability and waterproofing. A separate front vestibule is sold separately.
9. Hilleberg Allak
The Allak is a comfortable and rugged two-person freestanding dome tent with two large vestibule doors and large ceiling vents that provide excellent ventilation and livability. Deep pole sleeves ensure excellent wind resistance and are large enough to accept double poles for maximum strength. Weighing 6 lbs 2 oz, the Allak’s comfortable ceiling height and long length will also appeal to taller users. If you’ve never owned a Hilleberg Tent, you’ll be blown away by the quality of the materials and construction.
10. Big Sky Chinook 2P
The Big Sky Chinook 2P is a freestanding dome-style two person tent with two doors. The three pole construction is very strong and storm-worthy, but the tent can be set up with two poles to save weight. The inner tent is available in all mesh or with solid breathable sides to make the tent less drafty in cold and windy weather. Interior vents help prevent internal condensation. Weighing 4 lbs, the Chinook 2P can be set up fly first in rainy weather to keep the inner tent dry. Read our Chinook Review.
Check for the latest price at: Winter Backpacking Tent Evaluation CriteriaWhen evaluating winter tents, it helps to research the climate conditions you expect to use the tent in, as this will inform the degree of tent pole strength and ventilation required. Pole Architecture: Many winter tents have several crossed poles, anchored inside or outside the tent walls. Exterior poles that are anchored in sleeves are much stronger that poles that connect to an inner tent using clips or velcro tabs. They’re much more wind resistant and capable of withstanding heavier snow loads. Ventilation: Important to minimize and reduce internal condensation. This is achieved by keeping the door(s) open when feasible, through peak and side vents, and in some cases through the use of breathable wall fabrics. You can never have too much ventilation in a winter tent, although the addition of doors and zippers can result in increased weight. Interior Space: Winter tents designed for high alpine mountaineering are often cramped because weight savings are so critical when you have to climb many thousands of feet to reach your destination. When selecting a winter tent be realistic about your length and width requirements, particularly when choosing a two-person wedge style tent, as livability can be compromised. Number of Doors: Tents designed to hold two occupants are more comfortable and convenient to use if they have two doors and vestibules because you can come and go without waking your tent partner. Dome style tents often provide greater covered vestibule storage, which can make a significant different in livability. Check Out All of SectionHiker's Gear Guides!
The post 10 Best Winter Backpacking Tents of 2018-2019 appeared first on Section Hikers Backpacking Blog. from https://sectionhiker.com/10-best-winter-backpacking-tents-of-2018-2019/
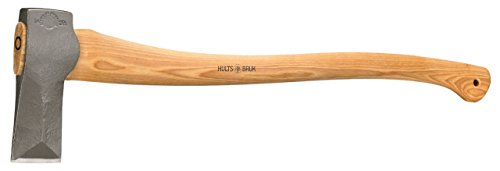
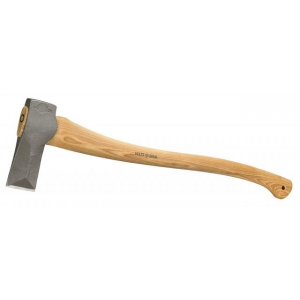
The Hults Bruk Bjork Splitting Axe is a lightweight axe with a 30″ long handle that’s good for splitting soft woods or dry wood with a straight grain. It’s perfectly good for around the house and splitting seasoned wood, but doesn’t cut it for splitting freshly cut green wood or wood with knots and twists in it. Think maple. I spend a fair amount of time harvesting firewood from the National Forest (with a permit) where I live and I heat my cabin exclusively with a wood stove. I mostly burn ash, beech, birch, and maple. This past year I harvested and split about 4 cords with a friend, all by hand. We cut up downed trees with chain saws and split it on the spot before hauling it home in a trailer to dry. They say firewood warms you many times and that’s the truth. You don’t need a gym membership if you have a decent wood pile. 
When I’m harvesting green wood, I usually split it with a 36″ Fiskars x27 Splitting Axe that weighs 5.4 pounds and has a 4 pound head. It does a great job, splitting meaty 75-year-old rounds with ease. The Hults Bruk Bjork has a much shorter handle (30″) and lighter weight, with a total weight of 4.7 pounds and a 3.4 pound head. It doesn’t pack the same wallop and it takes many more swings of the axe to split the same amount of green wood than the Fiskars X27. 
But the main difference between the axes is the head shape. The Bjork has a narrow head that gets stuck in green wood and is a pain to remove, while the Fiskars has a wedge-shaped head that rarely gets buried and blasts the wood apart. The difference doesn’t matter as much on seasoned wood or a low moisture, straight-grained species like ash, but it’s very noticeable with green wood. I also suspect that the shorter length of the Bjork is a secondary factor, since a longer and heavier axe like the Fiskars X27 is probably traveling faster when it hits the wood. 
The Hults Bruk Bjork is still a nice tool if all you have to do is split seasoned wood, including wood that’s been dried by a reseller and delivered to your house. It has a nice hickory handle and the head holds an edge well. I use the Bjork at home to chop kindling from seasoned wood and it works fine for that. But it’s not the right splitting axe for green wood, fresh from the tree. Compare 2 Prices
Last updated: 2018-12-21 03:45:06
Disclosure: Hults Bruk gave the author a sample axe for this review. Editor's note: Help support this site by making your next gear purchase through one of the links above. Click a link, buy what you need, and the seller will contribute a portion of the purchase price to support SectionHiker's unsponsored gear reviews, articles, and hiking guides.The post Hults Bruk Bjork Splitting Axe Review appeared first on Section Hikers Backpacking Blog. from https://sectionhiker.com/hults-bruk-bjork-splitting-axe-review/
The CAMP Corsa Ice Axe (8.8 oz) is the lightest weight walking ice axe available today, which explains its popularity with thru-hikers, ultralight backpackers, and ski mountaineers. It’s a straight-shafted walking axe designed to stop uncontrolled slides down snow and ice covered slopes, as opposed to a curved and shorter ice-climbing axe which is used to climb frozen waterfalls and high angle ice. When you think you might need an ice axe, you carry it in what’s called the “ready position”, with the butt of your hand wrapped around the pick and your fingers wrapped around the rear part, called the adze, with the point of the pick pointed away from your body. If you do fall, there’s no time to think, so prepositioning the axe in your hand properly is the only way you’ll be able to deploy it in time to prevent serious injury. 
I’ve always found it challenging to grip the CAMP Corsa in the ready position because a high dexterity glove is required to wrap around its small pick and shaft. But most high dexterity gloves lack the insulation required to grasp a freezing cold piece of aluminum and carry it for hours at a time. . 
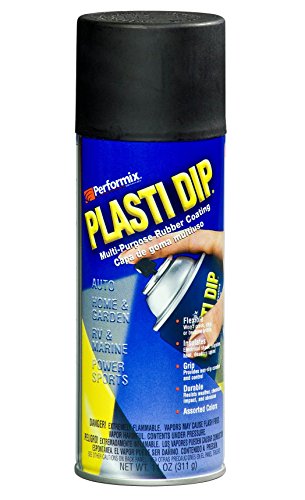
Then I saw a picture on facebook posted by Chris Townsend of a new walking axe called the Grivel Helix which comes with a pick head cover (not available yet in the US). I immediately started researching spray-on rubber-like insulation and decided to try to duplicate something like it for my Corsa. This hack is pretty simple, but surprisingly effective. First buy some Plastic Dip ($6) This is a spray-on rubber-like insulation with all kinds of nasty solvents in it, so do your spraying and drying outside or in a very well ventilated place. Plasti-Dip is also easy to peel off by hand if you make a mistake or don’t like the outcome. Next tape up the parts of the axe you don’t want to cover with painters masking tape. Then spray 7-10 coats of Plasti-Dip on the exposed metal that you want to insulate. Let dry at least 30 minutes between coats. When finished, let the axe dry for a couple of days. 
Before you remove the tape, cut the boundary between the tape and the uncoated bare metal portion with a razor blaze. Plastic-Dip forms a continuous skin over the exposed metal and the tape, so it’s important to slice through the boundary so it doesn’t peel off when you take off the tape. Carefully peel the tape off. Ta dah! You now have an insulated ice axe head that you can bare hand in warm weather or hold with a high dexterity, lightly insulated glove. 
Disclosure: The author purchased Plasti-Dip. Editor's note: Help support this site by making your next gear purchase through one of the links above. Click a link, buy what you need, and the seller will contribute a portion of the purchase price to support SectionHiker's unsponsored gear reviews, articles, and hiking guides.The post Ice Axe Insulation Hack for the CAMP Corsa appeared first on Section Hikers Backpacking Blog. from https://sectionhiker.com/ice-axe-insulation-hack-for-the-camp-corsa/
I’ve never met Cam Honan in person, but I think we’d hit it off if our paths ever do cross. He’s an exceptionally well-travelled backpacker who’s walked across 56 countries and 6 continents, he can write well, and he visits a lot of off the beaten track places, which is probably what I admire most about him. Hiking long trails is all well and good, but the hikers that impress me the most are people who journey to unique destinations, plan their own routes, and enjoy mastering the unknown. Cam has always struck me as resourceful and humble fellow traveller who can land on his feet, which is a useful skill if you like to backpack in strange new places. The Hidden Tracks is a compendium of destinations that Cam has travelled to and hiked, illustrated with fantastic large format photos of the unique landscapes he’s experienced. Each chapter describes one journey, and includes an overview map, helpful travel and equipment tips, and other pertinent information. While there are a few long distance trails described like the Pyrenean Haute Route (45 days) and the Hayduke Trail (60 days) the majority of hikes are under one or two weeks in duration and accessible to moderately experienced hikers and backpackers.
But The Hidden Tracks is first and foremost a picture book full of scenic photos with the size and heft of a good coffee table book. If you’re looking for a last-minute holiday gift to inspire a budding backpacker or your passport is feeling unloved and underutilized, get yourself a copy of The Hidden Tracks by Cam Honan. Disclosure: The author received a sample book for this review. Editor's note: Help support this site by making your next gear purchase through one of the links above. Click a link, buy what you need, and the seller will contribute a portion of the purchase price to support SectionHiker's unsponsored gear reviews, articles, and hiking guides.The post Book Review: The Hidden Tracks by Cam Honan appeared first on Section Hikers Backpacking Blog. from https://sectionhiker.com/book-review-the-hidden-tracks-by-cam-honan/
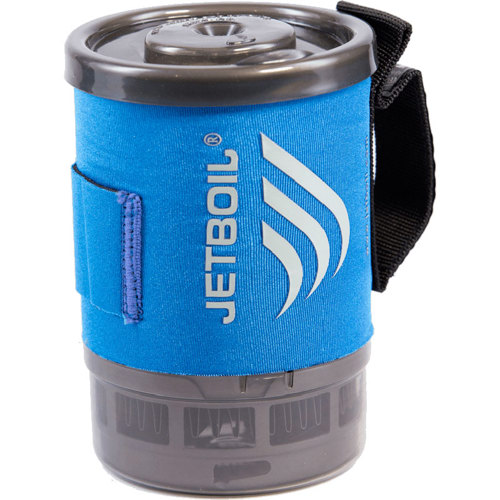
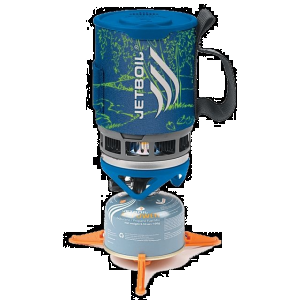
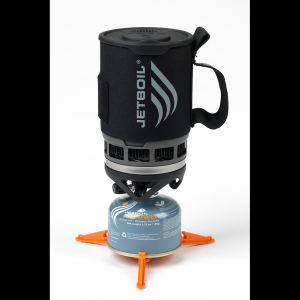
The Jetboil Zip is a complete canister stove system that includes an insulated cooking pot, top lid, stove burner, measuring cup, and stand. It’s large enough to carry a small-sized 100 g canister inside and packs together into a small and compact unit that’s easy to carry in a backpack. The Zip is designed to boil water so you can rehydrate freeze-dried or dehydrated backpacking meals and make hot drinks. Sized for a single person, it’s a complete, but bare-bones stove system that’ll get the job done for three season use. The value of this product is in the tight integration of its components and its small size, which makes it easier to pack. Specs at a Glance
Boiling WaterThe Jetboil Zip is really good for heating up water fast. In fact, that’s all it’s really good for. If all you need to do is boil water for drinks, re-hydrate freeze-dried, or home-packaged freezer-bag meals, the Zip will work admirably for your needs. I’d guess that describes about 95% of the backpacking population, which explains why this stove is so popular. The Zip is not designed to simmer or fry food, although I’m sure its been done. The valve that feeds gas into the stove has a short black plastic knob that is hard to grasp while the stove is on or to finely control the flame size. Other Jetboil stoves systems, such as the Jetboil Flash, Jetboil MicroMo, and Jetboil MiniMo have a longer wire handle that is safer and easier to turn while the stove is running. The Zip is also limited by the amount of water you can boil at a time, since it has a small 0.8 liter pot. Even then, you’ll be limited to boiling about a half liter (16 oz) at a time to prevent a dangerous boil over. On the flip side, the Zip can boil a 1/2 liter of water quite fast, in 2 min 30 sec on average. If you need more water, you simply boil it. 
Jetboil Zip StoveThe Zip’s stove is pretty bare-bones compared to the other system stoves in the Jetboil product line (see below). For example, it doesn’t have a push-button piezo igniter, so you’ll need to light your stove with matches, a lighter, or a sparker. Piezo igniters have a tendency to fail over time, so not having one isn’t a huge loss. While the Zip can boil water relatively fast, the stove is only rated for 4500 BTUs, compared to the much faster and more expensive Jetboil Flash, which is a 9000 BTU stove. The Zip also doesn’t have a pressure regulator, like the Jetboil Sumo, Jetboil MicroMo, or Jetboil MiniMo. A pressure regulator helps ensure that the size of flame stays the same, even as the contents of a canister are used up. It’s a nice-to-have feature, especially for colder weather, but not an essential if you backpack and camp in warmer weather. Worst case, you’ll need to wait longer for your water to boil when your fuel canister gets close to empty. That’s not the end of the world, either. The base of the stove has a Lindal B188 valve that screws onto threaded isobutane gas canisters. Most of the fuel canisters you can buy in the US are compatible with a Lindal valve including Jetboil JetPower Fuel, MSR IsoPro, andSnow Peak Gigapower Fuel. 
Jetboil Zip PotThe Zip’s pot is made with aluminum and is wrapped in an insulated neoprene cozy to conserve heat and fuel. The cozy also has a webbing handle so you can safely grip the pot and pour from it. The top of the pot has a black plastic lid perforated with a pour spout and colander holes. It fits rather well and will stay closed inside your backpack. If you want to cook noodles in a Zip, the best way to do it is to bring your water to a boil, turn off the stove, drop in your noodles, cover the top and let them rehydrate. There’s no need to simmer ramen noodles or pasta, which can simply cook by soaking (See Forget Boiling: How to Cook Dried Pasta and Stretch Your Stove Fuel) The interior of the pot has etched fluid measurements in milliliters (max of 500 ml ) and ounces (max of 16 oz). The base of the pot also has flanges that lock onto the stove when the burner is in use. This ensures an optimal distance between the flame and the bottom of the pot, while helping to prevent the pot from being accidentally knocked off the stove. 
The bottom of the pot has heat retention fins that retain heat that would otherwise be lost after the flame has come into contact with the pot, and provide a modest amount of wind protection. They’re surrounded by a reinforced cage, which locks onto the stove with specially shaped flanges, when used. Jetboil Zip CupThe Jetboil Zip comes with an 8 oz plastic measuring cup that can be used as a drinking cup or bowl. It snaps onto the bottom of the pot when packed and has fluid measurements on the inside. This measuring cup is not made with the most durable plastic and it is easy to lose. I know this from experience. I cracked both of the cups that came with my last two Jetboils and stopped carrying them with the stove. If you’re comfortable eating and drinking directly from the cook pot, there’s no need to carry the additional cup. 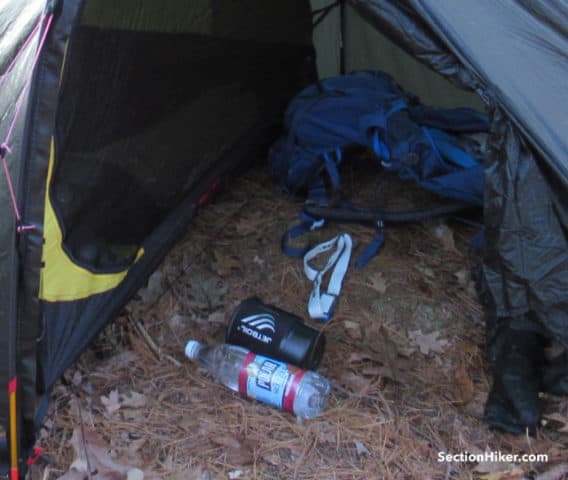
Jetboil StabilizerCanister stoves systems, by their nature, can be tippy. So Jetboil includes an orange pot stabilizer with the Zip that snaps onto small or large fuel canisters. The stabilizer legs folds up neatly, so you can store it in the pot with a 100 gram fuel canister and the stove when you pack the Zip up. The stabilizer is another component that you can leave at home if you’re careful, although it helps to fill in the space it takes in the cook pot to reduce any rattling when you’re hiking. Jetboil Cook Systems Comparison
RecommendationThe Jetboil Zip Cook System boils water quickly and efficiently for making hot drinks or rehydrating pre-packaged backpacking meals. While it lacks the features of Jetboil’s more expensive cooking systems, it’s perfectly sufficient for multi-day backpacking trips or thru-hikes. Compact, lightweight, and self-contained, the pot is large enough to store a 100 g fuel canister together with the stove and accessories so you can stay organized on trips. If you need to cook for multiple people or want to be able to cook more complex 1-pot meals, you’d be better off getting a higher volume Jetboil cooking system or cook pot (since Jetboil components are interchangeable) because they can hold more liquid. Compare 4 Prices
Last updated: 2018-12-18 02:19:06
Disclosure: The author purchased this stove. Editor's note: Help support this site by making your next gear purchase through one of the links above. Click a link, buy what you need, and the seller will contribute a portion of the purchase price to support SectionHiker's unsponsored gear reviews, articles, and hiking guides.The post Jetboil Zip Stove Review appeared first on Section Hikers Backpacking Blog. from https://sectionhiker.com/jetboil-zip-stove-review/ 
The Six Moon Designs Lunar Solo is a single wall trekking pole tent that weighs 26 ounces (740 g). It is a six-sided shelter, shaped like a half pyramid, with a side door and vestibule area that’s good for gear storage or cooking in rainy weather. The single side door is made of mesh for maximum ventilation. The tent is designed to be set up using a single trekking pole, although a 49″ tent pole is also available for purchase. Seam sealing is required, but is also available for a nominal fee. Specs at a Glance
The Six Moons Lunar Solo was the first ultralight backpacking tent I ever bought, about 13 years ago. It’s gone through several design revisions and material changes since, but its key characteristics remain unchanged. It’s also a few ounces lighter weight, despite the fact that the internal volume and living space have increased in the intervening years. This is a review of the most recent version. 
The Lunar Solo is a tarptent with a floating floor attached to its rain canopy with noseeum mesh. The floating floor makes it possible to set up on uneven surfaces and stealth tentsites, while a bathtub floor prevents rain from flooding the inside floor. A single wall shelter, it has one mesh side which functions as a door and provides excellent ventilation in order to minimize any internal condensation. The other walls are solid fabric, without a separate inner tent. 
The pyramid shape of the Lunar Solo makes it quite wind worthy, while the hexagon shaped floor is designed for increased livability. You also have the option to lower the peak in really bad weather to give the tent a lower wind profile, something that’s possible because the floor is loosely connected to the walls by mesh. The hexagon shape makes it possible to store some gear on the side of the sleeping surface, which is often lacking in many one-person ultralight shelters with narrow, rectangular sleeping areas. 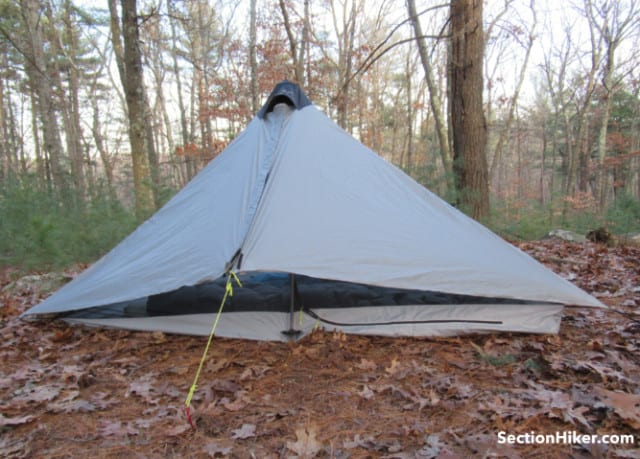
The vestibule is also somewhat untraditional, in that it doesn’t reach all the way to the ground, but has a gap at the bottom. This is to promote airflow in order to prevent internal condensation. It does require that you be conscious of wind direction on cool nights and that you pitch the vestibule away from the wind direction, so that the breeze hits the rear of the tent instead. I can recall one particularly cold night when I didn’t heed this advice and I had to use my backpack as a bivy sack for warmth when cold wind blew into my tent. 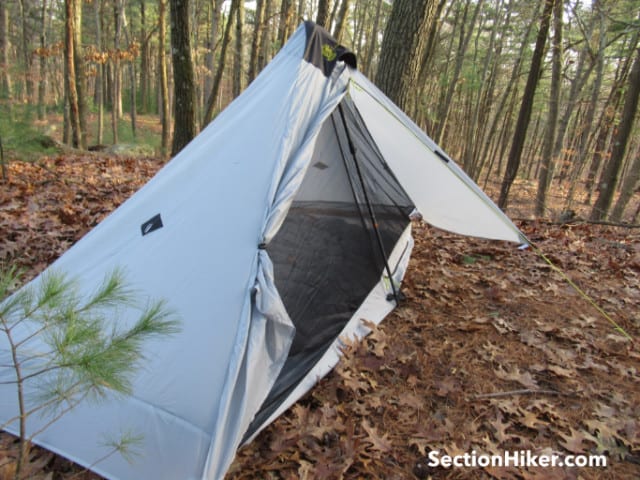
Setting up the Lunar Solo is an easy process, but it pays to read these tent setup tips from Ron Moak, the tent designer, about the order in which top stake out the guy out points. The most important tip I can share when setting up any pyramid-like shelter like the Lunar Solo, is to keep the guylines as loose as possible when staking it out, only tightening them once the main pole has been set. This gives the shelter the ability to adapt to potentially uneven or slightly sloped terrain. The pole is pitched at a slight angle so it doesn’t intrude into the living area. The top of your trekking pole fits into the tent peak, which also has a top vent (the Lunar Solo is Pacer Pole compatible, as shown.) The carbide tip of your pole fits into a grommet attached to the tent floor, providing a nice stable support that won’t slip at night. There’s a single guyline that runs from the peak to the ground and prevents the pole from falling. It’s really quite a strong setup. 
There’s a zipper that connects the two half front doors, which you close above the front guyline. Each door has a small webbing loop at its base which you can connect to a prusik knot that travels along the front guyline. This lets you tension the doors down or up, or connect one to the guyline and not the other. The interior of the Lunar Solo is quite comfortable and spacious with plenty of head room to sit up or change your clothing inside. Like all pyramid shelters, the head and foot ends slope down, but the floor is long enough (90″) that there’s little risk of internal condensation transfer. There are also additional guyout points halfway up the side walls that you can guy out with extra cordage to increase the interior space and anchor the tent down in high wind. 
While the Lunar Solo has a bathtub floor, the height of the sidewalls can vary from flat, up to 6″ in height, depending on a subtle interplay of factors such as the height of the pole, the flatness of the ground that you pitch on, and the amount of tension exerted on the guylines. Getting the right combination of factors can be very hit or miss, so your best bet is to focus on good campsite selection to compensate for a less than perfect pitch. That means pitching the tent in a well-drained spot and over porous soil or forest duff in order to avoid pooling water if it rains. Having used a dark green Lunar Solo and the gray one shown here, I far prefer the green colored shelter because it’s stealthier in forest and lets less light in through the fabric. But that’s just my personal preference. The gray tent shown here was seam sealed by Six Moon Designs and I’d recommend having them do it instead of doing it yourself. They do a far better and cleaner job at it than I’ve ever done. Comparable One-person Ultralight Tents and Mids
RecommendationThe Six Moon Designs Lunar Solo is a 26 oz single-wall trekking pole tent that’s good for three season use. It’s simple to set up with a little practice and easy to anchor down in a stiff breeze, with extra guy-out points on the fly should you need them. Internal condensation is easy to keep under control, provided you practice good campsite selection and keep the vestibule partially open at night. But the thing I’ve always liked about the Lunar Solo is its spacious interior and headroom. The tent’s height and hexagon footprint provide plenty of space to sit up, change clothing, and store extra gear inside the tent when you want a little privacy or to grab some shuteye. At $230 (on sale now for $160), the Lunar Solo also continues to be one of the best deals money can buy when it comes to ultralight 1-person tents shelters from “cottage” manufacturers, especially when compared to those charging exorbitant prices for Dyneema DCF tents and tarps. Disclosure: The author received a tent for this review. Editor's note: Help support this site by making your next gear purchase through one of the links above. Click a link, buy what you need, and the seller will contribute a portion of the purchase price to support SectionHiker's unsponsored gear reviews, articles, and hiking guides.
The post Six Moon Designs Lunar Solo Tent Review appeared first on Section Hikers Backpacking Blog. from https://sectionhiker.com/six-moon-designs-lunar-solo-tent-review/ |

ABOUT MEHello my pleaseure to introduce myself, I am Jose Johnson. I am 26 years old from Monroe, LA. I love to got for hikings with my friends on holidays. Archives
April 2019
Categories |


 RSS Feed
