|
Quilt sleeping bags and sleeping bag quilts, as they’re sometimes called, are best thought of as hoodless sleeping bags. They usually have full length zippers, so you can completely block external drafts from stealing away your body heat, you can open them partway and use them like a quilt, or all the way like a … The post Quilt Sleeping Bags: Pros and Cons appeared first on Section Hikers Backpacking Blog. from https://sectionhiker.com/quilt-sleeping-bags-pros-cons/
0 Comments
The MSR Advance Pro 2 Tent is a two-person, wedge-style tent designed for professional mountaineers who are willing to sacrifice on tent comfort in exchange for light weight and a small footprint. Weighing 2 lbs 14 oz ounces, the single wall Advance Pro 2 includes a pair of Easton Syclone composite tent poles, connected by … The post MSR Advance Pro 2 Tent Review appeared first on Section Hikers Backpacking Blog. from https://sectionhiker.com/msr-advance-pro-2-mtneering-tent-review/ The Feather Friends Tanager 20 CFL Sleeping Bag is a hoodless, full length, and zipperless sleeping bag designed for thru-hikers, ultralight backpackers, and alpinists who want to minimize their gear weight and bulk. Weighing 18.6 oz, the Tanager is insulated with 12.6 oz of 950 fill power goose down and is best viewed as a specialized, … The post Feathered Friends Tanager 20 Hoodless Sleeping Bag Review appeared first on Section Hikers Backpacking Blog. from https://sectionhiker.com/feathered-friends-tanager-20-sleeping-bag-review-hoodless/ The Granite Gear Blaze 60 is a multi-day backpack with an adjustable length torso and hip belt, so you can get a personalized fit. Weighing 3 lbs, the Blaze 60 is optimized for hauling heavy and bulky gear, including the ability to carry a bear canister on top of the pack so it doesn’t consume … The post Granite Gear Blaze 60 Backpack Review appeared first on Section Hikers Backpacking Blog. from https://sectionhiker.com/granite-gear-blaze-60-backpack-review-multiday/ Raffle: Enter for a Chance to Win a MassDrop x Enlightened Equipment Revelation 20 Backpacking Quilt2/20/2019 The MassDrop x Enlightened Equipment Revelation Quilt is a 20 degree ultralight backpacking quilt that weighs 22.1 oz. It’s insulated with 14.5 oz of 800 fill power down, 6 feet in length, with a 54″ width at the head tapering down to 40″ in the footbox. The Revelation 20 comes with elastic straps to attach … The post Raffle: Enter for a Chance to Win a MassDrop x Enlightened Equipment Revelation 20 Backpacking Quilt appeared first on Section Hikers Backpacking Blog. from https://sectionhiker.com/raffle-enter-for-a-chance-to-win-a-massdrop-x-enlightened-equipment-revelation-20-backpacking-quilt/ The Ambient Weather WM-2 is a handheld wind and weather meter that measures wind speed, temperature, wind chill, wind gust, and something called the Beaufort Scale, which is a way to estimate wind speed based on observable phenomena. A wind meter can be a handy weather forecasting and safety tool for hikers to carry, particularly in … The post Ambient Weather WM-2 Handheld Windspeed Meter Review appeared first on Section Hikers Backpacking Blog. from https://sectionhiker.com/ambient-weather-wm-2-handheld-windspeed-meter-review/
Some ultralight backpack have internal frames, some come with frame stays, and others are frameless. Generally speaking you want more “frame” for heavier loads, but this can be a matter of personal preference. Most ultralight backpacks are unisex, although there are a few exceptions. They also tend to have fixed torso lengths and hip belt lengths. Packs made with Dyneema Composite Fabrics are more expensive, but don’t age well, suffering UV and abrasion damage. Roll top packs are the norm, but some come with optional lids. The most important factor when choosing a UL pack is fit. Keep trying ones on until you get a torso length and hip-belt that fits you perfectly. Return policies and warrantees matter. Stick close to manufacturers that guarantee their products and want you to have the best experience possible.
1. Osprey Exos 58 Backpack
The Osprey Packs Exos 58 is lightweight minimalist pack favored by thru-hikers and weekend backpackers alike. Weighing 2 lbs 10 oz fully configured, it has a rigid frame that makes it good for hauling heavier loads up to 30-35 pounds. The top lid can be removed if not needed, dropping the pack weight close to 2 lbs 5 oz ounces. Ultralight details and back ventilation make the Exos a good backpack for hiking in hot or humid conditions. A women’s model is available called the Osprey Eja 58. Read the SectionHiker Exos 58 Review.
2. ULA Circuit Backpack
The ULA Circuit Backpack is a popular multi-day backpack with thru-hikers and weekend backpackers. Weighing 41 ounces, this 68 liter backpack has a load carrying capacity of 35 pounds and is available with men’s or women’s-specific shoulder pads and a unisex hip belt. The Circuit has a roll-top favored by long distance hikers, with a front mesh pocket, two large side water bottle pockets, and two large hip belt pockets. Lightweight, but bomber tough, this pack can last through a long distance thru-hike and come back for more! Read the SectionHiker Circuit Backpack Review.
Check out the latest price at: 3. Granite Gear Crown 2 60 Backpack
The Granite Gear Crown 2 60 is an ultralight-style roll-top backpack that’s well-suited for thru-hiking and multi-day backpacking trips. Weighing 2 lbs 5 ounces, it has all of the features you’d expect in an ultralight backpack including a large mesh back pocket and side water bottle pockets. What makes this pack distinct is its adjustable length hip belt so you get a custom fit, the ability to carry a bear can canister under the top lid, or remove it altogether and go lid-less. The Crown 2 60 has a maximum recommended load of 30-35 pounds. A women’s model of the Crown 2 – 60, is also available. Read the SectionHiker Crown2 60 Review.
4. Gossamer Gear Mariposa 60 Backpack
The Gossamer Gear Mariposa 60 is a great pack for backpackers who are lightening their loads because it has plenty of storage. It’s intuitively organized for a multi-day trips, with plenty of external pockets for wet gear, and lots of covered storage for items you need less frequent access too. The Mariposa has a lightweight aluminum frame stay capable of carrying 35 pounds comfortably, and interchangeable hip belts sizes are available, ensuring a good fit. Weighing 1 lb 14.5 oz, it has a unique side quiver pocket which is perfect for storing a tent. Sizing is Unisex. Read the SectionHiker Mariposa 60 Review.
Check out the latest price at: 5. Hyperlite Mountain Gear Southwest 3400 Backpack
The Hyperlite Mountain Gear 3400 Southwest (55L) is a streamlined and durable backpack good for any kind of outdoor adventure from thru-hiking and climbing to packrafting. Made with super strong but ultralight Dyneema Composite Fabrics, it’s effectively waterproof with solid external pockets that are virtually impossible tear on desert scrub or sharp rock. The frame on this roll top pack consists of two aluminum rods, called frame stays, that can be bent for a custom fit. Weighing 2 lbs 3 oz, it has maximum recommended load of 40 pounds. Sizing is Unisex. Read the SectionHiker.com 3400 Southwest Backpack Review.
Check out the latest price at: 6. Zpacks Arc Blast Backpack
The Zpacks Arc Blast (55L) is an ultralight ventilated backpack with a hybrid external frame that lets you adjust the amount of curve and air flow it provides. Made with Dyneema Composite Fabric, the 1 lb 5 oz Arc Blast is a roll top with side water bottle pockets and a front mesh pocket for external gear storage. The torso length is adjustable by raising and lowering the shoulder pads, while the hip belt is available in multiple lengths to let you dial in a great fit. The Arc Blast can haul up to 35 lbs. Sizing is Unisex. Read the SectionHiker Arc Blast Review.
Check out the latest price at: 7. Zpacks Arc Haul Backpack
The Zpacks Arc Haul (62L) is similar to the Zpacks Arc Blast, but is made with a gridstop nylon fabric instead of DCF, making it more abrasion and UV resistant as well as less expensive. Like the Blast, the Arc Haul has a ventilated and adjustable length frame, a roll top closure, side bottle pockets, and a front mesh pocket. The hip belt is also interchangeable, so you can dial in a perfect fit. Weighing 1 lb 8 oz, the Arc Haul has a max recommended load of 40 pounds.
Check out the latest price at: 8. Gossamer Gear Gorilla 40 Backpack
The Gossamer Gear Gorilla (40L) is a streamlined load hauler for the fast and light crowd. It’s a super comfortable pack with a specially-shaped frame stay capable of hauling heavy loads when needed. Unlike the Mariposa 60 (above) the Gorilla has a more conventional side water bottle pocket configuration, with large pockets that are reachable while wearing the pack. A top lid pocket provides accessible storage for maps and personal items. Weighing 1 lb 14.4 oz, the Gorilla is available in a wide range of torso lengths and has interchangeable hip belt lengths that make it much easier to dial in a perfect fit. Read the SectionHiker Gorilla Review.
Check out the latest price at: 9. ULA Ohm 2.0 Backpack
The ULA Ohm 2.0 (63L) is a ultralight pack designed for people with a base weighs of 12 lbs or less. While it is a higher volume pack, it has a minimalist carbon fiber & fiberglass stay that requires more nuanced packing than backpacks with a beefier frame. Weighing 2 lbs 2.5 oz, the Ohm 2.0 has a two large water bottle pockets, a stretch mesh front pocket, and is available with a cinch or roll top. Read the SectionHiker Ohm 2.0 Review.
Check out the latest price at: 10. Granite Gear VC Crown 60 Backpack
While the Granite Gear Crown VC 60 isn’t made anymore, it’s still a very popular ultralight backpack and easy to find online at a steep discount. It has all the attributes that make Granite Gear Backpacks so popular on the trail, including top, side, and back compression. a deep front mesh pocket, and numerous external attachment points. Weighing 2 lbs 2 oz, this minimalist pack is strippable down to 1 lb 13 oz, which further explains its ongoing popularity with thru-hikers and the ultralight backpacking community. A women’s model is also available called the Crown VC 60 Ki.
Check out the latest price at: MethodologyHow do we know what the top 10 best ultralight backpacks are? We survey our large readership to ask. In this case, we asked 2500 backpackers what three-season packs they preferred and recommended. If you’d like to participate in our surveys, be on the look up for the gear raffles we run every few weeks on SectionHiker, where we give survey participants a chance to win. Or sign up to the weekly, award-winning SectionHiker newsletter, so you never miss out on an opportunity to participate. We hate spam, so we’ll never share your email with anyone else and you can unsubscribe at any time. Check Out All of SectionHiker's Gear Guides!
The post 10 Best Ultralight Backpacks of 2019 appeared first on Section Hikers Backpacking Blog. from https://sectionhiker.com/10-best-ultralight-backpacks-of-2019/
“You know, thirty-below isn’t that bad if you’re dressed properly”, said Eliot, as we stood in the sun by the South Kinsman Mountain summit cairn. We were suited up in full above-treeline regalia including balaclava, facemasks, and heavy gloves. It was so cold, that I was even wearing long underwear, something that I almost never do on winter hikes. Our objective for this hike was North Kinsman and South Kinsman, two 4000 footers overlooking Franconia Notch. It’s a wonderfully scenic hike in fine weather, with views of Franconia Ridge on the other side of the pass. Our route approached the peaks from the east, up to the Lonesome Lake Hut, before climbing to Kinsman Pond, North Kinsman, and the South Kinsman. The total distance for our route was 10 miles, with 3,900 feet of elevation gain. We’d been tracking the weather forecast all week for this hike and the weather was looking pretty harsh with subzero temperatures (fahrenheit, not wimpy celsius) and sustained winds between 45-55 mph, with gusts up to 70 mph. Forty mile per hour winds will blow you off your feet, but it’s worse in winter, because you have to worry about frostbite on top of it. That means you need to wear goggles and full face protection whenever you leave the protection of trees, above-treeline. The weather forecast was so sketchy that we’d discussed some alternate hikes up nearby 4000 footers with less exposure. But we decided to go ahead with the original Kinsman route because I’ve climbed both peaks in winter before and knew first-hand that the amount of actual exposure was quite limited. I also knew that we’d decide to turn around if conditions proved too dangerous, because we’d talked about it before we started hiking, 
This was a 4 season leadership qualification hike for Eliot, who’s currently a 3 season Appalachian Mountain Club (AMC) trip leader. That 4 season qualification takes a lot of training and dedication to attain, especially since it’s for leading winter trips anywhere in New England, including the White Mountains. The most important part of the training qualification process is peer mentoring and peer review, although existing 3 season leaders are pretty well seasoned by the time they start the 4 season qualification process. I was ostensibly mentoring Eliot on this hike, but we were working closely together as equals on participant qualification, gear needs, routing decisions, weather forecasting, and all of the minutiae required to pull off a group hike in winter. Collaborating like this, with a peer, is probably the thing that I like the best about being an AMC leader. The parking lot at the base of the Lonesome Lake Trail hadn’t been cleared of snow, so we met at the Mt Lafayette / Mt Lincoln Trailhead on the other side of the interstate. That parking lot is usually overflowing in summer but there were very few cars there that morning because of the cold. I ran into some old friends who were also leading a hike up the Kinsmans that day, after deciding that hiking a Franconia Ridge Loop (much more exposure) was simply too dangerous with the wind forecast. We crossed the interstate and started climbing the Lonesome Lake Trail, which climbs steeply uphill. I occasionally suffer from cold induced asthma, which kicks in at about 0F, and I was huffing and puffing on this climb. We made it up the Lonesome Lake which was frozen over, before proceeding to the AMC’s Lonesome Lake Hut for short break. The cabin is open in winter and you can sleep overnight in the unheated bunkrooms there for a small fee. There’s a combination common room / kitchen out front, with a wood stove, but it’s used sparingly, often just a few hours per day. 
We stopped in and I took two puffs on my inhaler, which quickly opened up my airways. We drank some water and ate a snack, before heading back outside to hike up the Fishin Jimmy Trail towards Kinsman Pond. This section of trail was frozen and well consolidated, so we were able to climb it using microspikes alone. It was steep though and we knew full crampons would be necessary for a safe descent. After a quick lunch stop at the junction with the Kinsman Trail, which climbs to the Kinsman Ridge Trail from the east, we hiked up to the North Kinsman viewpoint, just below the summit. This is a large rock ledge that juts out from North Kinsman. It has a 270 degree view of Mt Cannon and entire Franconia Ridge including Mts Liberty and Mt Flume at the south end. There was no wind on the ledge, because it was blowing from the west and the North Kinsman summit blocked the wind. 
The distance from North Kinsman to South Kinsman is 0.9 miles and protected by short stubby trees for most of the way. First, you drop into a col (the dip between two mountain summits) before climbing back up on the other side. This section of the trip went by quickly and we were soon standing at the point where the trees gave way to the summit area which was open rock ledge covered with hard ice. We put on full face protection, including balaclavas with face masks, and ski goggles and set out for the final summit push. I can’t say that I enjoy wearing a face mask and goggles. As a glasses wearer, there’s always the risk of the ski goggle lenses fogging up. They also block most of my peripheral vision, so I can’t see my feet unless I turn my head to look down at them. On this hike, I was using a new pair of Smith Knowledge Turbo Fan Ski Goggles that have a built-in exhaust fan, which worked well. The power pack wires on my last pair broke, but Smith, to their credit, offered me a free pair under their lifetime warranty. At $180/pair, that warranty is gold. 
The short walk to the summit cairn was uneventful and we basked in the warm sun, fully suited up. We were surprised that the wind wasn’t howling on South Kinsman because it’s not as protected as North Kinsman. After admiring the view and picking out the peaks we could see in Vermont from the summit, we hightailed it back to North Kinsman and back down to the Lonesome Lake hut. Full crampons were required for that descent and I was glad that we’d required them for our hike participants. 
We didn’t stop at the hut on the way down and kept on going across the frozen Lonesome Lake lake bed, all the while admiring the view of Franconia Ridge on the other side of Franconia Notch. It’d been a wicked cold day, but the views had been great, and the time has passed too quickly with good company. Here’s a look out our route: North and South KinsmanRecommended Guidebooks and Maps:
The post Above Treeline Winter Hike to North and South Kinsman Mountains appeared first on Section Hikers Backpacking Blog. from https://sectionhiker.com/above-treeline-winter-hike-to-north-and-south-kinsman-mountains/
Specs at a glance
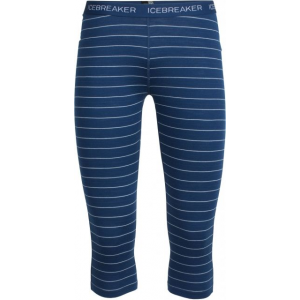
I tend to run hot when hiking. It takes a very cold day for me to even consider wearing a bottom base layer under my winter softshell pants. I find that with the softshell pants plus gaiters and heavy wool socks below the knee, an additional base layer there is really unnecessary for me. People new to winter hiking often underestimate how warm they'll be and tend to overdress. It's best to experiment with different layering schemes to better understand your metabolism and how different weather conditions, such as cold wind, can affect your layering system. For me, my butt and thighs only get cold on really frigid or windy days. To stay warmer, I experimented with a couple of different options to insulate that portion of my body in an unobtrusive and inexpensive way as possible. At first, I tried cutting off some old polypro long johns below the knee, but they wouldn’t stay in place and had a tendency to ride up above the knee. I thought of trying some of my gym clothes, but I know how sweaty those can get. A little bit of searching last year led me to the Icebreaker Capri length bottom base layers. I already owned some Merino wool full-length long johns and plenty of shirts, so another Merino base layer seemed like a natural fit. Icebreaker has several products in this category. The 200 Oasis Legless retails for $80. They also make the ultralight 175 Everyday Legless for $60, which is also 100% Merino wool. My experience with the 200 Oasis has been good so far. They give me a little extra warmth where I need it on really cold days. I've worn them a couple of dozen times, and so far, they don’t seem to show any failures or signs of wear or shrinkage. At the time I purchased them, I took the advice from some online reviews and sized up to a medium. I was glad I did. Although I would take a small in most clothing items like this, the medium in the Oasis was a perfect fit. They hold their shape well while worn despite the lack of Lycra. Give them a try, especially if you generate a lot of heat in your calves and tend to sweat there on winter hikes. About the AuthorWanda Rice has been backpacking since the late 1980’s. She has climbed the New Hampshire 48, the New Hampshire 48 in winter, the New England 67 and is working on the New England Hundred Highest and the Four-Season 48. Wanda also teaches for the Appalachian Mountain Club’s (AMC) Mountain Leadership School, the AMC New Hampshire Chapter Spring and Winter Schools as well as the AMC NH Winter Hiking Series. She leads day and overnight trips for AMC NH year round and loves mentoring new leaders. She is a gear junkie, a self-proclaimed Queen of Gear Hacks and loves sharing her tips and tricks with others. Wanda lives in southern NH and is looking forward to moving closer to the mountains in the next few years.Disclosure: The author purchased this item. Editor's note: Help support this site by making your next gear purchase through one of the links above. Click a link, buy what you need, and the seller will contribute a portion of the purchase price to support SectionHiker's unsponsored gear reviews, articles, and hiking guides.The post Icebreaker 200 Oasis Legless Baselayer Review appeared first on Section Hikers Backpacking Blog. from https://sectionhiker.com/icebreaker-200-oasis-legless-baselayer-review/
The Montbell Down Balaclava is insulated with 800 fill power down and can be used to augment an insulated jacket or as a part of a backpacking quilt sleep system. Weighing 3.1 oz (87 grams) it is a highly adjustable piece of headgear with two rear volume adjusters, two elastic cords to control the size of the face opening, and three snaps that close over the face and neck. Unlike a fleece balaclava, it extends well below the neck to cover your upper chest and neck, providing seamless integration with hoodless jackets and quilt draft collars. Specs at a Glance
There are two basic ways to use the Montbell Down Balaclava. The first is to augment a hoodless jacket and the second is to augment your sleep insulation system, such as a sleeping bag or backpacking quilt. Both of those scenarios are facilitated by the balaclava's neck which covers the entire neck as well as the top of your shoulders and chest. This ensures a tight seal between the neck of a jacket or the draft collar of an ultralight backpacking quilt. It can also act like a draft collar if you have a quilt that doesn't have one to prevent heat loss around your neck. 
I prefer wearing a hoodless insulated jacket in three season weather because it layers better with a lightweight rain jacket than a hooded insulated jacket. There are times though when I do wish I had more head warmth and a garment like the Montbell Down Balaclava could serve that function. I also like the extra down in the neck area and upper shoulder areas because it's even better insulated than some of the hooded down jackets I use. There's a lot of blood flowing near the skin of your neck and keeping it well insulated is one of the keys of staying warm. I often carry an insulated Polar Buff for just this purpose. 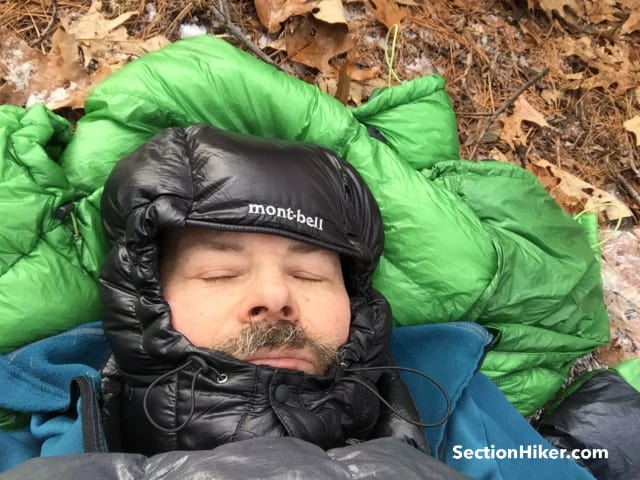
The Montbell Down Balaclava is also well suited for use as sleeping insulation with a down quilt because it is so adjustable, with several ways to adjust the interior volume and coverage it provide. I have a small head, so this is an issue that I'm acutely aware of. But do you really need a down hood when sleeping with a quilt? Companies like Enlightened Equipment and Therm-a-Rest base the temperature ratings they assign their quilts on that assumption (see Backpacking Quilt Temperature Ratings). They also assume that you'll be wearing long underwear and sleeping on a pad that has an R-value of at least 4. So if you've been cold in a quilt, that may explain why. 
There are two ways to adjust the interior volume of the balaclava, both on its rear. The first is a velcro tab that controls the position of the panel over your forehead with the Montbell logo stenciled on it. You can raise or lower it depending on how much visibility or forehead insulation you want. There's also an elastic cord that you can lock in place with a cord lock. It controls the size of the hood's crown, just above the ears, so you can prevent drafts from blowing into the hood's sides. There are also two elastic cords on either side of the face opening. These let you control the size of the opening and how much cheek coverage you want. Comparable Down Hoods
RecommendationThe Montbell Down Balaclava is a highly adjustable down hood that can be used with a hoodless jacket or a backpacking quilt. It's amazingly warm and compatible with all head sizes and hairdos. While it can be used to augment a hoodless jacket, it does feel a little awkward to wear if you're active and hiking hard. I prefer wearing a down hat or fleece balaclava in those circumstance. But my favorite way to use the Montbell Down Balaclava is with a backpacking quilt because it boosts my warmth and won't come off at night if I trash around. I especially like the way that the long, wraparound neck and upper chest insulation complement the quilts and hoodless sleeping bags I own. If you're pulling together an ultralight, quilt-based sleep system, I can strongly recommend using the Montbell Down Balaclava for that purpose. It's also reasonably priced, well constructed, and readily available. Disclosure: Montbell provided the author with a sample garment for this review Editor's note: Help support this site by making your next gear purchase through one of the links above. Click a link, buy what you need, and the seller will contribute a portion of the purchase price to support SectionHiker's unsponsored gear reviews, articles, and hiking guides.The post Montbell Down Balaclava Review appeared first on Section Hikers Backpacking Blog. from https://sectionhiker.com/montbell-down-balaclava-hood-review/ |

ABOUT MEHello my pleaseure to introduce myself, I am Jose Johnson. I am 26 years old from Monroe, LA. I love to got for hikings with my friends on holidays. Archives
April 2019
Categories |


 Icebreaker's 200 Oasis Legless base layer bottoms
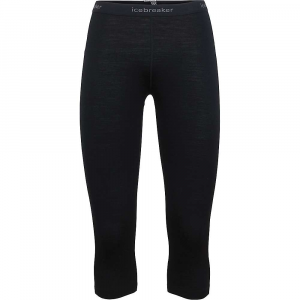


 RSS Feed
