|
Winter hiking boots have evolved tremendously over the past 10 years and are now lighter weight and more comfortable than ever before. Gone are the days when you needed to choose between military surplus boots, plastic mountaineering boots, or heavy pac boots to keep your feet warm. Today’s winter boots are waterproof, breathable, and insulated to keep you warm down to -40 Fahrenheit or more. They’re also optimized for walking over ice and packed snow, and compatible with traction aids such as microspikes and snowshoes. Whether you’re climbing mountains or snowshoeing across mixed terrain, the latest generation of winter hiking boots will keep you warm and dry. Here are our top 10 best winter hiking boot recommendations: 1. Salomon Toundra Pro CS WP
Salomon’s Toundra Pro CS WP was the first winter hiking boot to incorporate ultralight Aerogel insulation developed by NASA for spaceflight. Rated to -40F, these popular winter hiking boots have a large comfortable toe box. a reinforced toe kick for added protection, and a heel cap that is compatible with microspike and snowshoe bindings. An arch in the midsole provides gaiter compatibility, while a fleece lined tongue and upper boot provide a cushy, comfortable fit. I’ve been wearing the Toundra Pro for the past few winters and think they’re a great cold weather hiking boot. The Salomon Toundras run true to size. A women’s Toundra Pro CS WP is also available.
2. KEEN Summit County
The KEEN Summit County is also rated to -40F, but it has more insulation positioned in the toe box than in the upper cuff to keep your feet warmer. These winter boots have KEEN’s large signature toe box and run a bit wide, so they’re good for people who have a hard time jamming their feet into narrow boots. A beefy toe kick, heel cap, and excellent side protection make these boots ideal for challenging terrain, while a heat-reflective foot bed covered with wool adds warmth from below.
3. Vasque Snowburban II UltraDry
Vasque’s Snowburban II UltraDry boots are beefy winter hiking boots insulated with 400 grams of Thinsulate synthetic insulation. The have leather uppers with a water proof lining to keep your feet dry and a slight arch for gaiter compatibility. The EVA midsole has a thermoplastic urethane shank which is lightweight but helps cushion and protect your foot from sharp rocks while relieving calf stress on descents. A wool collar helps reduce odors and increases comfort for all day use.
4. Merrell Thermo Freeze
The Merrell Thermo Freeze is a mid-sized winter hiking boot with 400 grams of insulation. The height of the boot’s cuff is just 6″, so they’re much lighter weight than boots that run higher up your calf. The Thermo Freezes have a protective toe cap and heel cup, but less lateral protection than boots with heavy wraparound rands. EVA midsoles and molded nylon arch shanks deliver cushioning and stability. A generous arch provides gaiter compatibility, but the boots do not have a front gaiter ring so you’ll need to clip them to your laces. A women’s model is available.
5. The North Face Chilkat 400
The Chilkat 400 is the North Face’s cold weather winter boot, rated to -40F and insulated with 400 grams of Primaloft Silver Eco insulation. They have a waterproof full-grain leather upper with a heavy-duty wrap-around rand, protective toe cap, and snowshoe compatible heel cup. A compression-molded EVA midsole provides good support, while extra hell cushioning and forefoot pads provide enhanced comfort. The lacing system has durable rust-proof metal hardware and a gaiter D-ring is provided. They run a full size small, so size up if you plan to wear a thick sock. A women’s model is available.
Check for the latest prince at: 6. Oboz Bridger 10″ Insulated BDry Winter Boots
Oboz Bridger 10″ BDry Winter Boots are lined with a waterproof membrane and insulated with 400 grams of Thinsulate. The uppers are covered with synthetic leather for added protection, along with a beefy toe cap, and snowshoe compatible heel cup. An arched sole and front D ring provide gaiter compatibility, while aggressive lugs provide excellent traction on snow. The Bridgers have a PU midsole and nylon shank for added undercarriage protection and come with a wool-covered reflective insole for added warmth. A 9″ women’s model is also available.
7. KEEN Durand Polar Waterproof Winter Hiking Boot
The KEEN Durand Polar Winter Hiking Boot is narrower than the KEEN Summit County Boot listed above, with a smaller toe box and less external protection, but they just as warm, with 400 grams of insulation. They have metal lacing hardware which is easier to use and more durable, an arch for gaiter compatibility, and more boot rocker, making it easier to walk in them. The Durands also have a TPU midsole shank and heel cushion providing underfoot protection from sharp rocks and debris. KEEN claims that they’re not compatible with third-party insoles or orthotics, but I can replace the factory insoles with green Superfeet without any issues. The sizing runs about 1/2 size small, so size up. A women’s version is also available.
8. Columbia Bugaboot Plus IV XTM Omni-Heat Winter Boots
Columbia makes many varieties of Bugaboots, but we think the the Plus IV XTM is the best model for winter hiking if you have really cold feet. The Plus IV has 600 grams of insulation and is rated down to -65F. A wraparound waterproof rand provides good lateral protection, while a robust toe cap and heel cup work well with microspikes and other traction aids. An arched mid sole and front gaiter clip ensure gaiter compatibility, while a padded tongue and collar provide all day comfort. The extra tall cuff also helps seal in heat. The fit runs slightly wide, so these are a good option for people with larger feet. A women’s model is also available.
9. La Sportiva Nepal EVO GTX Mountaineering Boots
While most winter hikers use lightweight insulated hiking boots with microspikes for traction, there are times when a stiff-soled mountaineering boot and full mountaineering crampons are required. The La Sportiva Nepal Evo is a single skin leather mountaineering boot lined with Gore-Tex Duratherm, a lightweight and waterproof insulation layer. They have a rigid TPU last and innovative lace locks so you can get the lacing tight enough to front point with crampons. An integrated mini gaiter helps seal the top of the boots for greater warmth and keeps out debris, while front and rear welts enable compatibility with all crampon types.
10. Scarpa Mont Blanc Pro GTX Boot
The Scarpa Mont Blanc Pro GTX is a waterproof mountaineering boot with an integrated gaiter like the La Sportiva Nepal Evo GTX, listed above. It’s insulated with Gore-Tex Comfort, another waterproof breathable liner layer. It has a sturdy PU midsole and nylon shank for rigidity and shock absorption, with front and rear lugs that provide universal crampon compatibility. The fit runs wide and has a large toe box, while all-metal lacing hardware lets you lock in a good fit for front pointing. A women’s model is also available.
How to Select Winter Hiking BootsWinter boots should be waterproof and insulated to keep your feet dry and warm, they should have laces, they should be comfortable so you can wear them all day, and they should be compatible with traction aids like microspikes and snowshoes. While the amount of insulation you need will vary, winter boots with non-removable synthetic insulation are the lightest weight and therefore the easiest to hike in. Boots made with synthetic materials are also lighter weight and more waterproof than leather boots. The reason you can’t use your regular 3 season boots or shoes for winter hiking, comes down to waterproofing and insulation. Most insulated winter hiking boots are guaranteed waterproof out of the box. Many have lowers made with rubber or waterproof synthetics so you don’t have to worry about the fabric absorbing water. If you do get moisture in your boots, insulated winter boots will still keep them warm. The same can’t be said about leather hiking boots, even when treated with waterproofing creams and sprays. If your regular hiking boots absorb water in winter, they can freeze and lead to frostbite. Some boot manufacturers provide temperature ratings for their products, but there’s no standard way for measuring the warmth of winter boots. Understand that these ratings are eastimates at best and that users will have varying experiences based on their activity level, health, weight, sex, metabolism, and other factors. Some winter boot manufacturers publish the amount of insulation in their boots, while others don’t. For example, some boots have 200 grams of Thinsulate insulation, a popular synthetic insulation, while others have 400 grams. All of the boots listed above have 400 grams of insulation or the equivalent, so they can used well below zero. This is the amount of insulation we recommend if you hike in the backcountry, where winter hikes may last far longer than anticipated. Key Winter Boot FeaturesTemperature rating: While you need to take manufacturer’s temperature ratings with a grain of salt, they are a good indication of the relative warmth of a boot. While it’s difficult to make warmth comparisons between boots that have different kinds of insulation, knowing the amount of insulation used in boots can help you compare the warmth of different models made by the same manufacturer. Gusseted tongue: This is just like a regular boot tongue, except the sides are closed and sewn to side of the boots to prevent water from leaking into the boot when you step in puddles. Reinforced toe cap: In addition to providing more protection, a beefy toe cap won’t collapse the front of the boot when worn with microspikes or crampons. Lugs: The soles of your boots should provide good traction when walking on loose or packed snow. Look for boots with a deep tread like a Vibram sole, although you’re likely to augment your boot with microspikes. Cuff: Looks for boots with a soft cuff that closes off the gap between your leg and boot. Gaiter ring: A gaiter ring is a small ring attached to the top of the boot that you can hook your gaiters onto. It’s not the end of the world if your boots don’t have one since can still hook the gaiter to your boot laces. See Also:Check Out All of SectionHiker's Gear Guides!
The post 10 Best Winter Hiking Boots of 2018-2019 appeared first on Section Hikers Backpacking Blog. from https://sectionhiker.com/10-best-winter-hiking-boots-of-2018-2019/
0 Comments
Carter Dome is the ninth tallest White Mountain 4000 footer with an elevation of 4832 feet. It’s located almost due east of Mount Washington and has the distinction of being the highest mountain in the Carter Moriah Range. Most of the peakbaggers who climb Carter Dome approach it from the east and climb to the summit via Zeta Pass. This Carter Dome route takes a less-travelled approach and climbs the summit from the west, before descending to the Wild River Wilderness and looping back through Perkins Notch. One of the highlights of this route is the open summit of the South Knob of Carter Dome, which at 4274 ft, is a 4000 footer in its own right, even though it’s not listed on the official AMC 4000 footer list. It has an excellent view of Mt Washington, which makes up for the viewless Carter Dome summit. From Carter Dome, the route drops back into the Wild River Wilderness down the Black Angel Trail, one of the prettiest and most remote trails in the Whites. This loop is especially beautiful to hike in early October when the leaves begin to change color. Carter Dome Wild River Loop Backpacking Trip PlanRating/Difficulty****/4 out of 5 Distance/Elevation Gain21 miles with 4400′ of elevation gain White Mountain 4000 Footers
Recommended Duration2-3 days SeasonJune thru October Permits RequiredNone. RegulationsBackcountry Camping Regulations for the White Mountain National Forest.
New to the White Mountains? Read this Quick and Dirty Guide to Backpacking in the White Mountains for information about camping regulations, road access, trail shuttles, lodging, dangerous wildlife, weather, etc.
Trailhead Directions
Trail SequenceThe route follows the following trails in sequence. Refer to the AMC White Mountains Trail Maps 5-6: Carter-Range-Evans Notch North Country-Mahoosuc (2017 ed), although I’d recommend buying the complete AMC White Mountain Waterproof Map Set (2017 ed) rather than one map at a time, because it’s less expensive that way. Detailed trail descriptions can also be found in the AMC White Mountain Guide (2017 ed), which is considered the hiking bible for the region. Take photos of the relevant pages using your phone for easy reference, instead of carrying the entire book with you on hikes.
Scenic HighlightsThe following list provides cumulative distances on the route to each view or landmark.
Camping and Shelter Options
WaterNatural water sources are plentiful in the White Mountains although you may need to descend to them from ridgelines along side trails if you run short. In any case, carry a detailed topographic map with you and don’t rely on the overview map provided with this trip description to find water sources. I also recommend purchasing the WMNF Wild River Map in Guthook Guide’s New England Hiker Smartphone App (IOS, Android) which is a GPS guide to all of the trails, trailhead, shelters, campsites, views, and water sources in the White Mountains National Forest. I use it all the time and it is much more complete and current than using the maps bundled with the Gaia Smartphone App. Note: There is no water from the north end of the Bog Brook Trail until about half way down the Black Angel Trail along this route and you may want to carry a bit extra. On the TrailBegin at the Bog Brook Trail trailhead. There are three water crossing in the first two miles that are usually rock hopable, but may be difficult to cross in high water. You can also bypass them by following the gated FR 233 road to the intersection of the Bog Brook trail with the road. While slightly longer, your feet will stay dry. I’d recommend staying on the trail though, since it is quite pretty and the road walk is boring. 
Merge onto the Wild River Trail for a short distance until you come to the Rainbow Trail Junction. 
Turn left onto the Rainbow Trail and follow it through a grove of birch trees and berry bushes (in the summer months) which are popular with moose and bear. Most of the birch trees are dead due to climate change and disease, but are quite a sight nonetheless. If you’re concerned about a large animal encounter, make a lot of noise and hike with a partner or small group. The animals are afraid of you and will leave the area if you alert them to your presence. 
Continue ascending through scrappy woods until you reach the open summit of the South Knob of Carter Dome, also referred to as South Carter Dome. On a sunny day, you can clearly see Mt Washington and its glacial cirques, Tuckerman Ravine and Huntington Ravine ,to the west. 
Proceed through the summit krummholz (dwarf trees) for an additional mile to the open summit of Carter Dome. The site of an old fire tower, you can still see the tower foundations and find assorted historical debris from when it was taken down, in the nearby woods. One man’s trash is another man’s treasure: these items are considered archeological artifacts and it is against the law to disturb or remove them. 
From the summit trail junction, hike north along the Carter Moriah Trail towards Mt Hight. Turn right onto the Black Angel Trail after 0.4 miles before you reach Hight and descend for 4.9 miles down to the Wild River Trail. 
The Black Angel Trail is considered to be one of the most beautiful trails in a region full of beautiful trails. Most of it is easy hiking, but there are a few rock scrambles along the top of the trail which can sketchy if the rocks are wet or covered with ice. The trail crosses into the Wild River Wilderness shortly after leaving the Carter Moriah Trail and while it is lightly blazed, the trail can be more difficult to follow in autumn when leaves cover the obvious trail tread. 
When you reach the Wild River Trail, the path follows closely beside the upper reaches of the river to its source in No Ketchum Pond. They say that the wild trout fishing along this section of river is out of this world. It’s also takes a heck of a walk to get to, which probably keeps the fishery so vibrant and wild. 
In 0.8 miles, you’ll reach the Spruce Brook Tentsite spur trail which climbs steeply uphill to several packed earth tent pads. The fire ring is located near the entrance sign along the Wild River Trail, down where the old lean-to used to be before it was removed. The pads are spaced widely apart and there’s plenty of privacy. If you plan to hike the route in two days, this is an excellent place to stop for the night. 
Continue south along the Wild River Trail, crossing a stream just beyond the Spruce Brook Tentsite. It is rock hopable, although you may want to hike upstream a bit to find an easier crossing point. Continue past the Eagle Link Trail Junction, following old logging skid roads and over newly constructed bog bridges. Passing the East Branch Trail Junction, just before another stream crossing. No Ketchum Pond will soon come into view on your right, followed by the Perkins Notch Tentsite on your left. 
Continuing east along the Wild River trail, you’ll soon arrive at the Rainbow Trail junction you passed previously before climbing up to Carter Dome. Retrace your steps from the previous day along the Wild River and Bog Brook Trails back to the trailhead parking lot.
About Philip Werner: Philip is the 36th person to finish hiking and backpacking all of the trails in the White Mountain Guide (1440 miles). He's also finished hiking many of the region's peakbagging lists including the White Mountain 4000 footers, the 4000 footers in Winter, the Terrifying 25, the RMC 100, and the Trailwrights 72. Philip is a 4 season backpacking leader for the Appalachian Mountain Club, a member of the executive committee for the Random Hikers, a Long Trail Mentor for Vermont's Green Mountain Club, and a Leave No Trace Master Educator. He also teaches several compass, GPS, and off-trail navigation courses each year, listed on Outdoors.org.
Safety DisclaimerThis trip plan can not alert you to every hazard, anticipate your experience, or limitations. Therefore, the descriptions of roads, trails, routes, shelters, tent sites, and natural features in this trip plan are not representations that a particular place or excursion will be safe for you or members of your party. When you follow any of the routes described on SectionHiker.com, you assume responsibility for your own safety. Under normal conditions, such excursions require the usual attention to traffic, road and trail conditions, weather, terrain, the capabilities of your party, and other factors. Always check for current conditions, obey posted signs, and Backcountry Camping and Wilderness Area Regulations. Hike Safe and follow the Hiker responsibility code.Published 2018. Help support this site by making your next gear purchase through one of the links above. Click a link, buy what you need, and the seller will contribute a portion of the purchase price to support SectionHiker's unsponsored gear reviews, articles, and hiking guides.The post Backpacking a Carter Dome Wild River Loop Trip Plan: Backpacking the White Mountain 4000 Footers Guidebook appeared first on Section Hikers Backpacking Blog. from https://sectionhiker.com/backpacking-a-carter-dome-wild-river-loop-trip-plan-backpacking-the-white-mountain-4000-footers-guidebook/
KEEN Summit County Winter Hiking Boots are waterproof and insulated winter boots that are good for snowshoeing, winter hiking, and peakbagging. They have KEEN’s signature oversized toe box with body-mapped insulation to keep the parts of your feet that need extra insulation warm. Large non-marking lugged rubber soles provide a good grip on soft and packed snow, while the boots pair well with traction aids such as microspikes or snowshoes for hiking across ice and snow. The Summit County winter boots run a bit wide, so you should try them if have problems finding shoes wide enough for your feet. If you’ve never worn KEEN shoes or boots before, the toe-box is wider than you’re probably used to. This is good for winter hiking because your toes and feet will stay warmer if blood can circulate easily through them. KEEN insulates the Summit County with 450 grams of insulation around the toes and foot and 300 grams in the uppers where you need less, since your ankle is covered by long pants and a heavy winter gaiter. The effect on toe warmth is immediately noticeable and makes the boot very comfortable to wear. KEEN insulates and waterproofs their boots with KEEN.WARM and KEEN.DRY, their in-house proprietary synthetic insulation and waterproof breathable membrane instead of licensing Thinsulate insulation or Gore-Tex membrane. It doesn’t make any noticeable difference and helps keep the price down. 
The upper part of the boot is eight and a half inches tall which is a good height to keep snow out of your boots and your ankles warm. The upper cuff and tongue provide good support but are still comfortable to wear, unlike more rigid mountaineering boots. The exterior of the Summit County is well protected with synthetic leather and heavy-duty side walls to keep rock and ice from bruising your feet. The oversized toe bumper is firm enough that you can kick into snow for more traction, while a rigid heel cap protects the back of your foot with ridges that help secure microspikes and snowshoe bindings. The boot sole has widely space lugs that provide excellent traction and don’t fill up with snow like a regular vibram tread. The have a slight arch that permits use with a gaiter, although there isn’t a front gaiter ring, so you’ll have to clip them to your laces. The boots have a slight interior arch and fit more like running shoes than hiking boots. They come with a heat reflective insole covered with wool for comfort, but you can easily replace it with a Superfeet insole if you prefer more arch support. The midsole is made with a firm EVA foam to provide shock absorption and cushioning, while helping reduce the occurrence of plantar fasciitis, Achilles tendonitis, posterior tibial tendonitis and most other conditions related to excessive pronation. The laces thread through cloth channels along the sides of the tongue and not more durable metal eyelets. There are two pairs of metal speed hooks at the top of the uppers and its possible to tie more advanced lacing patterns like heel locks, surgeon’s knots, and lacing windows without any issues. 
The KEEN Summit County Winter hiking boots are true to size, but run slightly wide, so I wear them with a thicker wool sock to take up some of the extra interior wiggle. While they’re reasonably lightweight at xx per pair, they are pretty chunky boots, although you quickly get used to walking in them. While they are soft out of the box and require virtually no break-in period, I do recommend you wear them for a few off-pavement hikes before taking them out for an all day hike. Hiking on uneven terrain stresses different parts of a shoe than walking on sidewalks and will help you develop the proper “boot-feel” to give you confidence in the boots when you do venture off the beaten track. Highly recommended! Compare 3 Prices
Last updated: 2018-10-29 03:52:07
Keen Footwear provided the author with boots for this review. Help support this site by making your next gear purchase through one of the links above. Click a link, buy what you need, and the seller will contribute a portion of the purchase price to support SectionHiker's unsponsored gear reviews, articles, and hiking guides.The post KEEN Summit County Winter Hiking Boots Review appeared first on Section Hikers Backpacking Blog. from https://sectionhiker.com/keen-summit-county-winter-hiking-boots-review/
I buy a lot of cold-weather hiking clothes through REI because they sell high quality clothing that’s just as good as what you can buy from Smartwool or Patagucci, but for less money. REI doesn’t have to advertise their products, so they can pass the savings to consumers and members. You don’t have to be a member to buy REI clothes, but you do get an 10% end of year rebate on them which doesn’t hurt. I recently bought several REI Merino Midweight Baselayer Tops and have been wearing them frequently since. They’re surprisingly warm and have become my goto layer around the campsite and when I’m sleeping outdoors this autumn. I bought these shirts on sale for 50% off and they’re still on sale if you want to snag a few. Merino baselayers are more odor resistant than synthetic baselayers, which is a big advantage for backpacking if you’re out for a few days at a time. These shirts are made with an ultrafine merino wool that is soft to the touch. They don’t require any special care. I wash and dry them with my regular colored clothes and they don’t shrink, which can be a problem with some wool shirts. They have flat seams to eliminate chafing and have a droptail hem that’s designed to work with a backpack hip belt and stay tucked into your waistband if that’s what you want. The underarms are gusetted to allow for full range of movement when climbing or scrambling, or working in the yard. The REI Midweight merino shirts are the equivalent of a 200 (gram) fabric in Smartwool’s way of classifying the warmth of their garments. At 200 grams, it’s warmer than a 150 gram Merino baselayer that I prefer for highly aerobic hiking, like climbing a mountain with a backpack, even in cold weather. But it’s ideal, for sitting around camp on cool nights when I’m less active, sleeping in a cold weather sleeping bag, or sorting through my firewood pile outdoors. If you can get a REI Merino Midweight Baselayer Top on sale, it’s a good deal. Even at full price, REI’s Merino and Synthetic baselayer tops are less expensive that equivalent garments from major brands and just as good. Hell, they’re probably made in the same factories in Vietnam. Disclosure: The author purchased this product. Help support this site by making your next gear purchase through one of the links above. Click a link, buy what you need, and the seller will contribute a portion of the purchase price to support SectionHiker's unsponsored gear reviews, articles, and hiking guides.The post REI Merino Midweight Baselayer Top Review appeared first on Section Hikers Backpacking Blog. from https://sectionhiker.com/rei-merino-midweight-baselayer-top-review/
Halloween hikes are a lot of fun, but it’s difficult to find good Halloween costumes that you can hike in that are compatible with hiking boots, backpacks, and trekking poles. Halloween nights are cool and you’ll want a costume that’s easy to layer with warm clothing. Take women’s Halloween costumes for example. The ones that feature high heels, latex masks, billowing dresses or mini-skirts are a complete fail in the woods. Our recommended costumes have been carefully selected to work with your existing hiking clothes and gear, so you can stay warm, and have fun on a chilly Halloween eve. Add a little darkness and no one will know you’re human! Here are our top ten picks for the best Halloween Costumes for hikers and their hiking dogs. 1. Black Widow
|


| Make / Model | Type | Size | Doors | Min Weight | Price |
|---|---|---|---|---|---|
| MSR Advance Pro | Wedge | 2 Person | 1 | 2 lb. 14 oz. | $549 |
| Black Diamond El Dorado | Wedge | 2 Person | 1 | 4 lb. 8 oz. | $699 |
| Big Agnes Shield 2 | Wedge | 2 Person | 1 | 3 lb. 12 oz. | $650 |
| Hilleberg Soulo | Dome | 1 Person | 1 | 4 lb. 7 oz. | $694 |
| Black Diamond First Light | Wedge | 2 person | 1 | 2 lbs 13 oz | $370 |
| Hilleberg Unna | Dome | 1 Person | 1 | 4 lb. 7 oz. | $680 |
| The North Face Assault 2 | Wedge | 2 Person | 1 | 3 lb. 4 oz. | $589 |
| Rab Latok Mountain 2 | Wedge | 2 Person | 1 | 4 lb. 1 oz. | $650 |
| Hilleberg Allak | Dome | 2 Person | 2 | 6 lb. 2 oz. | $990 |
| Big Sky Chinook 2P | Dome | 2 Person | 2 | 4 lbs | $550 |
Recommendation
The Big Sky International Chinook 1Plus is a great four-season tent that’s lightweight, storm-worthy, and comfortable to use. Weighing slightly over 3 lbs, it’s also a self-supporting freestanding tent that can be set up just about anywhere, on wooden tent platforms, rock, sand, and snow without having to be staked to the ground first. Plus you can set up the rain fly before you set up the inner tent guaranteeing that it stays dry when it’s raining, That kind of flexibility goes a long way when you’re camping at wilderness tent sites and you want to pitch up quick to get out of the weather.
Disclosure: The author received a tent from Big Sky for this review.
Help support this site by making your next gear purchase through one of the links above. Click a link, buy what you need, and the seller will contribute a portion of the purchase price to support SectionHiker's unsponsored gear reviews, articles, and hiking guides.The post Big Sky International Chinook 1Plus Tent Review appeared first on Section Hikers Backpacking Blog.
from
https://sectionhiker.com/big-sky-international-chinook-1plus-tent-review/

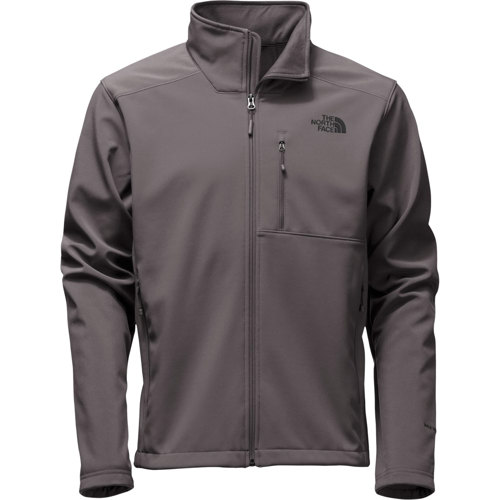
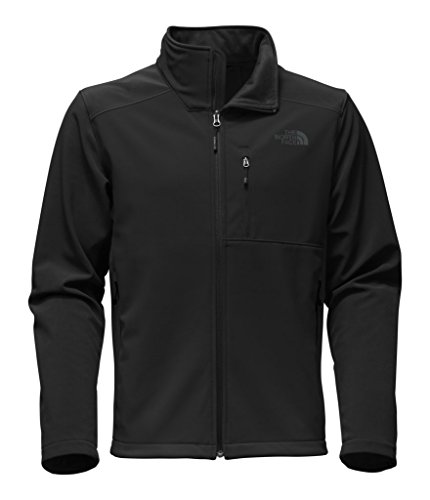
The North Face Apex Bionic 2 Soft Shell Jacket is a hoodless, windproof fleece jacket that you’d normally wear as an outer layer. The jacket’s exterior has a smooth, almost suede-like, exterior fabric that has some stretch to it. Called WindWall, the jacket’s exterior fabric has a low level of air permeability, which helps block wind. It is coated with a DWR layer, which also helps repel rain, but wears off with use.
The inside of the Apex Bionic 2 has a grid fleece liner over the chest that traps body heat and provides enhanced insulation around your core. The back of the jacket, insides of the sleeves and neck are lined with a soft fleece for greater comfort. The fit of the jacket is relaxed so you can layer underneath it. The sleeves of the jacket do not have cuffs to block out drafts, so it is best worn with gloves to help keep your wrists warm in cold weather. The jacket fabric is really quite stiff and doesn’t drape very well, even after you’ve worn the jacket for some time.
There are three zippered pockets: two side hand warmer pockets and a chest pocket. The two side pockets are not hip-belt compatible and are covered when wearing a backpack hip belt. The side pockets have internal hem adjustment pulls so you can block cold air from blowing inside from below. The nice thing about these hidden pulls is that they don’t snag on protruding objects when you walk by them.

The inside of the pockets is lined with grid fleece (facing the interior) and soft fleece. The grid fleece allows for the passage of moist perspiration, warmed by your body heat, to pass into the pockets, which can be an issue if you store electronics, like a camera or phone, in them. Wrap them in plastic bags so they don’t get moist and fog up.
While the Apex Bionic 2 is wind proof it isn’t much warmer than a 100 weight fleece jacket, so you’ll definitely want to layer underneath it in cooler weather. It’s also quite heavy, at least in a men’s XL, weighing in at 1 lb 9 oz. If you are backpacking or hiking and you want a combination wind and warmth layer, you’d be better off getting a wind shirt like a Patagonia Houdini or a Rab Vital Windshell which weigh a few ounces and combine it with your existing mid layer garments. You’d be surprised how much warmth a wind shell jacket or hoody can provide with a warm mid-layer garment, while still providing good breathability.
I like soft shell jackets as much as the next guy, but if you’re a hiker, you should opt for ones that are more technical and lightweight than the Apex Bionic 2 reviewed here. I’d recommend getting one with pockets that are hip belt compatible, wrist cuffs for warmth, an adjustable hood, and hem adjusters.
The North Face Apex Bionic 2 Jacket works fine around town and for light outdoor activities, but if you’re looking for a lightweight and warm softshell jacket for active shoulder-season or winter use, I’d give it the pass.
Compare 6 Prices
-
 Moosejaw
$109.95$76.99View -
 Sunny Sports
$99.95View
Sunny Sports
$99.95View -

 Summit Hut
$149.00$109.99View -

 REI.com
$110.00View
REI.com
$110.00View -
 Amazon US
$149.00$144.71View -
 Eastern Mountain Sports
$149.00View
Eastern Mountain Sports
$149.00View

Disclosure: The author purchased this jacket.
Help support this site by making your next gear purchase through one of the links above. Click a link, buy what you need, and the seller will contribute a portion of the purchase price to support SectionHiker's unsponsored gear reviews, articles, and hiking guides.The post The North Face Apex Bionic 2 Soft Shell Jacket Review appeared first on Section Hikers Backpacking Blog.
from
https://sectionhiker.com/the-north-face-apex-bionic-2-soft-shell-jacket-review-ss/

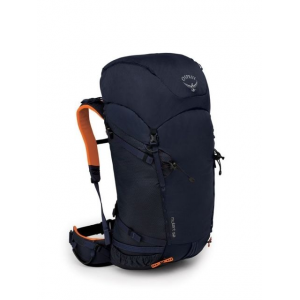
The Osprey Mutant 52 is a top-loading alpine style backpack made for winter backpacking, climbing, and backcountry ski tours. Like many winter-specific packs, it is highly modular and can be stripped down to save weight, with a removable top lid, hip belt, and frame. Reinforced ski loops, haul loops, hip belt gear loops, daisy chains, wand pockets, and ice tool holders make the Mutant 52 easy to use if you like the cold and snow. New this year, the Mutant 52 is higher volume version of the popular Mutant 38 backpack and replaces the Variant 52 (now heavily discounted) in Osprey’s winter backpack line.
Specs at a Glance:
- Volume: 52 liters
- Gender: Unisex
- Total weight:3 lbs 8 oz (size M/L)
- Removable components
- Top lid: 5.5 oz
- Helmet carry: 1.8 oz
- Hip belt: 7.3 oz
- Plastic frame sheet: 7.9 oz
- Pair of aluminum stays: 1.4 oz each
- Frame: Internal
- Torso length sizing: S/M 16 – 19 in; M/L 18-22 in.
- Materials 210D High Tenacity Nylon, 420HD Nylon Packcloth
- Maximum recommended load: 45-50 Lbs.
Backpack Storage and Organization
The Mutant 52 is a streamlined top loading backpack with a floating top lid and a main compartment that closes with a drawstring. While there are wand pockets on both sides of the pack, the pack lacks side water bottle pockets or a front stuff pocket on the pack, in line with its minimalist winter character. While the lack of external storage makes the pack more durable for hauling up cliffs, it changes how you’ll use the pack since you the only way to open it is to pop the lid and dig around in the main compartment. This isn’t necessarily bad on a winter pack, but more a matter of preference.

The floating top lid is attached to the top of the pack with plastic buckles and webbing straps, making it easy to remove if it’s not needed. Floating lids are a great option on winter packs because can sandwich bulky gear like ropes, tent bodies, or pads between the lid and the main compartment if you need to carry extra gear on approach hikes. This isn’t the kind of gear you can fit inside a backpack easily. If you don’t need the top lid or want to reduce the weight of the pack, the Mutant 52 comes with a permanently attached speed lid (Osprey calls these flap jackets) that covers the hole over the main compartment instead.

The top lid has two pockets. A cavernous, zippered main pocket (with a key fob) that’s big enough to store multiple pairs of gloves, hats, maps, and navigation equipment. There’s also a second smaller pocket which contains a helmet carry net that can be attached to the top of the lid (if used) or attached to the daisy chains on the front of the pack. This small pocket is large enough to hold a GPS or Personal Locator Device, smartphone, or camera and a handy pace to stash stuff.
The main compartment has a hydration pocket inside and hook to hang the bladder, making it easier to drink from. A single hydration port is located between the shoulder pads. There’s also a frame pocket where you can pull out the frame (a plastic sheet and w/ 2 aluminum stays) and a good place to stash a thin bivy pad.

Compression and External Attachment Points
The Mutant 52 has two tiers of side compression straps, which can also be used to secure gear to the sides of the pack. The top compression strap opens with a buckle, but the bottom doesn’t. This is a little less convenient for securing snowshoes to the sides of a pack, but still a workable solution.

There are reinforced ski loops positioned under the bottom compression strap, making it possible to configure an A-Frame ski carry together the top compression strap. That are also shallow wand pockets also on the pack sides, and a rope strap that loops over the main compartment.

The mutant comes with universal ice tool holder system, including two shaft holders. A pair of daisy chains on the pack’s front and two more on the two lid let you attach additional gear to the pack, using carabiners, webbing, or ski straps.

The mutant’s climbing and mountaineering pedigree is also evidenced by a three-point haul system, good for winching gear up cliffs and to portaledges.
Backpack Frame and Suspension
The Mutant 52 in an internal frame backpack with a stiff plastic sheet and two removable aluminum frame stays, so you can adjust the degree of stiffness you want. The aluminum stays can also be custom-shaped to fit body shape if desired. The pack also has load lifters, which are particularly useful on pack designed to haul heavy gear. The entire frame system is removable if you want to save gear weight. Tightly packed gear can often compensate for the lack of a frame, at least in terms of pack bag stiffness, or you can drop a foam pad into the main compartment and pack you gear inside it (like a donut) to create the same effect.

The shoulder pads, back of the pack, and hip belt wings are lightly padded with foam and provide minimal cushioning to help keep the pack weight down. The shoulder pads are minimally outfitted with two hydration hose keeper loops and an adjustable sternum strap with a daisy chain height-adjustment system. The padded area behind the shoulder straps contains a foam bivy pad that you can kneel or sit on in a pinch, but it’s pretty tough to remove if you wanted to replace it.

The hip belt comes with gear loops instead of pockets to rack gear with carabiners. It can be folded backwards around the front of the pack if you’re wearing a climbing harness or completely removed since it’s attached to the pack with velcro. Hip control straps, at the rear of the hip belt, help pull the bottom of the pack closer to your hips for better control. The hip belt closes with a single beefy buckle, using pull forward straps for mechanical advantage. The one thing missing on the Mutant 52 hip belt is a simple webbing strap-style hip belt to help lock the pack to your hips when the full hip belt is not needed. Check out The North Face Phantom 50 Backpack, which has this feature, and is another good option for climbing and winter mountaineering.
Comparable Winter Backpacks
| Make / Model | Weight | Floating Lid | Crampon Pocket | Hip Belt Loops | Ski Carry | Price (USD) |
|---|---|---|---|---|---|---|
| Alpine Luddites Alpine Machine 70 L | 48 oz | Y | - | Y | Option | $650 |
| Black Diamond Mission 75 L | 64 oz | Y | Y | Y | - | $240 |
| Cold Cold World Chaos 66 L | 60 oz | Y | Y | Y | Y | $245 |
| Exped Lightning 60 L | 41 oz | - | - | - | Y | $229 |
| Gregory Denali 75 L | 72 oz | Y | - | Y | - | $360 |
| Hyperlite Mountain Gear Ice Pack 70 L | 37 oz | - | Y | Y | Option | $380 |
| Mountain Hardwear South Col 70 L | 59 oz | Y | Y | Y | - | $300 |
| Osprey Mutant 52 L | 55 oz | Y | - | Y | Y | $200 |
| The North Face Cobra 60 L | 57 oz | Y | Y | Y | Y | $250 |
| The North Face Phantom 50 L | 40 oz | Y | - | Y | Y | $190 |
Recommendation
The Osprey Mutant 52 is an internal frame winter backpack that’s more optimized for climbing and mountaineering than general purpose winter backpacking use. The 52 liter volume is on the small side if you need to pack a winter tent and cold weather sleeping bag, although quite doable if you’ve refined your winter gear list to be as compact as possible. While the Mutant 52 has a quite respectable external attachment system, the pack’s frame and load carrying capabilities are where it really shines. The combination plastic frame sheet and pair of aluminum stays make it possible to carry 40+ pound loads with ease, while the minimal shoulder strap and hip belt padding makes the pack highly responsive when skiing or climbing.
Compare 3 Prices


Disclosure: The author purchased this backpack.
Help support this site by making your next gear purchase through one of the links above. Click a link, buy what you need, and the seller will contribute a portion of the purchase price to support SectionHiker's unsponsored gear reviews, articles, and hiking guides.The post Osprey Mutant 52 Backpack Review appeared first on Section Hikers Backpacking Blog.
from
https://sectionhiker.com/osprey-mutant-52-backpack-review-winter/

If you’re going to hiking or backpack in mountainous terrain in winter, you should learn about the prevailing weather patterns and forecasting tools that are are available for planning hikes and other backcountry tours. The weather in valleys seldom matches the weather at higher elevations, especially in terms of temperature and wind. These factors can have a big impact on the gear required for a hike, your comfort and enjoyment, and risk, since search and rescue times are much slower in poor winter weather. Mountain weather is sufficiently dynamic that you can’t simply plan a hike months or weeks in advance and expect the weather to cooperate. I have cancelled many hikes due to sketchy weather and advocate you take a similarly conservative approach. The mountains will be there another day.
Weather Related Hazards
The main weather-related hazards in mountainous terrain are wind, cold temperatures, snow conditions, and water crossings.
- High wind can make walking difficult. It can accelerate heat loss from exposed areas of skin, resulting in frostbite and or create missiles, such as flying branches, chunks of ice, or tree blowdowns that can injure you.
- Cold temperatures cause ice which can make walking difficult or dangerous depending on your location. They can also accelerate hypothermia and frostbite when coupled with wind.
- Deep snow can be difficult to walk through, resulting in higher energy expenditure if you need to break out a trail with snowshoes or end up postholing because you do not have proper flotation. Blowing snow can obscure your vision in the form of whiteouts and cause navigational problems. In certain areas, snow accumulation can also produce avalanche conditions.
- Unbridged water crossings become much more risky, since getting wet can quickly lead to frostbite or hypothermia in freezing weather. River rocks that are dry during three season weather may be covered with snow or ice, making crossings far more hazardous.
Mountain Weather Concepts
Mountain weather results from the interplay between topography, wind, and moisture. Being able to read and interpret the elevation changes shown on topographic maps becomes much more important in winter when deciding on routes to take and whether to hike or not on any given day.
Mountains Create Their Own Weather
When the wind hits the mountains, it speeds up as it flows over mountain tops. This can create numerous microclimates, depending on the geography of the terrain, which can have very different weather despite being relatively close together. For example, if the wind hits a mountain’s east side, it’s not unusual for the valley on its west side to receive substantial snowfall. Moisture carried by the wind hits the mountain and cools as it’s deflected upwards. This results in snowfall on the opposite side and potential avalanche conditions, if the valley’s sides have a slope angle between 30 and 45 degrees.
High Elevations are Colder
For every thousand feet of elevation you climb, the temperature drops 3 to 5 degrees. Called the atmospheric lapse effect, this not only has temperature consequences, but can also explain why the weather on top of mountains differs from valleys and lower elevations. It also explains why the risk of frostbite and exposure increases at higher elevations when coupled with increasing wind speeds.

Prevailing Winds
The wind blows across most mountain ranges in a consistent direction: for example, from west to east or east to west. Significant changes in wind direction are often an indication of a significant change in the weather pattern. In winter, this can often mean increased precipitation if the wind passes over a major body of water, or extreme cold, if it comes from the north.
Fronts Bring Bad Weather
Fronts – both cold fronts and warm fronts – define the dividing line between two air masses, one of which pushes the other out so its way. When fronts collide there is a change in the weather pattern, usually with bad weather, high winds, and a change in weather direction. Here’s what the interaction between these two types of fronts looks like on the ground.


Warm fronts, associated with areas of high pressure, affect local conditions gradually and often provide observable clues, such as wispy clouds, 24 hours before their arrival. Cold fronts associated with areas of low pressure move in much more rapidly, as fast as 35 mph, and causes rapid dramatic storms, followed by cooler and clearer weather. Knowing which is headed your way and when they will arrive can help you decide where you want to be when they make their influence on the weather felt.
Forecasting
There are a lot of information sources you can tap into for weather information and forecasts, but nothing trumps local knowledge of a mountain region’s weather patterns. That’s why it always makes sense to hike with a guide or experienced local who is familiar with the local weather patterns and can double-check your assumptions. Many mountain areas also have local weather and avalanche forecasters that can help you determine what conditions will be like in the mountains and wilderness areas. It’s important to find out about these and track them for a few weeks before any major expedition, so you can anticipate bad weather patterns ahead of time and change your plans to avoid them. Observing weather trends is the most important part of good forecasting, because it lets you observe the formation and development of bad weather systems as they develop and provides a context to assess the conditions that will be present during your trip.
If you hike in the United States, NOAA (weather.gov) publishes detailed forecasts and instrument readings for free, along with several very useful graphical tools for displaying the information. This same information reformatted and dumbed down by many commercial websites, which is why I prefer to get it directly from NOAA instead.
The two NOAA tools that I use the most are the point forecast, which lets you position a cursor on the your region of interest and surrounding areas to get an idea of local weather patterns. This tool is quite precise, so you can drill down to the summit of a mountain if you want to discern weather differences on the basis of elevation or terrain. The point forecast tool is locate don the bottom right, below. It’s also quite accurate within a 12 hour window, in my experience.

The 48 hour Key Metric Forecast is also very useful for trend analysis. This is a sub-report in the lower right hand corner of NOAA’s 7 day forecast report and one of the most useful forecasts you can find for predicting key weather metrics 48 hours into the future. The report is based on the location of the current point forecast and let’s you browse multiple variables including wind speed, gust speed, temperature, dewpoint, sky cover, thunder, and precipitation forecasts. I have found this report useful for forecasting when winds will increase or decrease above-treeline.

Other Resources
That’s a brief introduction to winter weather forecasting for winter hiking, mountaineering, backcountry skiing and other winter pursuits. The best way to learn how to forecast local winter weather patterns is to find a friend who knows how to do it and can show you the ropes. It is an important skill for winter recreation, especially if you’re after Type II routes that require a greater deal of self-sufficiency.
See Also
- Mountain Weather: Backcountry Forecasting for Hikers and Backpackers
- Staying Alive in Avalanche Terrain
- Winter Navigation and Escape Route Planning
The post Winter Weather Forecasting in Mountainous Terrain appeared first on Section Hikers Backpacking Blog.
from
https://sectionhiker.com/winter-weather-forecasting-hiking-mountainous-terrain/

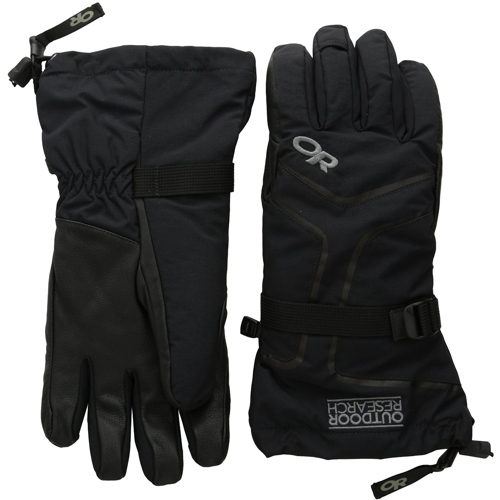
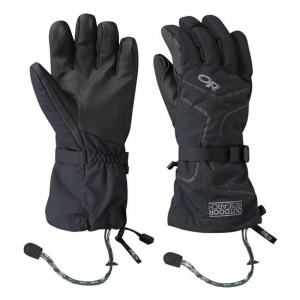
Outdoor Research HighCamp Gloves are insulated waterproof winter gloves with soft goat leather palms and touchscreen compatible liner gloves rated down to -15 F / -26 C. They’re best used in cold and exposed mountain terrain when you need to balance the competing demands of insulation and dexterity. For example, if you need to grip an ice axe in the ready position or tighten your backpack’s hip belt, you need the dexterity of a glove. Mittens won’t cut it.
The HighCamps’s outer glove is waterproof, insulated with Primaloft synthetic insulation, and has an additional sewn-in 100 weight fleece liner. In addition, the HighCamps come with a separate pair of fleece liner gloves, which you can use by themselves, as liners inside the HighCamp gloves, or any other shell glove or mitten you own. The outer HighCamp gloves also have gauntlets that can be tightened or loosened with one hand, ladder locks on the back, idiot cords to prevent them from blowing away, and pull loops to help you pull them on. The fingers are pre-curved and also have finger loops so you can clip them to a climbing harness.
Most of the time I just use the HighCamp gloves without the separate liners, since they’re already quite warm, and I use the liners by themselves when I just need a lightweight glove to keep my hands warm on brisk mornings. The liners have a silicone imprinted grip and touchscreen compatible forefinger and thumb. These liners are nice to have if you use a phone for navigation or reference, as many of us increasingly do.

The nice thing about this multi-part glove system is that you can mix and match the layers depending on your needs. For example, you could wear the liners by themselves when you’re skinning up a hill and then switch to the dry and insulated outer glove when you ski back down it and want a waterproof glove for the descent. The HighCamp is really like owning two gloves in one.
While the leather palms on the outer glove are water resistant, they do absorb water if soaked and it can take a while for then to dry. These gloves are also not warm enough for very cold temperatures below 0 degrees despite their -15 F rating by OR. Still, they’re excellent gloves for cold weather use, both with and without the touch compatible liners.
I’ve found that the OR HighCamp Gloves run about a half-size small, so size up.
Compare 7 Prices
-

 CampSaver.com
$88.95$61.59View -
 REI.com
$89.00$61.73View -
 Amazon US
$89.00$62.16View -
 Sunny Sports
$64.95View
Sunny Sports
$64.95View -
 Summit Hut
$88.95View
Summit Hut
$88.95View -

 Outdoor Research
$89.00View
Outdoor Research
$89.00View -
Moosejaw
$94.95View

Disclosure: The author purchased these gloves with his own funds.
Help support this site by making your next gear purchase through one of the links above. Click a link, buy what you need, and the seller will contribute a portion of the purchase price to support SectionHiker's unsponsored gear reviews, articles, and hiking guides.The post Outdoor Research HighCamp Gloves Review appeared first on Section Hikers Backpacking Blog.
from
https://sectionhiker.com/outdoor-research-highcamp-winter-gloves-review/

ABOUT ME
Hello my pleaseure to introduce myself, I am Jose Johnson. I am 26 years old from Monroe, LA. I love to got for hikings with my friends on holidays.
Archives
April 2019
March 2019
February 2019
January 2019
December 2018
November 2018
October 2018
September 2018
August 2018
July 2018
June 2018
May 2018
April 2018
March 2018
February 2018
January 2018
December 2017
November 2017
October 2017
September 2017
August 2017
July 2017
June 2017
May 2017
April 2017
March 2017
February 2017
January 2017
 RSS Feed
