|
What is Dyneema Composite Fabric (DCF)?Dyneema Composite Fabric is a non-woven, laminate material that is used to make ultralight backpacking gear including backpacks, tents, tarps, footprints, stuff sacks, and backpack rain covers. It is made by sandwiching ultra-high-weight-molecular polyethylene Dyneema fibers with polyester to produce an exceptionally lightweight, strong, and waterproof material. Dyneema fibers are 15 times stronger than steel by weight, which gives the material its strength. DCF is available in different thicknesses and weights which are used to make different types of products. Heavier DCF has a higher density of Dyneema threads that increase its strength. Hybrid variants of DCF are laminated with polyester to make them even more abrasion-resistant. For instance, products like backpacks, tents, and tarps take a beating because they come in contact with rough grand so frequently. Polyester coated DCF is also is also easier to dye, providing a wider range of color options. What is the difference between Dyneema Composite Fabric and Cuben Fiber?Dyneema Composite Fabric used to be called cuben fiber, CTF3, or non-woven Dyneema. Originally developed to make ultralight sailboat racing sails, cuben fiber was made and marketed by a company called Cubic Tech. Cubic Tech was subsequently acquired by a Dutch Company named Koninklijke DSM N.V, the makers of the Dyneema fibers which are used to make cuben fiber. They renamed and rebranded cuben fiber as “Dymeema Composite Fabric” after the acquisition. What is the difference between Dyneema X and DCF?Dyneema X is ripstop nylon with a PU coating that has Dyneema branded fiber woven into it for enhanced durability. with a very tight grid pattern. It’s used by many backpack makers, usually in a 210 denier weight fabric. Dyneema X is not non-woven DCF. Calling “Dyneema X” a dyneema fabric is mostly a marketing tool and fairly misleading as the huge bulk of the fabric is just nylon. How much lighter weight is DCF than other materials used to make ultralight backpacking gear?You can expect a 25-50% weight reduction by using an item made with DCF. For example, silicon impregnated nylon (silnylon), another popular material for making ultralight backpacks, tents, tarps, stuff sacks, rain gear, and backpack covers, is two to four times heavier than the DCF used for similar applications and products. How expensive is ultralight backpacking gear made with DCF?Gear made with DCF is typically 50-75% more expensive than gear made with more conventional fabrics. It is also more labor intensive to make gear with since most of the work must be done manually by highly skilled workers in the United States and can’t be outsourced to Vietnam or China. For example, backpacking gear made with DCF is often taped together by hand instead of sewn, requiring gear companies to evolve highly manual fabrication and styling processes to create products using it. What other benefits does DCF provide besides weight reduction?DCF is a waterproof material that doesn’t absorb water like nylon or other woven fabrics. This makes it ideal for making tents, shelters, and backpacks. It also does not stretch like silnylon (used to make ultralight backpacking tents and tarps), eliminating the need for you to adjust tent or tarp guylines at night to counteract fabric sag. DCF is also very tear resistant because the Dyneema fibers embedded in it are so strong. This, in addition to its light weight, was why it was used to make large racing sails. There’s not such thing as a perfect material for making backpacking gear. What are some of the weakness or disadvantages of using backpacking gear made with DCF?The DCF used to make tents and tarps is translucent and lets in light that can disturb people who are sensitive to it. Being translucent, it also provides limited privacy, unlike solid fabrics which prevent you from seeing occupants or their backlit silhouettes. Some sewing is required when making DCF backpacks in order to attach non-DCF shoulder straps, webbing straps, pockets, and hip belts. This creates holes in the fabric which can leak water if not seam sealed or taped. This is the reason that most DCF backpack manufacturers have stopped claiming that their backpacks are watertight, even though DCF is a non-absorbent, waterproof material. Gear made with DCF occupies more space when stuffed rather than folded or rolled. Frequent folding and unfolding can also weaken the material resulting in fraying or holes, particularly in stuff sacks. What colors is DCF available in?Regular DCF is available in light green, light blue, and white. It is used mainly for making tents, tarps, stuff sacks, and backpack covers. Hybrid forms of DCF covered with thicker polyester are easier to dye. They are often available in black, blue, green, orange, or camouflage. Why don’t all backpacking gear manufacturers switch to using DCF if it’s so great?DCF is far more expensive to make gear with than other more conventional fabrics and most consumers are unwilling to pay extra for it. That’s unlikely to change unless the cost of DCF drops and automated fabrication processes are invented and tooled to reduce labor costs. There are also several alternative materials that are comparable to DCF in terms of waterproofness and durability including XPAC and high denier high tenacity nylons called Robic, which are far less expensive. XPAC has also been in use far longer than DCF by mainstream backpacking gear manufacturers. What companies make ultralight backpacking gear using DCF?Dozens, but some of the largest, most experienced manufacturers include Hyperlite Mountain Gear, Zpacks.com, and Mountain Laurel Designs, although many smaller companies also create products using the material on a smaller scale. Where can you buy DCF if you are interested in making your own backpacking gear?Ripstop by the Roll and MakeYourGear.com are two companies that sell small volumes of DCF and tape to consumers who want to make their own gear. Published 2018. SectionHiker.com receives affiliate compensation from retailers that we link to if you make a purchase through them, at no additional cost to you. This helps to keep our content free and pays for our website hosting costs. Thank you for your support.The post Dyneema Composite Fabrics FAQ appeared first on Section Hikers Backpacking Blog. from https://sectionhiker.com/dyneema-composite-fabrics-faq/
0 Comments
Bikepacking is an emerging sport that combines bicycle touring and backpacking. It’s different from conventional paved bicycle touring because it favors off-road routes over gravel and dirt roads, ATV and snowmobile routes, XC ski trails, logging roads and even hiking trails where bikes are permitted to travel. Instead of road bikes, mountain bikes and fat bikes are the norm, with an emphasis on ultralight and highly compressible backpacking gear since off-road cycling is so energy intensive. Bikepacking BagsBikepacking bags come in all shapes and sizes, but the emphasis is on keeping your load as close to your bikes center of gravity as possible for balance and so you can ride down narrow single-track without having overhanging vegetation tear it off. As a consequence, bikepacking bags are low volume and can’t hold much gear, so you need a lot of them, or you need to slash your backpacking gear list to a minimum and only carry the absolute essentials.
Bikepacking bags are also surprisingly heavy and overbuilt because they need to incorporate some sort of attachment system to hang off your bike, be it a metal rack to connect to your front fork or velcro strapping to wrap around your top tube and step. When push comes to shove, many riders also carry a hydration pack or even a backpack so they can haul all their gear and food – which is pretty sub-optimal on long rides. 
PanniersPanniers are waterproof bags that hang off racks situated over your rear wheel for on your front fork. They come in a wide range of sizes and sizes, making it easy to overpack for a bikepacking trip and haul too much heavy gear if you’re not disciplined. They also require more side clearance than bikepacking bags and front panniers can seriously impede the visibility of your front wheel, something that’s very important when riding over rough terrain. While pannier racks are almost universally compatible with road bikes, the same can’t be said about mountain bikes or fat bikes which often don’t have the braze-ons or mounting points for adding pannier racks. That’s changing, but it’s one of the reasons why bikepacking bags evolved for off-pavement riding. You also need to be careful to buy a rack that’s compatible with the mechanical or hydraulic disc brakes commonly found on mountain bikes and fat bakes and has clearance for a wider tire. 
How to ChooseI wrestled with the choice between bikepacking bags and panniers for most of last year when I was first getting into bikepacking. If you’re an experienced lightweight or ultralight backpacker, it’s easy to assume that bikepacking bags are the way to go and that you won’t have any problems minimizing the gear you need to fit into them. Ah hem. It wasn’t easy. It was expensive and I ended up preferring panniers much more than bikepacking bags. I own two bikepacking bikes, a gravel bike with drop bars and a fat bike with 5″ wheels, and use panniers on both. I never ride single-track and prefer piecing together routes that Here’s a summary of my key takeaways comparing the pros and cons of both packing systems: Bikepacking Bags

Panniers

Comparison TableWhen comparing bikepacking bags and panniers, remember that you’ll probably need multiple bags to get the same amount of storage provided by provided by a pair of rear panniers.
Wrap UpMost bikepackers aren’t orthodox about the type of storage they bring on bikepacking trips. The best approach I’ve found is to is to mix and match, depending on your preferences and budget. For example, I like riding with a frame bag because it lets me keep my bike repair tools and tubes separate from my camping gear. But the simplicity of using a pair of panniers over a million little bikepacking bags seals the deal for me, regardless if I’m riding a fat bike or a more conventional gravel bike. Published 2018. SectionHiker.com receives affiliate compensation from retailers that we link to if you make a purchase through them, at no additional cost to you. This helps to keep our content free and pays for our website hosting costs. Thank you for your support.The post Bikepacking Frame Bags vs Panniers: How to Choose appeared first on Section Hikers Backpacking Blog. from https://sectionhiker.com/bikepacking-frame-bags-vs-panniers-how-to-choose/
The Fire Warden’s Loop is a 2-3 day, 18 mile backpacking route that climbs four 4000 footers: Hale, Zealand, South Twin, and North Twin. All four of these peaks surround the Little River Valley but aren’t normally climbed together as a group by day hikers because there isn’t an obvious loop to follow. While there’s a trail from the North Twin Trailhead to North Twin Mountain, there’s not a well-known trail linking Hale to the valley floor. However, there used to be a fire tower on Hale (removed in 1972) and a road leading to it that was named the Mt Hale Trail. It’s known today as the Fire Warden’s Trail and is still used by winter hikers and backcountry skiers to climb Hale when the roads to trails on the other side of the mountain are closed in winter. That old trail has been kept open (although it’s not listed in the White Mountain Guide or Appalachian Mountain Club Maps) and makes it possible to climb all four peaks in a continuous loop. This isn’t atypical in the Whites. There are a lot of old logging roads and herd paths used by hikers that aren’t “officially” recognized, but are still widely used. Their routes are frequently available in apps and online mapping programs that incorporate open-source GPS data like the GaiaGPS app and Caltopo.com. This trip starts with an ascent of Hale on the Fire Warden’s Trail, before dropping down to the AMC’s Zealand Hut on the Lend-a-Hand Trail. From there, it climbs to an open cliff called Zeacliff, which has a great view of Zealand Notch and the Whitewall Mountain Cliffs. After passing a small alpine lake called Zeacliff Pond, hikers summit Mt Zealand, followed by Mt Guyot. Next, the route follows the Twinway to South Twin Mountain, before traveling out to North Twin Mountain and dropping steeply down to the route’s beginning in the Little River Valley.
Optional Extension: You can easily add West Bond, Bondcliff, and Mt Bond, to this route. All three of these peaks are in close proximity to Mt Guyot and the Guyot Tentsite, which is a convenient campsite along the route.
Rating/Difficulty****/3 out of 5 Distance/Elevation Gain18 miles w/5600′ of cumulative elevation gain White Mountain 4000 Footers
Recommended Duration2-3 days SeasonJune thru October Permits RequiredNone. RegulationsBackcountry Camping Regulations for the White Mountain National Forest.
New to the White Mountains? Read this Quick and Dirty Guide to Backpacking in the White Mountains for information about camping regulations, road access, trail shuttles, lodging, dangerous wildlife, weather, etc.
Trailhead DirectionsTrail SequenceThe route follows the following trails in sequence. With the exception of the Fire Warden’s Trail, refer to the AMC White Mountains Trail Map 2: Franconia-Pemigewasset (2017 ed), which is the best waterproof map available for this region, although I’d recommend buying the complete AMC White Mountain Waterproof Map Set (2017 ed) rather than one map at a time, because it’s less expensive that way. In addition to the GeoPDF and GPX file found attached to this route plan, the Fire Warden’s Trail is clearly marked in the GaiaGPS App (iPhone & Android) on the Gaia Topo Base Map. Detailed trail descriptions can also be found in the AMC White Mountain Guide (2017 ed), which is considered the hiking bible for the region. Take photos of the relevant pages using your phone for easy reference, instead of carrying the entire book with you on hikes.
18 miles with 5500′ elevation gain. Scenic HighlightsThe following list provides cumulative distances on the route to each view or landmark.
Camping and Shelter Options
WaterNatural water sources are plentiful in the White Mountains although you may need to descend to them from ridgelines along side trails if you run short. In any case, carry a detailed topographic map with you and don’t rely on the overview map provided with this trip description to find water sources. I also recommend purchasing the WMNF Pemigewasset Map in Guthook Guide’s New England Hiker Smartphone App (IOS, Android) which is a GPS guide to all of the trails, trailhead, shelters, campsites, views, and water sources in the White Mountains National Forest. I use it all the time and it is much more complete and current than using the maps bundled with the Gaia Smartphone App. On the TrailFollow the North Twin Trail for 1.0 miles to the first river crossing. Just before the trail reaches the river bank, turn left onto an unmarked side path and follow it for 0.4 miles, staying close to the hillside on your left. Look for a tree up a slight incline on your left that has had a blaze chopped into it, and turn left hiking uphill to continue on the Fire Warden’s Trail. 
Note: Chopping blazes into trees violates the principles of Leave No Trace. Most White Mountain Hikers were horrified to discover that someone had marked the trail in this manner since it’s so unnecessary, and it violates White Mountain National Forest Regulations. The Fire Warden’s Trail, like many trails in the White Mountain National Forest, is largely unblazed. However, the trail is still heavily used and the path is easy to follow. Running along an old road bed, the trail is a well beaten path, with surprisingly few rocks to clamber over as it climbs uphill. If you encounter a tree blocking the path (called a blow-down), just detour around it and the path will continue heading uphill on the other side. 
As you approach the summit of Hale, there a good view through trees of Mt Washington’s east side and the ridgeline between Mt Jefferson and Mt Monroe. The Fire Wardens Trail runs directly to the Hale summit which is viewless. It has a large rock cairn at the top, with magnetic rocks that can play tricks on your compass. 
From the Hale summit, follow the signed Lend-a-Hand Trail which runs down to the Appalachian Mountain Club’s Zealand Hut. When you reach the section of this forest trail that has wooden boardwalks, slow your pace way, way down to avoid slipping and falling on them if they’re wet. If you do fall, try to land on the base of your backpack where you’re sleeping bag is packed because it will cushion the fall. When you arrive at the hut, drop your pack on the porch and go inside to visit with the crew. You don’t have to be a paying guest to visit and it’s a good place to stop for a rest and refill water bottles from the indoor taps. The Hut is also a good place to spend the night if you want to follow this route at a leisurely pace. Reservations are highly recommended though, especially in the summer and autumn. All of the huts, major junctions, and fragile areas of the Whites are surrounded by Forest Protection Areas (FPA), usually 1/4 to 1/2 mile in diameter, where camping is prohibited. They’re all marked by signs nailed to trees that announce when you’re entering or leaving them. While I can’t recommend it, there is also large pre-existing campsite on the Ethan Pond Trail, south of the Zealand Hut, near the perimeter of the FPA surrounding Zealand Falls. Heavily used by AT Thru-hikers, it’s not the prettiest campsite by a long shot, but you can camp there for free in a pinch. 
Leave Zealand Hut and climb up the Twinway Trail to Zeacliff, a cliff face that overlooks Zealand Notch and the Whitewall Mountain cliffs on its far side. The climb up to Zeacliff is steep and rocky, ascending 900 feet in 1.2 miles, but it’s the last significant climb on the route. At the top of the climb, follow a signed side trail to the viewpoint. There’s a good view of Presidential Range in addition to the cliffs. 
From the cliff, head north along the Twinway which is the major trunk trail along the northern rim of the Pemigewasset Wilderness. It also coincides with the Appalachian Trail, so you’re likely to run into thru-hikers between July and September as they head towards Maine. As you approach Zealand Mountain, you’ll pass a 0.1 mile side trail to tiny Zeacliff Pond on your left. Depending on the year and the time of season, Zeacliff Pond may be beautiful or just plain nasty. It does have a great view of Mt Carrigan in the distance though, which is well worth checking out. Local naturalist Alex MacPhail has a wonderful description of the pond’s origins on his White Mountain Sojourn Blog, that’s worth a quick read if you’re interested in mountain pond ecology and the geological forces that help create them. For instance, I learned that the difference between a pond and a lake is whether or not sunlight can reach the bottom. 
Continue along the Twinway until you reach the 0.1 mile spur trail that leads to the Zealand Mountains summit. The summit is viewless and hemmed in by spruce, with barely enough space to get your photo under the sign. While it may feel like you’re not on a 4000 footer, rest assured, you’re at 4260′ of elevation. That’s the beauty of ridge walks, something that the White Mountains has in abundance. Once you climb to a ridge crest, you can hike along it picking off one summit after another, with less incremental effort. Continue along the Twinway towards Mt Guyot (pronounced Gee-oh, with a hard ‘g’.) The mountain is named after Professor Arnold H. Guyot(1807–1884), who’s credited with drawing the first map of the White Mountains. Guyot is a 4000 footer although it’s not on the AMC 4000 footer list because its summit is too close to other peaks that are. That’s the funny thing with peakbagging lists, they are not a literal reflection of the landscape (The Adirondack 46ers 4,000 footer list contains several peaks less than 4,000 feet in height), but very much a man-made abstraction. For example, Guyot is considered a 4000 footer on another White Mountains peakbagging list called the Trailwrights 72, which lists 24 additional mountains that are 4000 feet or higher, beyond the 48 peaks included on the AMC 4000 footer list. 
Guyot is a pretty peak with a graceful bald summit dome topped with rock cairns. It’s also a major crossroads linking the Bondcliff Trail to the Twinway, putting the Bonds (West Bond, Mt Bond, and Bondcliff) within spitting distance if you want to add them to this route. The Bondcliff Trail also leads to the AMC’s Guyot Shelter and Tent Platforms in 0.8 miles, which is a good place to camp (the only nearby place to camp) or refill your water if you’re running low. 
From the Guyot summit, continue northwest on the Twinway, passing through dense woods, to the summit of South Twin Mountain, where t he view of Franconia Ridge and Mt Garfield more than makes up for the lack of views on Mts Hale and Zealand. On a clear summer days, you can even see hang gliders soaring above Franconia Ridge on the hot air thermals. 
From South Twin, turn right onto the North Twin Spur Trail, reaching the summit of North Twin in 1.3 miles, passing open ledges with more great views. There’s also a short side trail from the summit cairn to another ledge overlooking Mt Garfield and its sub-peaks, which is a great place for lunch or to admire the view. Continue onto the North Twin Trail, which descends steeply down to the Little River Valley for 4.3 miles. The descent requires three stream crossings, which can be difficult in high water. Being a steep and narrow valley, the Little River can flash up quickly during a heavy rain event, so check the weather during the dates of your hike to avoid heavy rain. If you do find yourself unable to cross safely during high water, wait for the water level to drop until it’s safe to cross. The Little River has a small watershed and the levels will drop quickly. 
After the final water crossing, it’s a short walk back to the North Twin Trailhead where this route began. If it’s warm out, there are many fine cascades and pools along the river where you can swim and cool off. I haven’t found any trout yet in this section of the Little River, but your luck may be better,
About Philip Werner: Philip is the 36th person to finish hiking and backpacking all of the trails in the White Mountain Guide. He's also finished hiking many of the region's peakbagging lists including the White Mountain 4000 footers, the 4000 footers in Winter, the Terrifying 25, the RMC 100, and the Trailwrights 72. Philip is a 4 season backpacking leader for the Appalachian Mountain Club, a member of the executive committee for the Random Hikers, a Long Trail Mentor for Vermont's Green Mountain Club, and a Leave No Trace Master Educator. He also teaches several compass, GPS, and off-trail navigation courses each year, listed on Outdoors.org.
Safety DisclaimerThis trip plan can not alert you to every hazard, anticipate your experience, or limitations. Therefore, the descriptions of roads, trails, routes, shelters, tent sites, and natural features in this trip plan are not representations that a particular place or excursion will be safe for you or members of your party. When you follow any of the routes described on SectionHiker.com, you assume responsibility for your own safety. Under normal conditions, such excursions require the usual attention to traffic, road and trail conditions, weather, terrain, the capabilities of your party, and other factors. Always check for current conditions, obey posted signs, and Backcountry Camping and Wilderness Area Regulations. Hike Safe and follow the Hiker responsibility code.Published 2018. SectionHiker.com receives affiliate compensation from retailers that we link to if you make a purchase through them, at no additional cost to you. This helps to keep our content free and pays for our website hosting costs. Thank you for your support.The post The Firewarden’s Loop Trip Plan: Backpacking the White Mountain 4000 Footers Guidebook appeared first on Section Hikers Backpacking Blog. from https://sectionhiker.com/the-firewardens-loop-trip-plan-backpacking-the-white-mountain-4000-footers-guidebook/
A lot of backpackers get really stressed out when planning trips because they can’t find any information about pre-existing campsites along their route. While campgrounds, lean-tos, and signed designated campsites are usually easy to find out about, that’s often not the case with the dispersed campsites you find in the backcountry that aren’t officially sanctioned, managed or maintained. Dispersed campsites fall into two categories:
The rest of this article explains how to find dispersed pre-existing campsites and pristine campsites. It’s a lot easier to do than you might imagine. Bringing the right kind of gear helps, but studying your map beforehand can go a long way to help you find a campsite where you’ll be comfortable. Dispersed Pre-existing CampsitesPre-existing campsites are sites that people have used before, but aren’t signed, officially recognized, or maintained by a land manager, such as the US Forest Service, Park Service, BLM, etc. You can usually find them near water sources, near trailheads, trail junctions, and on mountain tops. They also tend to spring up along the perimeter of scenic areas where camping is usually prohibited. . Many of these pre-existing campsites may be “illegal” and violate local camping regulations that specify where people can camp. They might be too close to ponds, roads, trails or trail junctions. Such camping rules are put in place to help preserve the appearance of natural areas by limiting the amount of use they can receive. Too much use and they’re trampled flat. 
Despite this, many land management agencies turn a blind eye to pre-existing campsites because they’re the lesser of two evils. They know that people prefer to camp at pre-existing campsites, rather than create new ones, because it takes less effort to find them, and because it feels safer when you know someone’s camped there before. So they try to concentrate overuse in pre-existing areas, rather than forcing people to disperse and create new campsites. How to find pre-existing sitesSo how can you find out about pre-existing campsites in advance if you’ve never visited an area before?

How do you know you’ve found a pre-existing campsiteMost pre-existing campsites can be identified by the following features:
In busy areas, plan to arrive a few hours before sunset so you can search for a pre-existing campsite. You can never be sure that a campsite will be unoccupied when you arrive or that the existing tenants will make room for you. 
Dispersed Pristine CampsitesMany backpackers prefer to camp at pristine campsites away from other campers in a quiet and undisturbed setting. In addition, pristine campsites are often the only kind of campsites available, especially if you backpack deep into Wilderness Areas and off the beaten track. Low Impact CampingThe name of the game when pristine camping is to leave no trace when you camp, at least that’s my preference. No one should be able to tell you’re there when you’re camping. No one should know you were ever there after you leave and you shouldn’t tell anyone else about where they’re located. To accomplish this, it’s best to locate a campsite that’s out-of-sight of the trail and has no evidence of prior use. Areas with little vegetation are best, so you don’t trample fragile vegetation or create a recognizable trail between your campsite and a water source, cooking, or “privy” area. Limit your camping to one night if possible and return any branches or rocks to their original spot if you moved them when setting up camp, so people won’t recognize it as a campsite in the future. It should go without saying, but don’t build a fire ring or start a fire if you can avoid it. 
Gear SelectionCamping in pristine campsites can be real hit or miss. While you can study a topographic map to find areas along your route that are flat, you can never really be sure what you’ll find when you arrive. In my experience, it helps to bring a small tent or a tarp that can fit in small spaces if that’s all you can find or a hammock that can be hung from trees if you’re camping in a forest. These shelters will also have the smallest lasting impact on a campsite, because they have a smaller surface area. How to find a pristine campsiteBut how do you find a suitable pristine campsite? Planning ahead is useful but you also have to think on your feet.
Wrap UpNo matter how you slice it, it takes more backpacking skill to find and recognize a dispersed campsite than one that’s signed and already designated for use. No matter how much you plan in advance, there’s no way to know whether a pre-existing site will be available or still exist when you arrive or whether you’ll be able to find a good pristine campsite if you set out to camp in one. If you find the uncertainty of having to find a dispersed campsite each night unsettling, there’s no shame in sticking to designated campsites when backpacking, especially in unfamiliar terrain. See also:Published 2018. SectionHiker.com receives affiliate compensation from retailers that we link to if you make a purchase through them, at no additional cost to you. This helps to keep our content free and pays for our website hosting costs. Thank you for your support.The post How to Find Dispersed Campsites for Backpacking appeared first on Section Hikers Backpacking Blog. from https://sectionhiker.com/how-to-find-dispersed-pre-existing-campsites/
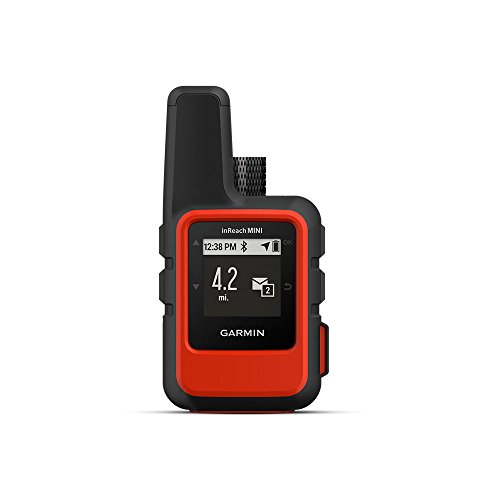
The Garmin inReach Mini 2-Way Satellite Communicator is a reliable and easy-to-use GPS-enabled satellite communicator that can send SOS messages to rescuers in an emergency, email or text your friends and relatives, track your route, mark GPS waypoints and help you navigate in the backcountry. Like its big brothers, the inReach Explorer+ and the SE+, the Mini notifies you when it’s successfully sent your messages. It can also receive messages from other people, including search and rescue personnel, friends, and family, anywhere in the world via the Iridium Satellite Network, offering piece of mind for anyone who spends time off the grid. The size of a plum, the Mini weighs 100 grams (3.5 oz), making it far easier to carry than the larger (214 gram) Garmin inReach Explorer+ (shown above) or SE+ models. This new small size makes it ideal for trail runners, ultralight backpackers, fishermen, skiers, or anyone who wants an unobtrusive GPS satellite communicator that they can stuff in a pocket for an emergency. The only real functional difference between the Mini and the bigger inReach units is battery life and ease of use. More on this below. 
Service PlansA monthly or annual service plan is required to use the inReach Mini, adding another $12 to $100 per month to the $350 cost of the unit. The nice thing about the monthly plans is you need only pay for the months you use the device, making them perfect for international travel or seasonal use only. I use the lowest tier $12 per month Safety plan, mainly to send daily check-in messages to my wife. I think it’s well worth the price when you compare it to what you pay each month for a Smartphone that only runs over cell networks. 
Mini User InterfaceThe Mini’s user interface is a hierarchical menu system that you navigate with up, down, back, and ok messages on the sides of the device. It’s not well documented, but easy enough to figure out. As you scroll through the menus, the current active or “in focus” item is displayed in larger letters than the other items on the menu. To trigger it, you push “ok.” If that item has additional sub-options, the one without any navigation icons (up or down arrows) is the current item selected and will be triggered when you click “ok” on the side of the unit. 
However, the size of the Mini’s screen does compromise its usability compared to the larger inReach Explorer+ and SE+. While the Mini is a fully functional standalone unit, you can pair it with a Smartphone using Bluetooth and the free Garmin Earthmate app. Doing this gives you a much richer interface to the unit’s functions and makes composing messages easier because you have a full keyboard at your disposal. However, using Bluetooth chews up the battery of the Mini and your Smartphone faster, so it’s a tradeoff. 
Reliable Two-Way MessagingThe inReach Mini provides fully interactive, two-way satellite based messaging up to 160 characters in length. There are four kinds of text messages supported on the inReach Mini:
One of the best features on the inReach Mini is audible or visual message confirmation. I’ve set up the Mini to make an audible chirp when the message I’ve sent has been successfully relayed to the recipients email address or SMS cell phone number. That chirp sounds anywhere from 30 seconds to 5 minutes after I send a message, but knowing that it’s been sent and not lost gives me enormous piece of mind. 
I mainly use the Preset Messages on the inReach Mini to let my wife know I’m ok or if I’m going to be delayed. It’s important that I know that she’s received them, since she has explicit instructions about when to notify Search and Rescue to come find me if I’ve overdue. Comparison to SPOT Satellite CommunicatorsI used to own a SPOT Satellite Communicators (Gen2 and Gen 3) and you never knew whether your messages had gotten through, because sometimes they didn’t. It’s the main reason I switched to the inReach for my personal use. While the new Spot X Messenger (review forthcoming) does provide 2-way communications, it’s far more difficult to use than any of the inReach devices and I can’t recommend it. 
Other inReach Mini FunctionsIn addition to its messaging functions, the inReach Mini can:
Mini Battery LifeThe Mini has a smaller battery than the inReach Explorer+ and SE+, but its actual battery life depends on your device settings, such as the tracking and message checking intervals. Here are the guidelines that Garmin publishes, for different usage patterns.
These battery life guidelines assume that you use the tracking feature, which isn’t something that I normally do. If you’re like me and only turn the unit on to send a preset Check-in message a few times per day, and don’t pair the Mini with a Smartphone, the battery lasts a long, long time. Still it’s prudent to carry a micro-USB plug and spare power bank with you on extended trips. Activation and SynchingThe inReach Mini isn’t an entirely standalone device and you need a web browser to set and synch certain functions associated with your account on the Garmin website. In addition to selecting or changing Satellite Network Plans, you need to log in to the website to specify your emergency contacts, change the default preset messages (3) or the preset canned quick response messages (10). After making these chances, they have to be synched to the Mini to take effect. The synching process can be achieved using a computer or a Smartphone, through the Garmin Earthmate App.
RecommendationThe Garmin inReach Mini 2-way Satellite Communicator is a real breakthrough in terms of convenience, giving you the ability to signal Search and Rescue in an emergency and communicate with them (or friends and family) by text or email, anywhere in the world, over the Iridium Satellite Network. While the Mini doesn’t provide any new functions beyond those provided by the existing inReach Explorer+ or SE+, its small size and low weight make it much more amenable to use for fast-and-light recreation like trail running, ultralight backpack, or cycling, where size and weight matter more. While the more advanced functions of the Mini are harder to use with its small screen size and limited controls, it is easily paired with the free Earthmate App running on a Smartphone using Bluetooth. If you’re carrying a Smartphone in the backcountry already, the two enhance each others’ capabilities. Highly recommended! Compare 4 Prices
Last updated: 2018-06-24 07:52:30
The author purchased this product. Published 2018. SectionHiker.com receives affiliate compensation from retailers that we link to if you make a purchase through them, at no additional cost to you. This helps to keep our content free and pays for our website hosting costs. Thank you for your support.The post Garmin inReach Mini 2-Way GPS Satellite Communicator Review appeared first on Section Hikers Backpacking Blog. from https://sectionhiker.com/garmin-inreach-mini-2-way-gps-satellite-communicator-review/
Ultralight and lightweight backpacks have become a lot tougher and harder to rip up over the past few years. The widespread use of Dyneema Composite Fabrics formerly called cuben fiber, XPac, and high tenacity nylon has ushered in a new era of durable sub-3-pound backpacks that can withstand the abuse of multiple thru-hikes, bushwhacking, canyoneering, and winter hiking and still come back for more. While you will pay a premium for a backpack that is both lightweight and durable, it’s worth the investment since your backpack is the one piece of gear that can’t fail. Here’s my go-to list of the most durable lightweight and ultralight backpacks available today. Go ahead, run these packs through your favorite backpack torture test. I’m pretty sure you’ll be impressed with their durability under fire. 1. Hyperlite Mountain Gear Southwest 2400 Backpack
The Hyperlite Mountain Gear Southwest 2400 (40L) is a bomber ultralight backpack that weighs 30 ounces. Made with special DCR/Polyester laminate for durability, it’s tough-skinned and effectively waterproof. There’s also no mesh on the backpack and all of the pockets on the hip belt, side water bottle pockets, and front stash pocket are hard-faced with 210D Dyneema X grid-stop. Sized for ultralight backpacking, the 2400 is also available in 3400 (55L) and 4400 (72L) sizes for gear-intensive trips. Available in white and black, the black-colored packs are made with a thicker DCF/Polyester laminate and more durable, with a slight weight penalty.
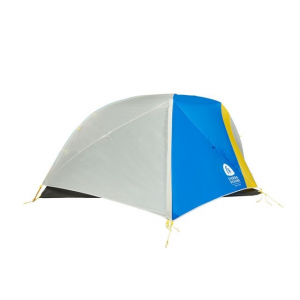
Check out the latest price at: 2. Sierra Designs Flex Capacitor 40-60L Backpack
The Sierra Designs Flex Capacitor is a top-loading, minimalist backpack with a unique top lid and two side water bottle pockets. Weighing 42 oz, its signature feature are volume adjustment straps that let you shrink or expand its capacity from 40L to 60L. This is complemented by a stiff but lightweight frame that makes it possible to haul 50 lbs loads, far exceeding those that can be carried by similarly sized ultralight or internal frame backpacks. Solid hip belt pockets and reinforced mesh water bottle pockets resist tearing, while the 420 denier nylon base resists abrasion in mountainous terrain.
3. Seek Outside Gila 3500 Backpack
The Seek Outside Gila is a 3500 cubic inch (57 L) ultralight-style roll top backpack with an external frame capable of hauling very heavy loads that blow other lightweight packs out of the water. Weighing 42 ounces, it’s made with a durable waterproof laminate called XPac that’s similar to DCF but less expensive to work with. The adjustable-torso length external frame behaves a lot like a ventilated backpack, keeping your shirt dry in hot weather. The solid side pockets and reinforced front mesh stash pocket provide an impressive amount of external storage, while a wide hip belt provides excellent support.
Check out the latest price at: 4. Elemental Horizons Kalais XT Backpack
The Elemental Horizons Kalais XT is a roll top backpack with an adjustable torso length. Weighing 41 oz, it’s made with XPac and 210 Dyeenma X Gridstop. It has solid hip belt pockets and side pockets for extra durability with a Dyneema X reinforced stash pocket in the front. Wide compression webbing and oversized buckles add to the pack’s durability. The hip belt pockets are optional and removable, which is a good way to avoid destroying them if you have to push through a lot of heavy brush.
Check out the latest price at: 5. Superior Wilderness Designs Long Haul 50
The Superior Wilderness Designs Long Haul 50 is an 29 ounce roll top style backpack made with XPac. It has solid hip belt and side pockets for added durability, with a tough front mesh stash pocket (the mesh can be replaced with a solid XPac pocket as a customization option.) The shoulder straps and hip belt are made with Dyneema X grid stop which has been reinforced with XPac for added durability. SWD is also one of the few lightweight pack makers to provide S-shaped shoulder straps, which are suitable for men and women alike.
Check out the latest price at: 6. Katabatic Gear Onni V40-50L Backpack
The Katabatic Gear Onni V40-50L Backpack is a 32 oz roll-top backpack made with an XPac body, Cordura Spandex side pockets, and a heavy duty mesh stash pocket. It has a single aluminum stay and ventilated back panel for comfort. Cordura hip belt pockets are available as an option. The side compression straps are as tough as the rest of the pack and with clip-style buckles so you can easily attach gear to the sides of the pack.
Check out the latest price at: 7. ULA Circuit Backpack
The ULA Circuit is a 68L roll top style ultralight backpack that weighs 41 oz. The pack body and side pockets are made with 400 denier (high-tenacity) Robic nylon, with a heavy duty mesh front stash pocket. The multi-part frame includes an aluminum stay, dense foam, and a carbon fiber hoop for comfort and optimal load transfer. The Circuit comes with a wide interchangeable hip belt for optimal sizing including large, hard-faced hip belt pockets. Male and female-specific shoulder straps are also available as an option at time of purpose.
Check out the latest price at: Comparison Table
What Makes a Lightweight Backpack Durable?I’ve always been a bit obsessed with the durability of lightweight and ultralight backpacks because I destroyed so many of them back in the days when they were made with less durable fabrics like silnylon. While most pack manufacturers have moved on to more durable materials and fabrics like Dyneema Composite Fabrics (formerly cuben fiber), XPac, and high denier Robic or Dyneema X nylon, the overall durability of a multi-day backpack can’t be determined solely by the material used to make the body of a pack. If you do careful analysis of backpack failure points, you’ll find that they fail in a number of common areas.
While the use of durable fabrics and materials helps address issues of abrasion, it’s a slippery slope because tougher fabrics tend to be heavier or higher in cost, making a pack that uses them potentially less attractive to buyers. If you want a lightweight (sub 3 pound) backpack that is going to last for a long time without a lot of pampering, it’s best to aim for packs that are:
Check out SectionHiker’s Other Gear Guides
The post 7 Most Durable Lightweight Backpacks of 2018 appeared first on Section Hikers Backpacking Blog. from https://sectionhiker.com/7-most-durable-lightweight-backpacks-of-2018/ 
One of the hallmarks of good hiking and backpacking navigation is picking trails or routes that reduce the level of effort required to climb mountains or descend into valleys. The steepness or slope angle of a trail is usually the best indicator of the level of effort required to climb or descend it. Steep slopes are harder and require more energy to climb than more gradual ones, even though the elevation gained is the same over the long run. You can also make educated guesses about what terrain conditions will be like on very steep slopes, since they’re often boulder choked or sheer slabs that make for slow hiking. In winter, slope angle is also a good indicator of potential avalanche terrain that is best avoided. While you can quickly assess the steepness of a slope on a topographic map by recognizing tightly bunched contour lines, computing the actual slope angle is difficult to do on the fly, because you need to do some basic trigonometry to compute it. It also requires very accurate map measuring tools, which you’re not normally going to carry with you. That’s where digitally computed slope shading comes in. Slope shading is a visualization tool provided in good navigation apps and planning tools like GaiaGPS (available for iPhone and Android) and Caltopo.com, which is a FREE web-based planning tool, best used with a desktop or laptop computer. It can colorize a map and help you evaluate route difficulty or danger, so you can compare alternative approaches or descents. Both GaiaGPS and Caltopo use the same color scheme for depicting slope angle (in fact GaiaGPS licenses many maps and data from Caltopo), where darker colors represent increasingly higher slope angles. 
For example, hikers and backpackers will find that a 27-29 degree slope angle makes for tolerable, but steep hiking. Slope angles higher than that are much more strenuous and will really slow you down. Slope angles in the 35-45 degree range will be more like climbing than hiking, requiring the use of your hands as well as feet to ascend. For backcountry skiers and winter hikers, slope angles between 30 and 45 degrees are the most likely to avalanche when other factors are present such a slabs or weak layers. Here’s a quick example to illustrate how you’d use the slope angle feature to evaluate the effort levels to climb a mountain using several different trails. The three easiest trail to climb Mt Washington are the Jewell Trail from the west, the Nelson Crag Trail from the east, and the Crawford Path from the south. I’ve shown them here on a Google Terrain map created in Caltopo. I’ll show an example using GaiaGPS below. 
Here are those same trails with slope angle shading turned on. 
Here are the three hardest trails up Mt Washington, the Great Gulf Trail from the north, the Huntington Ravine Trail from the west, and the Tuckerman Ravine Trail to the south of it, with slope angle shading turned on. 
As you can see, the difficult trails all run through dark red and purple colored zones which indicate 35-50 degree slope angles. These trails are very strenuous to hike and climb up and run across boulder fields or up steep rock slabs. They’re all avalanche zones in winter and full of avalanche debris each spring. Planning routes at home on Caltopo with your computer or laptop is one thing, but GaiaGPS lets you use the same slope angle shading and make the same kind of route decisions in real-time on a phone in the palm of your hand. Here’s the same area around Mt Washington displayed with USGS maps as a background (so you can see where the trails are) in GaiaGPS. 
Slope angle shading in GaiaGPS (and all map layering) is considered a premium feature, so you need to buy a premium license to use it ($32 per year or $128 for 5 years). It’s totally worth it if you hike or ski in mountainous terrain and need to make real-time course corrections based on the conditions you find on the ground around you. Wrap UpThis a quick intro to slope angle shading and how you can use it for navigation. Personally, I use it ALL the time for planning routes at home and making course corrections in the field when I hike off-trail. If you’d like to learn more about map layers like slope angle shading and digital navigation tools, see my post An Introduction to Map Layers for Backcountry Navigation. See Also:
The post Slope Angle Shading in GaiaGPS and Caltopo appeared first on Section Hikers Backpacking Blog. from https://sectionhiker.com/slope-angle-shading-in-gaiagps-and-caltopo/
The REI Traverse 70 Backpack is a multi-day ventilated backpack with an adjustable-length frame, swappable shoulder straps, and interchangeable hip-belts, so you can get a custom fitting pack that matches your unique size and shape for optimal comfort. Weighing 4 lbs 14 oz, the Traverse 70 is definitely not an ultralight backpack, but it is still surprisingly nimble for a pack that can comfortably carry 50 pound loads. Loaded with pockets and features, it also compares quite favorably to the Gregory Baltoro 75 and the Osprey Aether AG 70 in terms of features, pack weight, and price. Specs at a Glance
Backpack Frame and SuspensionWhile the Traverse 70 is loaded with organizational features, the pack’s frame is where the rubber really hits the road. The frame is an aluminum wire hoop that terminates below the lumbar pad. A mesh ventilated panel is suspended across the wire hoop and provides sufficient ventilation to help dry sweat that builds up on your back and shirt when you hike. The cavity formed by the mesh is not deep and does not intrude on the shape of the main compartment, so it doesn’t affect packing, unlike some packs (most notably Osprey) where the interior curvature is often so great that it makes it hard to access items stored inside. The Traverse 70 also does NOT pull you backwards and off-balance like many other ventilated backpacks, something that impressed me. 
The torso length on the Traverse 70 can be adjusted by lifting or lowering the shoulder yoke which is attached to the back of the pack by velcro. When you buy a pack designed to carry heavier loads, this really is a must-have. Adjusting the torso length on the Traverse 70 is a little awkward because the cavity space isn’t very large for your hands to maneuver in. Still this isn’t something you have to do very often and it’s not a major concern. The Traverse’s hip belts are quite wide, pre-curved, and well padded. They are also removable and replaceable if you need to go a size larger or smaller. They’re locked into place with velcro and won’t slip when you load up the pack. The hip belt also has a fairly chunky lumbar pad that’s designed to prevent the hip belt from slipping down your waist. When I first tried the Traverse 70, the lumbar pad was quite noticeable. But it’s covered with soft foam and I quickly got used to it, to the point where it’s faded into the background. Once you’ve dialed in the fit, the Traverse 70 carries heavy and bulky loads with ease. The pack doesn’t lean forward and smother you, nor does it pull backwards when heavily loaded. It sits up straight on your hip bones, while maintaining excellent control, with a slight air gap behind your back. You can of course tighten the shoulder straps and pull down on the load lifters if you prefer a tighter fit, but I prefer the airflow. One feature that REI touts on the Traverse 70 is their ActivMotion technology, which is supposed to pivot with the natural motion of your hips. While the hip belt does have some movement, I really couldn’t detect an obvious pivoting action. While I found the hip belt to be comfortable when scrambling or hiking on uneven ground, I couldn’t tell if the pivoting hip belt contributed to this or not. 
Backpack Storage and OrganizationThe Traverse 70 is a top loading backpack with a floating lid pocket that can be raised or lowered to hold gear, including a bear canister, on top of the main compartment. The top lid has two zippered compartments (one stores the rain cover) and comes with integrated shoulder straps, so you can use it like a small backpack. The cavernous main compartment has an oversized hydration sleeve that’s large enough to hold a 4L MSR Dromedary Reservoir, which is useful if you need to carry extra water. However the interior volume is completely unstructured, without even a sleeping bag divider inside. There is a front J-zipper however, that provides panel style access to the main compartment so you can get gear buried deeply in the pack out without having to completely unpack it. I’m not sure why REI did not include a longer U-shaped zipper for panel access, because that would have made it easier to fully open the front panel, even when the pockets on its exterior are full. 
The Traverse has large stash pocket located in front of the main compartment, good for storing wet gear or camp shoes, with mesh side panels and drain holes. In addition, the front of that pocket has two closed torpedo pockets for storing more gear that you might want frequent access too. These torpedo pockets are quite long and provide a lot of add-on storage. It’s best to put lighter weight items into them rather than heavy ones though, so the pack doesn’t pull you backwards and off-balance. REI’s latest generation of Flash and Traverse packs have unusual side pockets that are designed to hold water bottles where you can reach them easily (what a concept!) Unlike other backpacks, they’re not on the sides of the main compartment, but closer forward, over the wings of the hip belt where they wrap around your hips. This makes it easier to pull them out and replace if you have limited shoulder mobility or shorter arms. It also places your water squarely on your hips for optimal carrying efficiency. The bottle pockets work well with tall 1 liter plastic bottles and Nalgenes, but are harder to use with soft bottles that doesn’t have a rigid or round shape like the a 1 liter Platypus SoftBottle. An additional snap is provided to help hold bottles in place and is easy to re-snap while wearing the backpack. Great idea! 
Despite their convenience, these dedicated side bottle pockets can’t be used to hold cylindrical objects, like tent poles or glacier wants that are lashed to the side of the pack. So the Traverse has another set of side pockets located behind its water bottle pockets for this purpose. These pockets are best used for storing objects that are long enough that they can be secured by the top compression strap and the Uplift strap, which I’ll discuss in a moment. Finally, the Traverse 70 has a pair of cavernous hip belt pockets, one solid faced and one mesh. They easily fit a Garmin InReach, a cell phone, a turkey sandwich, or even a fairly chunky camera, with ease. 
External Attachment and Compression SystemThe REI Traverse 70 has two tiers of compression, both diagonal to help pull the load closer to your center of gravity. The bottom tier has an extra pulley-like strap system which helps prevent heavy loads from pulling you backwards. Combined with the pack’s load lifter straps, it helps align the pack angle closer to your natural, slightly forward-leaning stance. Called the “Uplift”system it helps prevent the heaviest items in your pack from drooping behind your butt and below your waist where they can throw you off-balance. It’s also quite simple and lightweight. If have a tent body or sleeping pad that is too large to fit inside your pack, the Traverse 70 has a pair of permanently attached sleeping pad straps that you can strap it to the bottom of the pack with. I’d encourage you to avoid that if possible, because weight there can pull you off-balance and hit the back of your legs when you walk. A better alternative is to rig up an attachment point above your hips, using some of the extra gear loops arranged around the pack and elastic cord. The Traverse 70 has 4 gear loops located around the sides of the stash pocket as well as 2 gear loops on the top of the floating lid for this purpose. If you carry trekking poles or ice axes that are dual shaft holders tucked away into the top of the stash pocket and dual ice axe loops below them, together with a trekking pole tip holder. Many pack manufacturers don’t include shaft holders, but they’re a must-have in my book. Comparison Table
RecommendationThe REI Traverse 70 is a real workhorse of a backpack that’s meant for carrying larger and heavier loads than lighter weight and simpler backpacks. While ideal for weeklong backpacking trips off the grid or family base camping, the Traverse trades off weigh savings for adjustability, features, and durability. While the Traverse is loaded with great features and an impressive variety of organizational options, the thing that sets it apart from other packs is the fact that its shoulder straps and hip belt are available in multiple sizes on both the men’s and women’s Traverse 65 models. That coupled with an adjustable torso length and back ventilation makes the Traverse 70 a very competitive alternative to comparable but more expensive packs like the Gregory Baltoro 75 or the Osprey Aether AG 70, which headline this style and size backpack. REI provided the author with this backpack for review. SectionHiker.com receives affiliate compensation from retailers that we link to if you make a purchase through them, at no additional cost to you. This helps to keep our content free and pays for our website hosting costs. Thank you for your support.The post REI Traverse 70 Backpack Review appeared first on Section Hikers Backpacking Blog. from https://sectionhiker.com/rei-traverse-70-backpack-gear-review/
The Moriah Loop is a 2-3 day, 24 mile backpacking route that climbs Mount Moriah and its graceful sister peak, Shelburne Moriah, before dropping down to the Wild River. From there, the route loops back through the heart of the Wild River Wilderness on the Moriah Brook Trail, passing countless cascades and pools that make for great backcountry swimming. Seldom visited by day hikers, this wilderness area is remote and lightly blazed, requiring good map-reading skills and navigation experience.
Rating/Difficulty****/5 out of 5 Distance/Elevation Gain24 miles w/5800′ of cumulative elevation gain White Mountain 4000 Footers
Recommended Duration2-3 days SeasonJune thru October Permits RequiredNone. RegulationsBackcountry Camping Regulations for the White Mountain National Forest. Most this route passes through the Wild River Wilderness Area. Please observe all wilderness area restrictions.
New to the White Mountains? Read this Quick and Dirty Guide to Backpacking in the White Mountains for information about camping regulations, road access, trail shuttles, lodging, dangerous wildlife, weather, etc.
Trailhead Directions
This trip starts the Carter Moriah Trailhead and ends nearby at the Stony Brook Trailhead. These are separated by a 1.3 mile road walk, all downhill, that takes about 20-25 minutes. If you only have one car, I’d recommend leaving it at the Stony Brook lot and getting the road walk out of the way up front. Turn left from the Stony Brook parking lot onto Rt 16 and walk 1.3 mile, turning right into the Libby Pool parking lot on Mill Street. Leave the parking lot on Mill Street and turn right onto a bridge in 0.2 miles. Cross the bridge and take a right onto Bangor Street, which quickly leads to the Carter Moriah Trailhead. You can also park at the Libby Pool lot (the sand covered part) if you have two cars, instead of trying to park at the Carter Moriah Trailhead, which has very limited parking. Trail SequenceThe route follows the following trails in sequence. Refer to the AMC White Mountains Trail Maps 5-6: Carter-Range-Evans Notch North Country-Mahoosuc (2017 ed), which is the best waterproof map available for this region, although I’d recommend buying the complete AMC White Mountain Waterproof Map Set (2017 ed) rather than one map at a time, because it’s less expensive that way. Detailed trail descriptions can also be found in the AMC White Mountain Guide (2017 ed), which is considered the hiking bible for the region. Take photos of the relevant pages using your phone for easy reference, instead of carrying the entire book with you on hikes. Getting the 2017 editions is important because there have been changes to the trail system.
Scenic HighlightsThe following list provides cumulative distances on the route to each view or landmark.
Camping and Shelter Options
Water
There’s no water on the first 9 miles of this route, until near the top of the Shelburne Trail, so carry extra. Three liters should do it. Water is abundant, thereafter.
Natural water sources are plentiful in the White Mountains although you may need to descend to them from ridgelines along side trails if you run short. In any case, carry a detailed topographic map with you and don’t rely on the overview map provided with this trip description to find water sources. I also recommend purchasing the WMNF Wild River Map in Guthook Guide’s New England Hiker Smartphone App (IOS, Android) which is a GPS guide to all of the trails, trailhead, shelters, campsites, views, and water sources in the White Mountains National Forest. I use it all the time and it is much more complete and current than using the maps bundled with the Gaia Smartphone App. On the Trail
Begin climbing the Carter Moriah Trail which climbs 3250′ feet over 4.5 miles to the summit of Mount Moriah. The trail is easy to follow, but this is a significant climb so take your time in ascending. Water is also scarce, as noted above, so pack extra. 
At 2.0 miles you’ll come to a rock ledge known as Mt Surprise which has a good view of Pine Mountain on the other side of Rt 16. From this point onward, the trail to Moriah switches from forest duff to rock ledge, gaining elevation steeply in places. 
Continue climbing until you come to a spur trail on your right to the Moriah Summit. There are very fine views of Mt Washington and the northern Presidentials from the summit. If you turn and look to the north, you can see the summit ledges on your next destination, Shelburne Moriah Mountain. Once you summit that peak, you’ll follow the ridge on its righthand side down to the Wild River Valley. 
Return to the Carter Moriah Trail and turn right. In a few steps, you’ll come to a rock chimney that you need to down-climb. The best way I’ve found to descend these is to go down backwards, like climbing down a ladder, grabbing hand and footholds as you climb down. At the bottom, turn left onto the Kennduskeag Trail where you’ll encounter numerous boardwalks on the way to Shelburne Moriah Mountain. This first section of the Kenduskeag Trail coincides with the Appalachian Trail and you’re like to to encounter thru-hikers or section hikers until the AT turns off at the Rattle River Trail Junction, 1.4 miles distant. 
Continue on the Kenduskeag Trail past the Rattle River Trail junction, walking on more bog bridges until you pop out above treeline near Shelburne Moriah Mountain. The views from the top of this 52-with-a view peak (3735′) are probably the best in the Carter Moriah Range. There’s a fine view looking back at Mt Moriah and Middle Moriah to its right. In clear weather, you can also see Mts Washington, Jefferson, Adams, and Madison. Turning north, you can see the entire Mahoosuc Range, which is also on the Appalachian Trail, and the Androscoggin River below it. Head east from the Shelburne Moriah Summit, descending steeply to the Shelburne Trail Junction. Until now, the route has skirted the Wild River Wilderness, following its northwestern boundary. When you reach the junction, turn right, where you’ll be greeted by the Wild River Wilderness boundary sign. Hang gliders are not permitted in the wilderness area, so leave yours at the boundary. 
If you’re low on water, there is a small stream at 2300′ and another larger one at 1800′. If you’re beat for the day and ready to camp, there are lots of locations on either side of the trail to camp in the open woods. The next major stream crossing at 1400′ is also a good area to find a backcountry site. At 1400′ you’ll pass outside the designated wilderness area. Continue to the Highwater/Shelburne Trail junction where Bull Brook meets the Wild River. This junction can be a little confusing because the sign you need to follow is hard to see as you come down the trail. When you see the sign announcing a Forest Protection Area on your right, turn right and look for sign that says “Highwater Trail, Moriah Brook 1.4.” 
From here, there are two small stream crossings separated by a small island. Chances are you’ll need to bushwhack to the left around the island and back around the other side because dead trees from the annual spring floods get hung up on it, blocking the trail. Look for a small wooden sign, nailed to a tree, on the other side of the second stream crossing to find the continuation of the Highwater trail. The Highwater Trail runs along the west bank of the Wild River for 1.4 miles, occasionally climbing above the river, before it turns onto the Moriah Brook Trail. While the Forest Service tries valiantly to keep this trail open year after year, the Wild River erodes the river bank each spring or after heavy rain events. So don’t be surprised if the riverside sections of trail disappear for short stretches because it’s been washed away. If you keep the Wild River to your left, bushwhack these areas, until you find the trail on the other side of the washout. You can’t overshoot the Moriah Brook Trail junction, as long as you stay in sight of the Wild River. 
Shortly before you come to the Moriah Brook trail junction, you’ll pass a sign pointing to the Wild River Campground. This is the site of a former suspension bridge, which was closed in 2016 and has since been washed away. But the sign is a good indicator that you’re still on the right track. The Highwater trail is intact from this point on, until you turn right onto the Moriah Brook Trail in 0.3 miles. Moriah Brook is a rocky mountain stream that runs up a narrow river valley for 5.5 miles. The place has a lost world feel to it, with countless cascades and pools that make for excellent swimming and relaxing. Few people venture down the Moriah Brook Trail, although it is a local favorite among backpackers. After a mile, you’ll come to the Moriah Brook Gorge, a small canyon that drops 300 feet to the Wild River below. The top pool below the water crossing is a great place to take a dip and cool off. The rest of the gorge is accessible, but requires considerable effort to explore. 
Cross the river at the top of the river and hike upstream through open forest. Like the Wild River, portions of the Moriah Brook Trail are periodically washed out by seasonal flooding, so don’t be surprised if sections are obscured by blowdowns or flood debris. If you lose the trail, just remember that it runs alongside the brook. 
While the trail leads to many attractive swimming holes, there are portions of Moriah Brook that you can only get to if you’re willing to hike off-trail to access them. If you have the time and inclination, it’s well worth spending an extra day along the Moriah Brook to investigate them. There is also a sparse trout population in the stream, making it a fun place to Tenkara fish if you have the patience. As you hike higher along the Brook, the valley begins to narrow and the trail starts to weave back and forth across the stream. Some of these stream crossings are obscure, so pay close attention to your map to avoid getting pulled off trail by a herd paths to pre-existing campsites. The valley narrows as you approach the southern cliffs of Mt Moriah. This section can be muddy, but you soon climb out of it reaching the Carter Moriah Trail. 
Take a left at the Carter Moriah Trail and follow the boardwalk 20 yards to the Stony Brook Trail junction. Take a right onto the Stony Brook Trail which descends steeply at first but then moderates. Follow it for 3.6 miles, past a gorgeous stream, with numerous swimming holes, until you reach the trailhead parking lot at the end of this route.
About Philip Werner: Philip is the 36th person to finish hiking and backpacking all of the trails in the White Mountain Guide. He's also finished hiking many of the region's peakbagging lists including the White Mountain 4000 footers, the 4000 footers in Winter, the Terrifying 25, the RMC 100, and the Trailwrights 72. Philip is a 4 season backpacking leader for the Appalachian Mountain Club, a member of the executive committee for the Random Hikers, a Long Trail Mentor for Vermont's Green Mountain Club, and a Leave No Trace Master Educator. He also teaches several compass, GPS, and off-trail navigation courses each year, listed on Outdoors.org.
Safety DisclaimerThis trip plan can not alert you to every hazard, anticipate your experience, or limitations. Therefore, the descriptions of roads, trails, routes, shelters, tent sites, and natural features in this trip plan are not representations that a particular place or excursion will be safe for you or members of your party. When you follow any of the routes described on SectionHiker.com, you assume responsibility for your own safety. Under normal conditions, such excursions require the usual attention to traffic, road and trail conditions, weather, terrain, the capabilities of your party, and other factors. Always check for current conditions, obey posted signs, and Backcountry Camping and Wilderness Area Regulations. Hike Safe and follow the Hiker responsibility code.Published 2018. SectionHiker.com receives affiliate compensation from retailers that we link to if you make a purchase through them, at no additional cost to you. This helps to keep our content free and pays for our website hosting costs. Thank you for your support.The post A Moriah Loop Trip Plan: Backpacking the White Mountain 4000 Footers Guidebook appeared first on Section Hikers Backpacking Blog. from https://sectionhiker.com/a-moriah-loop-trip-plan-backpacking-the-white-mountain-4000-footers-guidebook/
The Sierra Designs Sweet Suite 2 is a two-person, double-wall tent weighing 3 lbs 3 oz ounces. It’s easy to set up and has two doors and two vestibules, a must-have for couples camping. Near vertical side-walls and an open airy inner tent provide excellent ventilation and moonlight illumination, when the rain fly is not needed. Specs at a Glance
Inner TentThe Sweet Suite 2 has a 2-door inner tent, which is a must-have for 2-people, so you can each get out without having to climb over and wake up your partner at night. Both side doors have a “D” shape that makes entry and exit easy, even if you have a backpack stored under the side vestibule. The zippers are bi-directional, making the doors extra easy to open and close. 
The tent poles are aluminum, which is good for long-lasting durability, provided you avoid snapping the ends together when you put them together or pull them apart. There are two tent poles, a multi-segmented 3 pole affair with a center hub and a horizontal cross pole that helps create the near vertical sidewalls. The front pole is pre-bent and nearly vertical providing excellent headroom, while the rear of the tent slopes down toward the feet. Pockets sewn into the sidewalls provide plenty of storage for valuables and essentials, while the high bathtub floor prevents rain from flooding you out. The inner tent quickly clips to the hub and poles, but 4 tent states are still required in the corners to stretch out the corners. The floor fabric is a 30D Nylon Ripstop, fully seam-taped of course, but burly and durable enough that you can use the Sweet Suite without a footprint and not have to worry about surface abrasion. The interior width and length of the Sweet Suite 2 can fit two tapered 25″ inch wide sleeping pads with ease. The 84″ length of the inner tent also makes this a nice tent for taller folks. I always measure the interior dimensions of the tents I test and review, since manufacturers usually publish the dimensions of the rain fly, not the actual space available to lay out a sleeping pads. The near vertical front wall and ample 40″ peak height make it possible to sit up inside the inner tent if you’ve brought along a chair kit for that purpose. 
Rain FlyThe rain fly clips to the corners of the inner tent, making set up fast and painless. An additional two stakes are requires to secure the vestibules to the ground, bringing the total required to pitch the tent to 6. Ventilation is good, even when the fly is completely closed, because the side walls are cut high to improve air flow and cross ventilation. The two side vestibules are also large enough that you can fit a backpack under them and still get in and out of the tent easily. Sierra Designs touts the ability to roll back the rain fly on this tent (see top photo) for star-gazing, but provides no way to secure the fly when it is open to prevent it from unraveling or flapping in the breeze. I was disappointed by this, since you can roll back the fly this way on other dome-shaped, double-wall tents, just as easily. I would have been a lot more impressed if there were a way to pull up the rain fly, like an awning, from inside the tent, or to drop and secure it in place without having to leave the inner tent or vestibule. 
The pole structure and the shape of the rain fly, make the Sweet Suite 2 quite a strong tent for windy conditions and bad weather. Additional guy-out points are also available on the exterior of the fly, so you can further anchor it in poor weather. Compare the Sweet Suite 2 against these other 2-person backpacking tents.
RecommendationThe Sierra Designs Sweet Suite 2 is a comfortable, lightweight tent that’s super easy to set up. While it’s not the lightest weight two person tent you can buy, it provides a nice balance between features and cost. My favorite feature is the internal height and width of the inner tent, which makes it quite livable and good for hanging out in. It’s also a strong, solid tent that sheds wind and rain well and provides excellent ventilation and views when the vestibules are open. The use of durable fabrics means that this a tent that will stand up to the elements and lots of use, without breaking the bank. Compare 3 Prices
Last updated: 2018-06-18 02:31:05
Sierra Designs provided a tent for this review. SectionHiker.com receives affiliate compensation from retailers that we link to if you make a purchase through them, at no additional cost to you. This helps to keep our content free and pays for our website hosting costs. Thank you for your support.Published 2018. See Also:
The post Sierra Designs Sweet Suite 2 Tent Review appeared first on Section Hikers Backpacking Blog. from https://sectionhiker.com/sierra-designs-sweet-suite-2-review/ |

ABOUT MEHello my pleaseure to introduce myself, I am Jose Johnson. I am 26 years old from Monroe, LA. I love to got for hikings with my friends on holidays. Archives
April 2019
Categories |


 RSS Feed
