|
Moose are bashful animals that usually run away when you encounter them. But they can also be quite surly and hard to read when you encounter them on foot during hikes and backpacking trips. Males can become very aggressive during rutting season (September-October), while females tend to be very protective of young calves. Moose have very bad eyesight and may approach to get a better look at you. Don’t make the mistake of interpreting this as friendly gesture. These are large and unpredictable animals that can do a lot of damage if they kick or gore you. Adult males average 1200 lbs in weight while females average 900 lbs. If they make contact, you’re going to feel it. You can tell a moose is agitated if the guard hairs on its hump are raised, its ears are laid back, it lowers its head and stops eating to look at you, or urinates to mark territory. Avoid chasing a moose or getting between a mother and its calf. Unleashed dogs can also provoke an attack. When moose charge, they often kick out with their sharp front hooves instead of bashing you with their antlers. Many charges are bluffs warning you to back off, but you can’t tell this in advance. You can’t outrun moose, which can travel up to 30 miles per hour. The best defense is to maintain a safe distance when you see one and duck behind a large tree or object if you think they’re aggressive. Backing away slowly and giving them space is usually all they need to relax and will diffuse a confrontation. Moose live in forested areas near water sources like ponds and lakes. They’re also active in winter and forage all winter, even when food is scarce. They range widely and will make use of hiking trails to get from one area to another which can lead to human-moose encounters. 
Moose scat is often piled up on or along trails they frequent. It consists of small, egg-shaped pellets about the size of your big toe. If it’s soft (poke it with your trekking pole tip), it means moose have passed by recently. Moose also bed down in high grass, so take care when walking through such areas because they’re easily startled. Moose beds look like larger round depressions in the grass. It’s also common to meet moose on backcountry roads or see them along highways. If a moose is in front of your car, blocking the road, don’t drive toward it threateningly or honk at it. Just be patient. It will move along eventually. Don’t try to chase a moose that’s running along a road either, because this will only agitate it and may result in injury to the animal. Also be very careful when driving at night in forested areas to avoid hitting a moose with your car or truck. These accidents are often fatal to drivers as well as the moose. More about Moose
The post What Should You Do If You Meet a Moose? appeared first on Section Hikers Backpacking Blog. from https://sectionhiker.com/what-should-you-do-if-you-meet-a-moose/
0 Comments
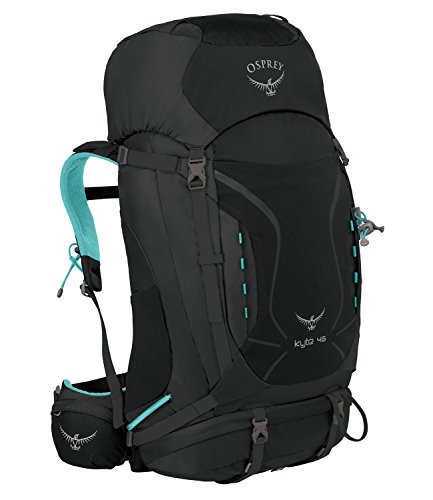
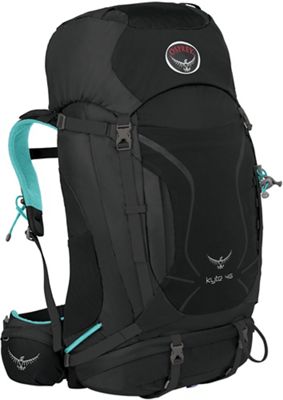
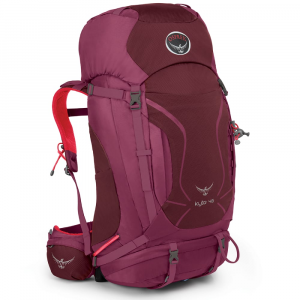
The Osprey Kyte 46 is a women’s specific backpack that’s big enough for weekend backpacking trips, but nimble enough for long day hikes and peakbagging adventures. Being a women’s specific backpack, it has a shoulder straps that won’t pinch or chafe your chest or underarms and a hip belt that flared to wrap around women’s curvier torso and hips. The men’s version of this backpack is called the Kestrel 48, which shares all of the same features. Specs at a Glance
Backpack Storage and OrganizationThe Kyte 46 has a top lid, main compartment, sleeping bag pocket, front mesh pocket, and side water bottle pockets. The top lid is sewn to the front of the pack and has two pockets, one external and one internal facing the top of the main compartment. The main compartment closes with a drawstring, but does not have a hydration pocket, because you’d store a reservoir behind the shoulder straps on the exterior of the pack on the Kyte 46, something that I find far more convenient than storing a reservoir inside a pack. More on that in a bit. 
There are two full length zippers on the sides of the pack. The right side zipper open into the main compartment so you can reach in and pull stiff out without having to open it from the top. That’s a big time saver. The left hand zipper open to a full length closed compartment, that’s ideal for stowing wet gear or a first aid / food/ toilet kit… most anything you either don’t want in your pack, or items you want handy. I use it for my raincoat and personal locator beacon. There’s also a separate sleeping bag compartment at the base of the pack at the bottom of the main compartment. It’s really a fold away shelf, that you release if you’d rather pack the man compartment as one continuous space. 
There’s also an open mesh pocket on the front of the pack, but it’s not that large. I can get my Crocs into it but it’s too small to carry my rain gear at the same time. That’s not a showstopper, but I’d prefer a larger pocket. 
The side water bottle pockets are also mesh and are sized to hold 1 liter Nalgene bottles. I can’t reach them when I’m wearing the pack, but prefer using a hydration system so it’s not a big issue. While the pockets don’t touch the ground when you put down the pack, they could become a durability issue if you hike off-trail where vegetation can rip them. 
Backpack Frame and Suspension SystemThe Kyte 46 has a lightweight wire frame that runs around the perimeter of the pack, but gives it a fair amount of flex, so it stays close to your torso when scrambling. The back area behind your shoulder blades isn’t ventilated like a trampoline pack, but it is covered with die-cut foam and mesh to help channel sweat away from your shirt and help it dry faster. It still works well for me. The Kyte is an adjustable frame backpack, which means you can change the torso length so it fits you exactly. Changing the torso length is as simple as raising or lowering the shoulder pads, so that there’s more distance or less, between them and the hip belt. The adjustment system couldn’t be simpler. The shoulder pads are connected to the backpack by velcro and raise and lower them, you simply release and reposition them where you want them. Why aren’t all backpacks made like this? You have to wonder. 
As I mentioned before there’s a big gap behind the shoulder strap yoke where you’d insert a hydration bladder if you use a hydration system. I love this pocket because it makes it SO much easier to get out, refill, and repack. It also makes it each to check how much water you have left. I hate having to unpack a hydration bladder when I’m backpacking because its takes longer and I have to usually repack my entire pack from scratch once I’ve taken the bladder out. The Kyte’s shoulder pads are s-shaped so they’ll curve around your breasts. While they’re padded, there’s softer padding along the inside edge, they they’re more comfortable. The sternum strap runs on a “rail”, making it very easy to reposition up or down. the hip belt is sewn the back of the pack, which is good, because provides better load transfer to the hips than a hip belt that’s just attached using velcro. The hip belt wings are flared to provide a better wrap around my hip bones and the hip belt has two solid-faced, zippered pockets, one on each side. They’re on the small size though. While I can get a compass or bar into them, they’re too small to hold my phone. 
External Attachments and Compression SystemThe Kyte 46 has two tiers of compression straps on the sides of the pack. Both straps open and close with buckles, making it easy to lash snowshoes to the sides of the pack. The front of the pack also comes with sleeping pad straps, so you can secure a pad or tent to the bottom of the pack of you need extra storage. The straps are also removable if you prefer to remove them. There are also gear loops all over the pack that you can attach more gear to, including loops on the top pocket (4), and 8 loops on the sides of the front mesh pocket, that can act like daisy chains if you prefer to lash gear there. The Kyte also has Osprey’s Stow-on-the-Go trekking pole retainer. I like this system because it frees your hands for scrambling and you don’t have to stop to strap your poles to the outside of your pack. 
RecommendationThe women’s Osprey Kyte 46 Backpack is loaded with features that make it really easy to use for backpacking, more technical hikes, and even winter hiking. I’d liken it to a lightweight Swiss Army Knife because there are so many ways to use the backpack, but there’s nothing extraneous on it. While it has lots of pockets and attachment points, I can’t think of anything that I’d want to get rid of. I also think it’s an exceptional backpack for women, because it’s lightweight and has an adjustable torso length, so you can really dial in a near-custom fit. It’s also available in multiple sizes, with a torso range from 13″- 20″, making it ideal for shorter women who have a difficult time finding packs sized for their torso range.
Beth Zimmer is an expert backpacker who's backpacked all over New England and Eastern Canada, with a long list of hiking accomplishments to her name. She's section hiked the New Hampshire Appalachian Trail, climbed the New England Hundred Highest and the New Hampshire 200 highest (mostly bushwhacks), redlined the White Mountain Guide (1440 miles), and climbed the White Mountain 4000 footers several times over. Beth also teaches GPS and off-trail navigation classes as a volunteer for the Appalachian Mountain Club and is co-chair of the New Hampshire Excursions Committee, which oversees all volunteer hiking and leadership training activities. When she's not hiking and backpacking, Beth resides in New Hampshire where she can usually be found sipping coffee and planning her next adventure.
Compare 6 Prices
Last updated: 2018-08-30 02:31:05
Disclosure: REI provided the author with a sample backpack for this review. SectionHiker.com receives affiliate compensation from retailers that we link to if you make a purchase through them, at no additional cost to you. This helps to keep our content free and pays for our website hosting costs. Thank you for your support.The post Osprey Kyte 46 Women’s Backpack Review appeared first on Section Hikers Backpacking Blog. from https://sectionhiker.com/osprey-kyte-46-backpack-review/
“I’ll never take my cell phone hiking or backpacking,” I said about 10 years ago. Famous last words. I now carry a Smartphone wherever I go, in part, because you can’t find a phone anywhere in the United States, Canada, or the UK, unless you carry your own. Look around. Phone booths have all but disappeared from the face of the earth. But there’s a bigger reason to carry a phone on hikes and backpacking trips having to do with emergency communication. While you can contact search and rescue with a 2-Way Satellite Communicator like the Garmin inReach Explorer+, inReach Mini, or SPOT X, and even send your lat/lon coordinates to them, emergency responders prefer that people contact them by dialing 911 (or the in-state SMS emergency number) if you have cell network service, because you’ll be in touch with *their* call center, their trained staff, and their network of SAR responders faster with fewer inter-agency handoffs. Speaking on a cell phone is also a much richer form of communication than pecking away at the messaging keyboard of a two-way satellite communicator. It’s very helpful to search and rescue if you can provide them with information about your gear and current condition, so they can give you advice and prioritize the people and equipment they need to respond. That kind of information is much more efficient to convey by voice than text. But there’s no guarantee that you’ll have cell network access in the backcountry, so it makes sense to have at least one cell phone and one satellite communication device in your group, at least on remote trips, where aid may be needed. While I carry a smartphone and a satellite communicator on all of my day hikes and backpacking trips, I don’t think of my smartphone as a “classic phone” anymore, because since I rarely call anyone and most of my phone calls (robocalls) go to voicemail. In the past 5 years, Smartphones have transcended voice communication and become hand-held computers. I use my Smartphone to get driving directions to trailheads, to navigate on and off trail, to take photos and notes, respond to blog comments, text my friends, send emails, and even write blog posts if the muse visits. But if you can get a cell phone signal in the backcountry, 911 can’t be beat. Try it before you try your Satellite Messenger or Personal Locator Beacon. SectionHiker.com receives affiliate compensation from retailers that we link to if you make a purchase through them, at no additional cost to you. This helps to keep our content free and pays for our website hosting costs. Thank you for your support.The post Should You Carry a Cell Phone on Backpacking Trips? appeared first on Section Hikers Backpacking Blog. from https://sectionhiker.com/should-you-carry-a-cell-phone-on-backpacking-trips/
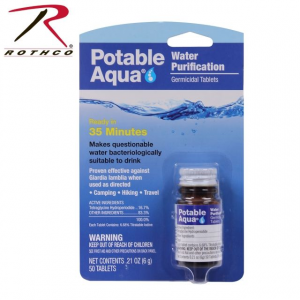
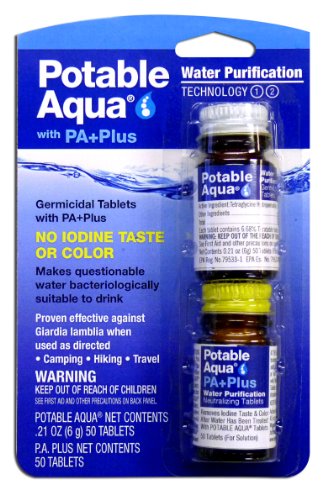
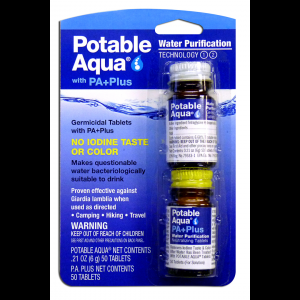
Potable Aqua Iodine Water Purification Tablets remain a popular method of backcountry and international water purification in developing countries, despite the increased availability of alternate purification methods like chlorine-dioxide tablets. Iodine Water Purification – Pros and ConsUsing iodine tablets is not for the faint-hearted because they turn clear water a nasty-looking brown that tastes mildly astringent to drink. Iodine stains the inside of drinking bottles and reservoirs, and your clothes if you spill it on them. While it’s effective in killing viruses and bacteria, iodine tablets are only moderately effective in killing giardia lamblia, according to the CDC, despite the manufacturer’s claims to the contrary. It’s also ineffective against cryptosporidium. The CDC also advises against consuming iodinated water for more than a few weeks. Pregnant women, those with a history of thyroid disease, and those allergic to iodine should not drink iodinated water. Iodine tablets have also been banned from sale in European countries because of these health reasons since 2009. In defense of iodine tablets, they can make a good addition to emergency preparedness kits (in addition to a filter to remove protozoa and other hard-shelled parasites) because they not expire when stored properly and they help limit the intake of radioactive material in the event of nuclear war. Iodine tablets are fast acting (30 minutes per liter), lightweight and about half as expensive as chlorine dioxide tablets, like Katadyn Micropur. 
You can also neutralize the brownish color and remove some of the Iodine taste by adding vitamin C to water that’s been treated with Potable Aqua Iodine Tablets, using PA+ Plus Taste Neutralizer Tablets, tiny tablets which are usually sold with the iodine tablets to make them more palatable. You add these *after* the iodine tablets have purified your water, otherwise they’ll interfere with the purification process. The PA+ Plus tablets take 5 additional minutes to work. If they haven’t completely dissolved in that time, you can still consume the water. Bacteriological Effectiveness: Giardia Lamblia?Why does Potable Aqua claim on the product label that their iodine tablets kill Giardia when the US CDC (Center for Disease Control and Prevention), states that iodine tablets only have a low to moderate effectiveness in killing Giardia? (see A Guide to Drinking Water Treatment and Sanitation for Backcountry & Travel Use) So I called up Potable Aqua’s customer service number and asked them specifically about the CDC report. They told me that “if Giardia is a primary concern, we recommend that people use Chlorine Dioxide tablets instead of Iodine Tablets. They are also available under the Potable Aqua Label.” Comparable Chemical Water Purification Products
AssessmentIf you need to protect yourself from giardia, a protozoa found in commonly backcountry water sources, and prefer using a chemical purification method over a filter or UV light, don’t use Potable Aqua Iodine Tablets. They are not effective against giardia or cryptosporidium, another hard shell parasite, which is an increasing concern in backcountry water sources. Iodine water purification tablets are really only effective against viruses and bacteria, and more appropriate as a second stage purification method to kill viruses after removing giardia and cryptosporidium with a water filter. Even then, using Potable Aqua’s Chlorine Dioxide Water Purification Tablets is preferable over iodine tablets, because they don’t turn your water brown, have a less offensive taste, and don’t have potentially harmful health effects. Compare 5 Prices
Last updated: 2018-08-27 12:01:57
The author purchased this product. SectionHiker.com receives affiliate compensation from retailers that we link to if you make a purchase through them, at no additional cost to you. This helps to keep our content free and pays for our website hosting costs. Thank you for your support.The post Potable Aqua Iodine Water Purification Tablets Review appeared first on Section Hikers Backpacking Blog. from https://sectionhiker.com/potable-aqua-iodine-water-purification-tablets-review/
Adjustable length backpacks let you change the torso length of a backpack so it does a better job of transferring weight from the shoulders to the hips. Traditionally, backpack companies have dealt with torso length by forcing you to choose between small, medium, or large frame heights which may or not fit you well. If a backpack frame is too short, all the weight will ride on your shoulders and make them sore. If it’s too long, the backpack will pull away from your back and throw you off-balance. But adjustable length backpacks give you the ability to resize a backpack’s length to match your exact personal measurements. It’s a lot like having owning a custom-made backpack that’s made just for you (without having to pay extra for it.) The torso length adjustment mechanisms on the following packs are very easy to understand and use. They’re so simple and lightweight that you have to wonder why all backpacks aren’t adjustable to eliminate the fit problems that so many people experience when buying new backpacks. 1. Osprey Atmos AG 50 Backpack
The Osprey Atmos AG 50 is one of the most comfortable backpacks ever made with a ventilated “anti-gravity” suspension system. Featuring a lightweight, yet rigid frame, this 9-pocket top loader has an adjustable torso and hip belt, ensuring a personalized fit. You can adjust the torso length by raising or lowering the shoulder straps to make the hip to shoulder pad distance longer or shorter. The hip belt can also be lengthened a few inches if its short by pulling out its side wings. After that, the Atmos AG’s ventilated mesh back panel contours automatically to the body, distributing weight and providing an outstanding fit. Osprey makes more adjustable length backpacks than any other pack manufacturer. It’s why so many people use their packs.
2. Gregory Paragon 58 Backpack
The Gregory Paragon 58 is a lightweight ventilated backpack designed to fill the void between minimalist ultralight backpacks and the monster capacity backpacks that Gregory is known for like the Denali 100 or the Baltoro 75. Weighing just over 3 lbs, the Paragon 58 has an adjustable length torso and quick-adjust hip belt, with hipbelt pockets that move with the adjustment to maintain easy access. The Paragon fits men with a torso length of 15-22 inches and is available in multiple volumes. A women’s version called the Maven 55 is also available.
3. REI Traverse 70 Backpack
The REI Traverse 70 Backpack is a multi-day ventilated backpack with an adjustable-length frame, swappable shoulder straps, and interchangeable hip-belts, so you can get a custom fitting pack that matches your unique size and shape for optimal comfort. The torso length on the Traverse 70 can be adjusted by lifting or lowering the shoulder yoke, which is attached to the back of the pack by velcro. When you buy a pack designed to carry heavier loads, this is a must-have. Loaded with pockets and features, the Traverse compares quite favorably to the other premium packs in terms of features, pack weight, and price.
Check for the latest price at: 4. Deuter Futura Vario 50+10 Backpack
The Deuter Futura Vario 50+10 is a 50 liter backpack with a 10 liter extension collar that lets you carry more gear and supplies if needed. It’s a ventilated backpack with an adjustable frame and a well cushioned hip belt that provides all day comfort. A simple-to-use webbing strap located behind the shoulder straps lets you raise or lower them and easily adjust the torso length. The hip belt wings also flex with your hips as you walk, making it easier to maintain your balance when scrambling over rocky trails. I’ll be publishing a favorable review of this backpack in another week or so.
Check for the latest price at: 5. Kelty Redwing 50 Backpack
The Kelty Redwing 50 is a versatile backpack than can be used for multiple functions, ranging from weekend backpack trips to international travel. It’s panel loading style makes it easy to pack clothes and gear, while an adjustable torso provides an excellent fit. The torso length is controlled by raising or lowering the shoulder strap yoke using webbing straps connected to the hip belt. You can even make length adjustments while you’re wearing the backpack, it’s that simple.
Check for the latest price at: 6. Granite Gear A.C. 60 Backpack
The Granite Gear Blaze A.C. 60 is a great multi-day backpack with a roll top-style top, although a separate top lid is also available. The torso length is adjustable by raising the shoulder yoke higher up on the framesheet. There are metal clips at the end of the shoulder straps that you insert into slots in the framesheet. If you need a longer torso, you move the clips up. For a shorter one, you’d move them down. The mechanism is quite simple to understand and there’s little chance of the shoulder straps slipping if they’ve been inserted properly. A women’s version called the Blaze A.c. 60 Ki is also available.
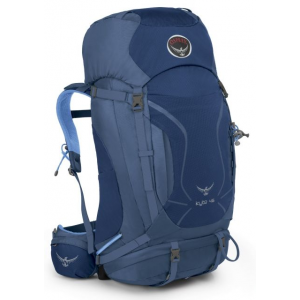
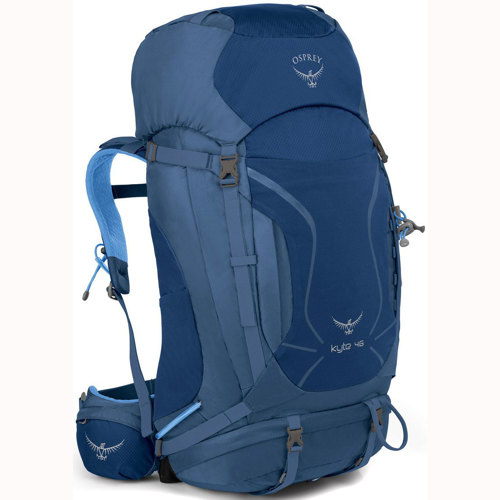
7. Osprey Kestrel 48 Backpack
The Osprey Kestrel 48 is an multi-purpose backpack that’s big enough for weekend backpacking trips, but nimble enough for peakbagging and day hiking. It uses Osprey’s Airscape adjustable length frame, which is lightly ventilated and has a simple velcro mechanism that lets you raise or lower the shoulder strap yoke to adjust the length of the torso. A women’s version is also available called the Osprey Kyte 46.
Check for the latest price at: 8. Kelty Trekker 65 Backpack
The Kelty Trekker is a ventilated external frame backpack designed to carry heavy loads. It has an adjustable telescoping aluminum frame that you can easily make shorter or longer depending on your torso length. External frame backpacks are still popular because they’re durable, heavy padded for comfort, and relatively inexpensive. They also make it possible to carry awkwardly sized gear since you can attach it to the frame, and don’t have to carry it inside the pack bag.
Check for the latest price at: 9. Exped Lightning 60 Backpack
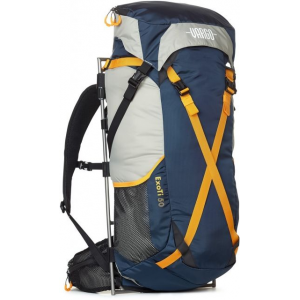
The Exped Lightning 60 is a minimalist, roll top backpack with an adjustable torso length. The frame is a single aluminum stay with the top horizontal cross-piece. The torso length is adjusted by raising or lowering the shoulder yoke along the aluminum stay using a simple webbing strap mechanism that locks firmly in place when secured. It’s very lightweight, intuitive, and easy to use. A women’s version of the Lightning 60 is also available.
Check for the latest price at: 10. Elemental Horizons Kalais 49 Backpack
The Elemental Horizons Kalais 49 Backpack is one of the few adjustable length backpacks made by cottage manufacturers. It’s a roll top style backpack with a side water bottle pockets and a long mesh front pocket for drying wet gear. Torso length and the height of the shoulder yoke are controlled by an adjustable webbing strap, while velcro panels behind the shoulder straps hold the yoke to the pack and prevent any lateral slippage. The hip belt is also available in multiple lengths and replaceable, so you can get the fit you need.
Check for the latest price at: How to Choose a BackpackWhat are the most important features to consider when choosing a backpack? How important is pack weight and getting a frame or hip belt that can be adjusted to fit your personal dimensions. What is the difference between a unisex and a gender-specific backpack and why would you pick one over the other? We answer all of these questions below, and many more. Backpack SizingThe two most important backpack sizing variables are your torso length and the circumference of your hips. Torso length is not the same as your height, but measures the distance between the top of your hip bones and the C7 (bulging) vertebrae on your neck. Tall people can have short torsos and short people can halve long torsos, so it pays to measure this correctly. Hip size is not the same as waist size or pant size and should also be measured separately. Measure the circumference of your body over your hip bones, where a hip belt should rest. Do this while wearing the clothes you expect to hike in. A cloth tape measure is the best thing to use for measuring both of these numbers. Adjustable Length Torsos and Hip BeltsThe majority of backpacks have fixed torso lengths and hip belt sizes, which can make getting a good fit difficult because people’s body shapes and proportions vary so much. Some premium packs let you adjust the length of these components so you can get a personalized fit. While they generally weigh a bit more, getting a well-fitting backpack is usually worth it. Gender-Specific SizingMen and women ave very different anatomical needs when it comes to fitting a backpack. Men tend to be taller and broader across the shoulders with squarish hips, while women have bosoms and curvier hips. Some backpack manufacturers make shoulder pads and hip belts that are gender specific and address these differences. For example, many backpacks have J-shaped shoulder straps and sternum straps designed for men that crush female breasts. Most women prefer a S-shaped shoulder strap that curves around their chest and is more comfortable. The same goes holds for hip belts. Backpack VolumeA 6o liter backpack is the sweet spot for most thru-hikers, week-end backpackers, and multi-sport adventurers because it gives you plenty of space for food, fuel, and gear. While you can go lower and higher, this is a good place to start looking, since many packs are available in smaller and larger volume models. When evaluating a backpack, it’s important to find out how the manufacturer calculates their pack volume. Some manufacturers only count closed storage while others add in all of the open pockets too. That can lead to an inflated number that you’ll regret when it starts pouring rain. Ventilated Backpack FramesEveryone sweats when they carry a loaded backpack. So many people prefer buying packs with ventilated frames that leave an air gap between your back and the pack to help dry your shirt faster. It’s a comfort thing. Backpack FramesThere are basically four types of backpack frames. The one you choose will be dictated by the amount of weight you need to carry.
Pockets and OrganizationDifferent people have different styles of packing needs. Some prefer lots of pockets for organizing their gear and others don’t. Some people prefer using a hydration bladder and others prefer using water bottles, as long as they’re reachable while wearing the backpack. External Attachment FeaturesGear can be carried inside a back or attached to the outside using webbing straps or elastic cord. If you have to carry bulky or awkwardly shaped gear like a foam pad, a large tent, a packraft, paddle, snowshoes, trekking poles, and ice axe, or bear canister, it pays to get a backpack that has special straps or places that you can attach gear to. DurabilityIf you plan to hike in tough desert or mountainous terrain or off-trail, it’s best to get a backpack that has as little external mesh (pockets) as possible, because these are usually the first things to get ripped up on a backpack. Zippers can also be a point of failure. Some fabrics are also thicker and tougher than others. When comparing fabric durability, those with higher denier counts (100D vs 210D) tend to be most abrasion and puncture resistant. Check Out All of SectionHiker's Gear Guides!
The post 10 Best Adjustable Length Backpacks of 2018 appeared first on Section Hikers Backpacking Blog. from https://sectionhiker.com/10-best-adjustable-length-backpacks-of-2018/
The MSR Guardian is a first class water purifier that removes viruses, bacteria, protozoa, dirt and silt from backcountry and international water sources. Weighing just 17.3 ounces, the Guardian has a self-cleaning filter which constantly purges itself while you filter water so you never have to backflush or scrub the filter element. It also has an exceptionally high flow rate of 2.5L per minute, making it ideal for individual or small group use. You can even perform a field integrity test with the Guardian purifier to make sure it’s still working correctly after it’s been accidentally frozen or dropped. That’s unique! Let’s take a closer look. Specs at a Glance
Water Purifiers vs Water FiltersTh Guardian is a water purifier which is different from being a water filter, because it can remove viruses in addition to bacteria and protozoa. Viruses are infectious microbes that are smaller than bacteria or protozoa and the pores in regular water filters aren’t fine enough to trap them. The Guardian, for instance, can remove pathogens down t0 .02 microns in size, or about is 10 times smaller than a comparable water filter like the MSR Miniworks EX water filter, which can only remove organisms down to 0.2 microns in size. While Steripen UV lights can neutralize viruses, bacteria and protozoa, they can’t remove suspended solids or dirt from water like a filter or purifier. Chemical purification in the form ofchlorine dioxide or iodine tablets can also purify water, but the treatment times can take up to 4 hours and isn’t instantaneous or as taste-free as the water processed by a purifier. 
Pump Style Water PurifiersPump-style water purifiers are better than UV or chemical purifiers for processing from turbid and cloudy water sources like snowmelt, beaver ponds, and cattle troughs because they can filter out particulates in addition to pathogens. Pressure provided by a pumping action is required to force clean water through the walls of a filter element to remove foreign matter. 
Hose and Pre-filterThe MSR Guardian come with two hoses, a pre-filter, and a float. The first hose is an intake hose that pulls water from the pre-filter into the purifier. The second hose is expels dirty water and backflushes the purifier filter every time you pump water through the Guardian, cleaning and removing trapped impurities in order to maintain a high flow rate. Having an intake hose also lets you obtain water from hard-to-reach water sources such as shallow seeps, boulder-covered springs, water flowing underneath obstructions like snow and ice, or down steep stream and river banks. It also lets you sit in a more comfortable position while you filter water, which can be a godsend if you have to do it for a group. The pre-filter is designed to block or remove as much muck (soil, sand, and suspended solids) from the water as possible before it reaches the purifier, which is responsible for removing microorganisms. Having a pre-filter is extremely useful if you need to get water from sources that are cloudy or have a lot of suspended solids in them like puddles, cattle troughs, beaver ponds, creeks, and snow melt because it increases filter life and decreases filter maintenance. 
The Guardian pre-filter is suspended from a foam float and oriented so that it pulls water from just below the surface of a water source, where it’s usually the cleanest. The foam float has two hoses attached to it, the intake and outlet hoses, in order to keep both hoses under control and manageable. The pre-filter hangs below the float at a right angle so it can reach water under the surface. The float and pre-filter work best when they’re used to extract water from a still pool, but have a tendency to flip over in moving water, which can reduce the Guardian’s flow rate because less water is reaching the filter element. The Guardian screws directly onto wide mouth water bottles and reservoirs and is compatible, out of the box, with plastic Nalgene style bottles, Nalgene soft canteens, MSR Dromedary, or MSR DromLite water bladders. The base of the purifier also has a nipple that you can attach a hose to if you want to output water to a small mouth bottle or reservoir. Unfortunately, an extra hose is not provided with the unit for this purpose. 
The Guardian is super easy to use. You just screw it onto the bottle or reservoir you want to fill, drop the float and pre-filter in the water and start pumping. It doesn’t take much pressure to pump and fills your bottles quite quickly. You just have to be careful to keep the bottom section which screws onto your bottles clean and out of contact with un-purified water. The Guardian comes with a screw-on clean side cap for this purpose, but you have to be careful to keep it clean as well, between uses. When you’re finished processing water, remove the float and pre-filter and pump the filter a few more times to empty any residual water trapped inside. Then screw on the clean side cap, wrap the hose around the pump, and store it in a dry bag or external pack pocket where it can drip dry. Potential IssuesFine SiltThe Guardian’s greatest strength, its .02 micron pore size, is sometimes its greatest weakness if you need to filter water that has very fine suspended silt in it, because it can clog the filter element and make pumping water through it impossible. I haven’t experienced this myself because we have very clean water where I hike, but I’ve read about it occurring elsewhere. If silt is an issue in your water supply, the best solution is to collect water in a separate container and let it sit for a while so that the silt settles out. You would need to do this regardless of the purification method you use because silt makes it harder to purify water with UV or chemicals. Another option is to filter the water using a water filter that has a larger pore size like the MSR MiniWorks EX, and then use UV or chemical purification to kill off the virus pathogens in the water in a second purification step. FreezingMost hollow fiber tube water filters (like the Guardian) are damaged if they freeze and should be replaced. The Guardian can be frozen, but must be completely re-thawed before use. If you do accidentally freeze it, it’s best to perform the simple purifier integrity test specified in the Guardian manual, before you resume using the filter. This test can be performed in the field, provided you have a clear wide-mouth bottle with you. 
RecommendationThe MSR Guardian is the most sophisticated and effective water purifier available today. Self-cleaning, it has a high flow rate, and generates remarkably good tasting water. While it is an excellent tool for backcountry use and international travel to countries with suspect water, it’s also quite a nice product to have on hand for emergency preparedness at home, especially if you live an area prone to flooding or other natural disasters. If you like great tasting water and don’t want to wait for it, the Guardian is a safe way to get it. Likes
Dislikes
Compare 6 Prices
Last updated: 2018-08-23 21:43:22
Disclosure: MSR provided the author with a Guardian for this review. SectionHiker.com receives affiliate compensation from retailers that we link to if you make a purchase through them, at no additional cost to you. This helps to keep our content free and pays for our website hosting costs. Thank you for your support.The post MSR Guardian Water Purifier Review appeared first on Section Hikers Backpacking Blog. from https://sectionhiker.com/msr-guardian-water-purifier-filter-review/
The AntiGravityGear Ultralight Rain Jacket is a silnylon rain jacket with 17″ pits zips, an adjustable hood, velcro wrist cuffs, and waterproof zippers. Weighing 7.1 oz in a size XL, the sizing is generous, making it easy to layer with other garments. I’ve worn this jacket for hiking and backpacking in heavy rain and it’s quite comfortable and waterproof. Specs at a Glance
The nice thing about silnylon rain jackets is that they’re permanently waterproof and very low maintenance, compared to waterproof/breathable jackets that have an external DWR coating which needs to be restored periodically with a product like Nikwax or Grangers. Silnylon is not “breathable” however, so silnylon rain coats typically come with pits zips to vent perspiration and internal condensation, something that many people would argue is far more effective than so-called breathable laminates. Silnylon rain jacks are also substantially less expensive, because they’re so much simpler to sew and manufacture. Still, there’s actually more to the AntiGravityGear UL Rain Jacket than meets the eye. The silnylon has a PU coating on the inside and outside, giving it a hydrostatic head of 30,000 mm, which is *really* waterproof. While the seams of the jacket are not taped, they are stitched, folded and stitched again for reinforcement, then stitched a third time with a 40d silnylon tape trim, which encapsulates the seams and makes them effectively waterproof.
When it comes to breathability, the AntiGravityGear UL rain jacket relies on its pit zips to vent moisture. A full 17″ in length, the pit zips are quite long, making them more like the torso-zips that Outdoor Research offers on their high-end mountaineering shells. These help vent the front and back of your torso in addition to your armpits, making them even more effective when you’re working hard and perspiring heavily. If you’re a day hiker or backpacker, temperature regulation features are more important than breathability, because the purpose of a rain jacket is to keep you warm across a wide range of weather conditions. Staying dry is a nice-to-have, in terms of importance, since most rain jackets are quickly overwhelmed by perspiration and internal condensation when it’s raining, no matter how “breathable” or expensive they are. 
A good backpacking rain jacket should provide a range of features to help you vent excess heat or protect sensitive areas of your body from getting chilled, particularly those near major veins and arteries near the surface of your skin. For example, the AntiGravityGear rain jacket has velcro and elastic cuffs at the wrists that you can tighten if you want to prevent heat loss or release if you want to vent excess heat. It has elastic hem adjusters to prevent cold wind from blowing up the bottom of your jacket and elastic neck toggles so you can adjust the size of the hood opening to prevent warm air heated by your torso from escaping through the hood. 
There are a few things missing from the jacket however, that make it less than perfect. There isn’t a brim on the hood or a volume adjuster to reduce its size for people with smaller heads. It’d also be nice to have an internal pocket or two for storing snacks, gloves, hats, or electronics that you want access to even if it’s raining. Comparison with the Lightheart Gear Rain JacketLightHeart Gear also makes a silnylon rain jacket which I’m quite familiar with because I’ve been using it for past few years (see the SectionHiker Review). Both it and the AntiGravityGear are good rain jackets but there are some differences between the two. For example, the LightHeart Gear rain jacket has a fabric brim built into its hood. It also has 2 internal and 2 external pockets for storing gloves, snacks, and keeping your hands warm. These are very handy for hiking in all day rain because they eliminate the need to stop and dig around in your pack for food or fresh gloves. The LightHeart Gear rain jacket is also more fitted than the AntiGravityGear rain jacket, which runs broader across the chest. Both jackets have long pit zips and appear to use the same seam construction technique, but the waterproof zippers on the AntiGravityGear jacket are sturdier and easier to use than the regular zippers on the LightHeart Gear rain jacket. The silnylon on the AntiGravityGear rain jacket also has a substantially higher hydrostatic head, although its debatable whether the difference makes that much of a difference in your ability to stay warm or regulate your body temperature, even in all-day rain. Disclosure: AntiGravityGear provided the author with a rain jacket for this review. See Also:SectionHiker.com receives affiliate compensation from retailers that we link to if you make a purchase through them, at no additional cost to you. This helps to keep our content free and pays for our website hosting costs. Thank you for your support.The post AntiGravityGear Ultralight Rain Jacket Review appeared first on Section Hikers Backpacking Blog. from https://sectionhiker.com/antigravitygear-ultralight-rain-jacket-review/ A Mt Carrigain and Mt Nancy Trip Plan: Backpacking the White Mountains 4000 Footers Guidebook8/21/2018
This trip has it all: great views, an epic ridge walk, a fire tower, two alpine lakes, moose habitat, waterfalls, and cascades. Mt Carrigain is at the geographic center of the White Mountains and on a clear day you can see over 30 of the other 4000 footers from its summit fire tower. From Carrigain, you’ll journey deep into the heart of Pemigewasset Wilderness before visiting two high elevation ponds at the foot of Mt Nancy. The site of the Nancy Brook Research Natural Area, the area surrounding the ponds is prime moose habitat and one of the largest tracts of virgin forest in New England. From there you have the option to climb Mt Nancy (3926′), a New England Hundred Highest Peak which has a fantastic view of Mt Washington and the Dry River Valley, before passing Nancy Cascades, a 300 waterfall which drops into a shallow pool where you can soak your feet on a hot day.
Rating/Difficulty****/5 out of 5 Distance/Elevation Gain16 miles w/5300′ of cumulative elevation gain White Mountain 4000 Footers
Recommended Duration2 days SeasonJune thru October Permits RequiredNone. RegulationsBackcountry Camping Regulations for the White Mountain National Forest. No Fires in Nancy Brook Research Natural Area
New to the White Mountains? Read this Quick and Dirty Guide to Backpacking in the White Mountains for information about camping regulations, road access, trail shuttles, lodging, dangerous wildlife, weather, etc.
Trailhead Directions
8-21-18: Sawyer River Road is currently closed due to road construction, but should open again quite soon. You can still reach the Signal Ridge Trailhead by parking at the bottom of the road and walking 2 miles up the road to the beginning of the trail. I did it a few weeks ago and it’s an easy walk. You can also turn this entire route into a loop hike by walking from the Nancy Pond Trail Head to the Signal Ridge Trail.
Trail SequenceThe route follows the following trails in sequence. Refer to the AMC White Mountains Trail Maps 2: Franconia-Pemigewasset (2017 ed), although I’d recommend buying the complete AMC White Mountain Waterproof Map Set (2017 ed) rather than one map at a time, because it’s less expensive that way. Detailed trail descriptions can also be found in the AMC White Mountain Guide (2017 ed), which is considered the hiking bible for the region. Take photos of the relevant pages using your phone for easy reference, instead of carrying the entire book with you on hikes.
Scenic HighlightsThe following list provides cumulative distances on the route to each view or landmark.
Camping and Shelter OptionsThere aren’t any designated campsites on this route, so it’s all wild backcountry camping. Please observe the White Mountains Backcountry Camping Regulations and leave no trace. See How to Find a Dispersed Campsites for Backpacking for some tips on how to go about this. WaterNatural water sources are plentiful in the White Mountains although you may need to descend to them from ridgelines along side trails if you run short. In any case, carry a detailed topographic map with you and don’t rely on the overview map provided with this trip description to find water sources. I also recommend purchasing the WMNF Pemigewasset Wilderness Map in Guthook Guide’s New England Hiker Smartphone App (IOS, Android) which is a GPS guide to all of the trails, trailhead, shelters, campsites, views, and water sources in the White Mountains National Forest. I use it all the time and it is much more complete and current than using the maps bundled with the Gaia Smartphone App. Weather AdviceWhile the open ridge (Signal Ridge) below the Mt Carrigain fire tower is well-marked by rock cairns, it is highly exposed to bad weather and is best hiked on a clear day, when cloud cover does not obscure the view. I’d recommending postponing your hike if rain is in the forecast, and because the subsequent descent of the Desolation Trail becomes considerably more difficult when the rocks are wet. Snow also lingers in the Norcross and Nancy Pond areas well into spring, so I would not advise hiking this route until June, to avoid deep postholing and spruce traps. On the TrailThe start of the trail climbs parallels Whiteface Brook, providing access to many fine swimming holes and cascades. The trail has been rerouted in recent years and is well blazed, making it easy to follow. 
At 1.7 miles, you’ll come to a wide, but shallow stream crossing with Carrigain Brook, which is the last place to top of your water bottles until you reach the other side of Mt Carrigain, about 6 miles distant. While the brook is often rock-hoppable in low water, there’s a good chance that your shoes will get wet at other times of year. 
The next 3.5 miles of trail leading to the summit of Carrigain are quite rocky and steep, so give yourself plenty of time to climb it. As you ascend, you will be able to catch glimpses of the avalanche-scarred face of Mt Lowell on the other side of Carrigan Notch to the east. At 4.8 miles, you’ll pop above treeline on Signal Ridge for a short stretch. There are a few good rocks to sit on here, so rest your legs, and admire the view. Looking ahead, you’ll just be able to make out the first tower on the actual summit. Re-enter a short stretch of trees, and climb 200′ higher to the base of the fire tower. It’s accessed by a sturdy set of stairs and provides 360 degree views of the Whites. The views are really incredible from this point and you can easily spend an hour or more soaking them in. Hint: Bring a camera that shoots panorama photos. 
Leave the tower via the Desolation Trail which begins at the base of the fire tower and enters the Pemigewasset Wilderness. The first 1000 feet of the descent are quite steep and rocky, but the trail levels out nicely after than and becomes quite pleasant to hike. Take your time scrambling down the top of the trail though, sit on your butt to slide down when it’s warranted, and you’ll get down it without much trouble. 
The Desolation Trail ends when it reaches Carrigain Brook and the well-signed Carrigan Notch Trail trail junction. Water is plentiful from this point forward on the route. Turn right onto the Carrigain Notch Trail for 0.8 miles, traveling towards the Nancy Brook Trail. This is a pretty stretch of trail that follows the old logging roads and skid ways that were used to harvest timber before the creation of the White Mountain National Forest. 
Turn left onto the Nancy Pond Trail when you reach the trail junction, crossing three streams in quick succession. The surrounding area is the best place on this route in which to find a nice campsite. My advice would be to walk up one of these streams a few hundred yards and find yourself an open, secluded area to pitch your tent or shelter. This area is quite rich in wildlife, especially moose, so I’d avoid making camp directly adjacent to the streams where the animals cross them at night. This is easy to determine by examining the ground and surrounding vegetation and avoiding highly trafficked areas. 
Continue along the Nancy Pond Trail, which climbs gradually to Norcross Pond at the foot of Mts Nancy and Anderson. The west end of the pond has some nice rocks to sit on and admire the view. If you look to the west, you’ll be able to see Franconia Ridge and the eastern face of Bondcliff and Mt Bond. If you opt to climb Mt Nancy, it’s accessed by an unmarked and un-maintained side trail that’s easy to follow to the summit (it’s now a decommissioned hiking trail, but still used quite frequently.) 
If you’re facing Norcross Pond, turn left and cross to the shore. From where you’re standing, you should see three paths. The rightmost one, closest to the shore, is the Nancy Pond Trail. To reach the Mt Nancy herd path, follow the leftmost path. You’ll know you’re on the correct path when you see a bare wooden board at head height near the bottom. The Forest Service posts a sign here warning people about the fines associated with illegal trail maintenance, but it’s frequently missing. The path is also encoded on the GeoPDF map and GPX file included above for this hike, which you can import into a GPS device or phone app like Gaia GPS. 
The Mt Nancy herd path is a calf burner, climbing 850′ in 0.6 of a mile. But it’s easy to follow as it runs through forest, before climbing steeply next to (but not on) an avalanche slide, and then climbing again through spruce to a signed summit view. When you reach the summit, there’s great view of Mt Washington, the Oakes Gulf headwall, and the Dry River Valley which leads up to it. 
To descend Mt Nancy, retrace your steps back to the beginning of the herd path and turn left onto the Nancy Pond Trail, which heads east along the shore of Norcross Pond. This section of trail travels over many bog bridges as it leaves Norcross Pond and passes smaller Nancy Pond, also on your right. 
By this point, the trail runs along a stream on your left, colored a deep tannic red by decomposing leaves and vegetation. As the stream grows in size, it becomes a series of cascades culminating in a tall 300 foot waterfall named the Nancy Cascades. The trail turns right at the top of the waterfall and descends steeply along a series of switchbacks to the bottom of the falls, where you can leave the trail and scramble over rocks to a shallow pool at its base. Use caution here, because the water is falling from a great height and cause injury. 
The Nancy Pond Trail continues on the right hand side of Nancy Brook for a short distance before a stream crossing, which may become difficult in high water. The trail climbs ascends after the crossing around an obstruction, passing the remains of an old mill building, before recrossing Nancy Brook in 0.6 of a mile. 
The trail continues for another 1.6 miles through open forest over a series of gravel logging roads, until it ends at the Nancy Pond Trail head on Rt 302.
About Philip Werner: Philip is the 36th person to finish hiking and backpacking all of the trails in the White Mountain Guide (1440 miles). He's also finished hiking many of the region's peakbagging lists including the White Mountain 4000 footers, the 4000 footers in Winter, the Terrifying 25, the RMC 100, and the Trailwrights 72. Philip is a 4 season backpacking leader for the Appalachian Mountain Club, a member of the executive committee for the Random Hikers, a Long Trail Mentor for Vermont's Green Mountain Club, and a Leave No Trace Master Educator. He also teaches several compass, GPS, and off-trail navigation courses each year, listed on Outdoors.org.
Safety DisclaimerThis trip plan can not alert you to every hazard, anticipate your experience, or limitations. Therefore, the descriptions of roads, trails, routes, shelters, tent sites, and natural features in this trip plan are not representations that a particular place or excursion will be safe for you or members of your party. When you follow any of the routes described on SectionHiker.com, you assume responsibility for your own safety. Under normal conditions, such excursions require the usual attention to traffic, road and trail conditions, weather, terrain, the capabilities of your party, and other factors. Always check for current conditions, obey posted signs, and Backcountry Camping and Wilderness Area Regulations. Hike Safe and follow the Hiker responsibility code.Published 2018. SectionHiker.com receives affiliate compensation from retailers that we link to if you make a purchase through them, at no additional cost to you. This helps to keep our content free and pays for our website hosting costs. Thank you for your support.The post A Mt Carrigain and Mt Nancy Trip Plan: Backpacking the White Mountains 4000 Footers Guidebook appeared first on Section Hikers Backpacking Blog. from https://sectionhiker.com/a-mt-carrigain-and-mt-nancy-trip-plan-backpacking-the-white-mountains-4000-footers-guidebook/
The Vargo ExoTi 50 is an external frame backpack made with an ultralight titanium-alloy frame. Weighing 42 oz (2 lbs 11 oz), it combines the ventilation and load carrying benefits of an external frame with the light weight of a modern, ultralight-style pack bag. While the pack’s titanium external frame is unique, it also has a highly functional compression system with a lower center of gravity than old-school external frame backpacks. If you’ve been deterred from trying an external frame backpack because they’re too heavy or hard to pack, the Vargo ExoTi 50 is the cure you’ve been waiting for. It combines the best elements of an external frame with the packability of an internal frame backpack. Specs at a Glance
Backpack Storage and OrganizationThe ExoTi 50 has a pack bag that would be feel at home on an internal frame backpack. It has a floating top lid with four webbing straps and can be raised or lowered to compress gear against the top of the pack bag. The lid has one large top pocket and is ideal for storing items that you need close to hand, like a map, GPS, gloves, or a hat. 
The pack bag has a large main compartment with a deep internal hydration pocket. It has a central webbing loop so you can suspend a hydration bladder. However, there is just one hydration port, located above the left hand shoulder. There are also two mesh side water bottle pockets, both sized to fit a single liter-sized water bottle. I can reach back and pull them out or replace them while wearing the backpack, which is pretty cool to be able to do with an external frame backpack. The side pocket mesh is not terribly durable, but the bottom of the pockets is reinforced with solid nylon, so they’re less likely to rip when you place the pack on the ground. While the pack bag itself isn’t that innovative, its positioning on the frame is. When the pack is full, the bottom of the pack bag lines up with the base of the titanium frame. This gives the ExoTi 50 a low center of gravity that’s comparable to an internal frame backpack, and lower than a classic external frame backpack, which feels top-heavy and tippy in comparison. 
Backpack Frame and Suspension SystemThe Vargo ExoTi 50 external frame backpack has a classic rectangular box shape with three horizontal struts for extra rigidity. The pack bag is attached to the frame vertically with a webbing strap and along the sides with velcro, like a classic Kelty external frame backpack. The suspension system is entirely separate from the pack bag and consists of hip belt, lumbar pad, and adjustable shoulder harness which can be moved up or down to accommodate different torso lengths. The hip belt has two zippered mesh pockets, large enough to fit an iPhone, but the mesh isn’t very strong or durable, so I’d caution you to keep this pack on-trail. Like the hip belt, the shoulder straps are backed with lightly padded breathable mesh, with one horizontal hydration tube keeper on each side, and a rail-based sternum strap. The hip belt has a central buckle and pull forward straps that provide mechanical advantage for getting a tight fit. The hip belt wings are 4″ wide and lightly padded compared to a conventional external frame backpack, like a Kelty, which has a much beefier and heavily padded hip belt for carrying heavier loads. I found the hip belt wings a bit short on my 38″ waist, barely reaching around my hip bones, despite the fact that the hipbelt is 60″ long. This also compromised the usability of the hip belt pockets which I had to reach backwards to use. 
The lumbar pad is fairly assertive, but I’m very sensitive to pressure in that spot, and other people might find it more comfortable depending on where you wear your hip belt (high or low). It is a permanent part of the hip belt and cannot be “reduced” in size unfortunately, like a Gregory Baltoro 65, which has removable padding shims that you can take out to reduce the lumbar pad’s profile. The torso length is adjustable by shortening or lengthening a webbing strap that connects the shoulder harness to the hip belt. It doesn’t have any length indications so you have to adjust it by feel and by inspection, making sure to keep the lifter straps at a 30-45 degree angle (see video below). This may be a bit intimidating for beginners, but more experienced backpack users will find it to be a straightforward process. While the hip belt and shoulder harness are backed by breathable mesh, the rest of the frame is uncovered and ventilated, which helps keep you cooler and allows your shirt to dry faster. Lest you write off the benefit of a ventilated backpack, they do cut down on the amount of sweat you experience between the cheeks, and are one of the key benefits of external frame backpacks. 
Compression and External Attachment and SystemThe ExoTi 50 has two orange webbing straps that criss-cross over the front of the pack bag and can be tightened to bring the load closer to your hips and core muscles. They work well as long as your pack contents are compressible. The effect is similar to REI’s uplift compression system (see REI Flash 45 review) which pulls loads up and closer to your back, so that you’re not pulled backwards and off-balance. However, the crisscrossed front straps don’t work well as external attachment points for bulky objects if you want to attach gear to the front of the pack. In that case, your best bet is to lash it to the top of the pack, under the floating lid, and not underneath the pack bag like you’d normally do on a conventional external frame pack. This is because the bottom of the ExoTi 50 pack bag is flush with the bottom of its titanium frame and there’s not really any room to attach it. While you could scrunch it under the top lid, I’ve found that attaching the item to the top of the titanium frame with ski straps is even more secure and comfortable to carry. The top lid is also easily removable if you don’t need the extra pocket. 
Comparable External Frame Backpacks
RecommendationThe Vargo ExoTi 50 backpack combines an internal-frame style pack bag with a titanium external frame, combining the best of both worlds, a bag that’s easy to pack and organize, with an adjustable-length, ventilated external frame that can carry heavier loads. Weighing just 2 lbs 11 oz, ExoTi 50’s low center of gravity and compact size make it possible to use almost anywhere you’d use a internal frame backpack. That’s not to say that the ExoTi 50 carries like an internal frame backpack, because it doesn’t. It’s far stiffer, less body hugging, and will make you stand up straighter. But the ExoTi 50 is by far the nimblest external frame backpack I’ve ever used and a great way to experience the benefits of an external frame backpack without giving up the packability of an internal frame backpack. Likes
Dislikes
Compare 2 Prices
Last updated: 2018-08-20 19:42:48
Vargo provided the author with a sample backpack. SectionHiker.com receives affiliate compensation from retailers that we link to if you make a purchase through them, at no additional cost to you. This helps to keep our content free and pays for our website hosting costs. Thank you for your support.The post Vargo ExoTi 50 Titanium External Frame Backpack Review appeared first on Section Hikers Backpacking Blog. from https://sectionhiker.com/vargo-exoti-50-titanium-external-frame-backpack-review/ 
“You need to buy the tent footprint if you want the fast pitch option,” is the common refrain of tent manufacturers and retailers. But you wonder, “When would I use the fast pitch option and what am I giving up if I don’t buy the footprint now?” Many double-wall tent manufacturers promote a fast fly or fast pitch option which lets you set up the rain fly with a footprint instead of the inner mesh tent as a weight saving option, when you don’t need the insect protection or creepy-crawly protection (spiders, scorpions, and snakes) it provides. The inner tents on most lightweight 2-person double-wall tents weigh close to 16 ounces, so this can save you a serious amount of gear weight in the right circumstances. For example on the Big Agnes Fly Creek (shown above), you’d stake down the footprint, open and insert the multi-segment pole tips into the footprint’s corner grommets, and then drape your rain fly over the poles and connecting it to the footprint’s corner connectors. For added strength, you can wrap the velcro connectors on the underside of the rain fly to the poles. While the resulting structure isn’t as sturdy, windproof, or rain-proof as it is when using the inner tent, it provides a tarp-like structure that provides light weather protection for well protected campsites. When would you use a fast pitch option like this? You could use it for short backpacking trips where you’re confident of favorable weather or anyplace where you might cowboy camp, but still want a lightweight shelter for just-in-case morning dew or light rain protection. You can also use it as a sun shade if you’re hiking in the desert. The good thing about the fast pitch option is that you don’t need trees or trekking poles to set it up, like a tarp.
Despite these advantages, fast fly options that require a footprint are fairly limited. While they do provide limited protection in light rain, there’s usually a substantial gap between the footprint and the bottom edge of the rain fly that lets let wind-blown rain enter the tent or drip on to the footprint. They also provide little protection from wind-blown sand, dust, or snow. 
Fast Pitch Options that Don’t Require FootprintsSome tents don’t require the purchase of footprint to set up the rainfly. For example, the MSR Hubba Hubba NX rain fly can be set up without a footprint, although you also have the option of purchasing a footprint and setting it up with one if you want the added benefit of a groundsheet. The problem with these footprint-free setups is that they tend to be structurally weaker than footprint-based fast fly pitches, because the only thing supporting them are tent stakes. Still they are less expensive than footprint-based fast fly pitches because you don’t have the added cost of a tent footprint. Fast and Light Tent BodiesMSR also offers a new fast and light tent body (see the SectionHiker Review) that is an inner tent without the insect netting and overcomes the structural deficiencies of footprint-based fast fly options. It also solves the issue of rain splatter and drips onto the footprint floor suffered by fast fly options that require footprints. They’re heavy though and represent little weight savings compared to using a footprint-based solution. They also cost a lot more than a footprint. Fly First TentsThere are also tents available that let you pitch the rain fly first, before you set up the inner tent. Once the rain fly is set up, you can crawl underneath it to get out of the weather and hang the inner tent by hooks suspended from the rain fly’s ceiling. This is a pretty common option in European-made double-wall tents from companies like Hilleberg. Tarptent also sells many tents with this capability. 
The main benefit of a fly-first pitch is the ability to set the tent up in the rain without getting the inner tent wet. Some of these fly-first tent pitches are also quite structurally strong, particularly those where the poles slot into sleeves sewn to the rain fly instead of being connected using velcro strips. Popular tents that fall into this category include: Wrap UpI’ve illustrated a number of different approaches that tent manufacturers offer for setting up a rain fly without requiring an inner tent:
In terms of value, the best option for using a rain fly alone is to purchase what I’ve called a fly-first tent, where the rain fly can be set up by itself or before the inner tent. These tend to be strong and weather worthy, even when the rain fly is used alone. While they can be expensive, you get two fully functional tents for the price of one, when used with or without the inner tent. While MSR’s new fast and light tent bodies solve the structural inadequacies of footprint-based and footprint-free fast fly options, they provide very little weight savings for the cost. Footprint-based fast fly options provide the least value however because they’re so limited by location or the time of year (insect-free) when you can use them. While buying a footprint that matches your tent can make sense if you camp on abrasive ground and have a very thin tent floor, it doesn’t make sense to buy a tent footprint so you can use a tent’s footprint-based fast fly option. SectionHiker.com receives affiliate compensation from retailers that we link to if you make a purchase through them, at no additional cost to you. This helps to keep our content free and pays for our website hosting costs. Thank you for your support.The post Backpacking Tent Fast Pitch Options: Pros and Cons appeared first on Section Hikers Backpacking Blog. from https://sectionhiker.com/backpacking-tent-fast-pitch-pros-cons/ |

ABOUT MEHello my pleaseure to introduce myself, I am Jose Johnson. I am 26 years old from Monroe, LA. I love to got for hikings with my friends on holidays. Archives
April 2019
Categories |


 RSS Feed
