|
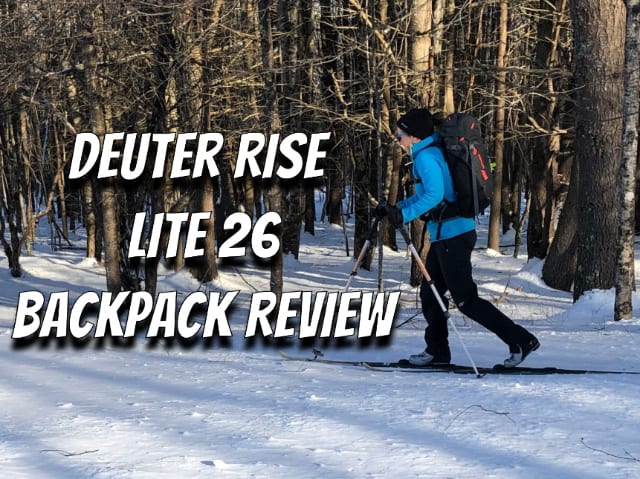
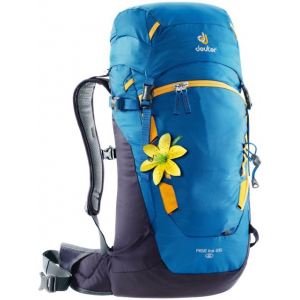
The Deuter Rise Lite 26 SL is a women’s specific winter backpack that’s ideal for winter day trips, such as skiing, snowboarding, hiking, climbing and snowshoeing. Being a women’s specific backpack, the torso length and width are designed for a smaller female frame as compared to a men’s pack and frame. The profile dimensions allow you to easily move or swing your arms while skiing, without grazing the sides of the pack. The pack attachments and straps are designed to quickly and easily adjust to allow you to carry skis and skins, snowshoes, snowboard, helmet, avalanche shovel, and more. Specs at a Glance
Backpack Storage and OrganizationThe Deuter Rise Lite 26 is a top loading pack with a sewn on lid. The lid has a top pocket, with a key fob inside that’s good for stashing goggles, while the bottom pocket is good for stashing toiletries or a map. They both zipper shut. The main compartment has a draw string closure that’s easy to open and pull shut while wearing gloves and mittens. It has a wide top that makes it easy to see and find items inside. There’s also one side pocket, pleated to allow for expansion. There’s also one small hip belt pocket that can fit a power bar, my chapstick, a small plastic ice scraper I carry when skiing, sunblock, and compass. It’s not big enough for my smartphone, but in winter,I keep that in a pocket on my pants to keep it closer to my body for warmth 
The pack a front pocket that opens and closes with a zipper. It has a special compartment inside that conveniently holds an avalanche shovel and probe. I don’t ski where there is avalanche danger, but for expert backcountry skiers, this would be handy. I tuck my ski skins in here and they fit perfectly. When snowshoeing, this pocket is perfect for stowing my lightweight wind shell, and extra mitts, etc. Backpack Frame and Suspension SystemWomen’s backs are not as long as men’s, and the SL carrying system is designed to be shorter. The shoulder straps and hip band are sewn into the pack and I wasn’t sure about the kind of “fit” I would get. But I was pleasantly surprised that I was able to adjust the shoulder load lifters, shoulder strap length, and sternum strap (adjusted, or slid, up/down on sliders) to create an excellent fit for my smaller frame. The hip belt has both a slight upward tilt and a slight curved shape to accommodate my female waist and hips; this was quite comfortable, even under a full and heavy load. 
The hip belt was thinly padded. But given that this pack is designed for more lightweight use, it felt like just the right amount of padding, and helped to ensure a snug, or body conforming fit when carrying my skis. The integrated, internal U-frame combined with back cushioning, provided stability on this light pack, allowing the pack to easily and comfortably bear the weight of my skis or snowshoes. 
The shoulder straps are a bit narrower on the women’s version of this pack, again, taking into account our smaller frames by nature. I was pleased that the shoulder “straps” were long enough to nicely accommodate my puffy layers when I needed to wear them, and yet allowed me to trim them tight and remain comfortable when I was down to base layers. Again, the slender profile of the pack, kept the load close to my body and allowed my arms to move freely while skiing with poles. I really liked this and enjoyed the freedom of movement. Gear Carry and External Attachment SystemThere are two side compression straps, one on each side. Corner loops are provided on the front of pack and on the top of the brain, for tying down external items such as a helmet or climbing rope. An optional helmet holder is available that attaches to these loops. There are also external straps to hold collapsed poles or an ice axe. When not in use, the lower ice ax loop (which adjusts), tucks inside a small hidden pocket so that it will not dangling or get caught on branches. 
For carrying skis, snowboards, or snowshoes, there is a set of external, adjustable straps on the outside of the shovel pocket. When not is use, they are stored or tucked into a hidden pocket of sorts on outside flap. A really cool design! For snowshoes or snowboard use, you bring both ends of the straps out to the far sides of the external shovel pocket flap. For skis, you thread the both ends of the top set of straps, off to one side (left or right) and thread the lower set to the opposite side. This creates a nice offset or diagonal for carrying skis. This was easy to do, even with gloves on. And again, when not in use, you tuck the straps in their pocket… you’ll never notice they are there. There are also reinforced ski loops on the sides that can be used for an A-frame ski carry, with the side compression straps, and a voile ski strap to lash the tops together. 
RecommendationThe Deuter Rise Lite 26 SL is a fabulous snow sports backpack for women. It’s lightweight and conforms well to the shape of a women’s frame and hips. It’s also very comfortable. My day packs have never really fit the “niche” for cross-country skiing or downhill skiing. They’re a bit too floppy and not form-fitting enough. And carrying skis on my daypacks has proved challenging. However, this pack, at a very affordable price, fits that niche ever so nicely. I’ve been very impressed impressed with the fit, even under load of skis or snowshoes, and recommend you give it a try. Compare 3 Prices
Last updated: 2019-01-31 02:31:04
Disclosure: Deuter provided the author with a pack for this review. Editor's note: Help support this site by making your next gear purchase through one of the links above. Click a link, buy what you need, and the seller will contribute a portion of the purchase price to support SectionHiker's unsponsored gear reviews, articles, and hiking guides.The post Deuter Rise Lite 26 SL Women’s Backpack Review appeared first on Section Hikers Backpacking Blog. from https://sectionhiker.com/deuter-rise-lite-26-sl-womens-backpack-review/
0 Comments
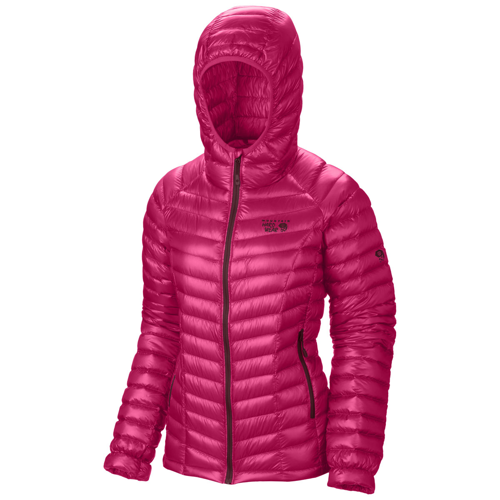
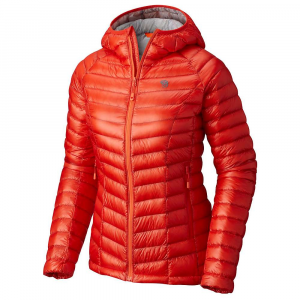
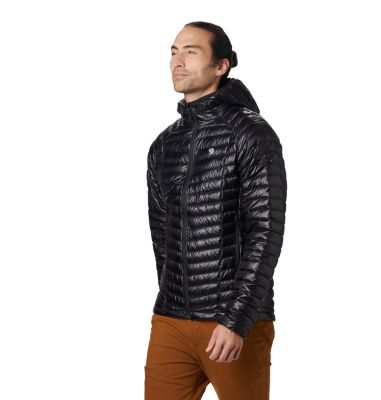
The Mountain Hardwear Down Hooded Ghost Whisperer Jacket is an ultralight 800 fill power hooded down jacket that’s a great addition to your pack as part of your layering system, especially for winter adventures. Weighing only 7.3 ounces for the women’s and 7.8 ounces for the men’s, it’s hard to find a reason NOT to put it in your pack. Specs at a Glance:
The Ghost Whisperer is intended for layering. Although fairly warm, it is not intended as your sole protection in extremely cold situations when you are stationary. However, it’s great layered over other layers and/or under your shell. It’s highly compressible and can easily be crammed into a gap in your pack. In order to attain such a light weight, the jacket goes light on features. The hood, with an elasticized rim, is not tight but would not fit over a helmet. There is no adjustability. The lightweight outer fabric is water resistant but not waterproof. With such a lightweight fabric, you will want to treat it with care to avoid holes or rips. 
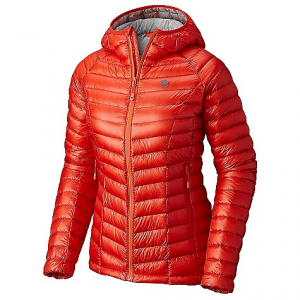
The insulation is 800 fill power hydrophobic down. This treatment is designed to keep the down from compressing excessively when wet and dry faster. I cannot personally attest to this as I typically try to keep my down dry and have not experienced this jacket being wet yet. On a damp day, I err on the safe side and put a hard shell over it. Also, on the rare occasion when I find myself wearing it while moving, I make sure to put a shell over it if there are a lot of low branches that could catch on it. The cuffs have an inner elastic binding and are not adjustable, but fit snuggly enough. At the bottom, there is one easily adjusted toggle in the hem to seal out drafts. The baffles are standard sewn-thru baffles. Since the jacket is not designed or intended for use as a sole insulating layer in extreme cold, this is not a deal breaker for me. Comparable Hooded Ultralight Down Jackets
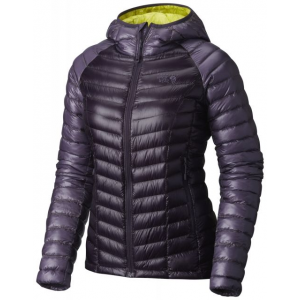
RecommendationI found out about the Mountain Hardwear Hooded Ghost Whisperer Jacket from my son who is always on a quest to achieve an ever lower base pack weight. At first, I thought it was a bit silly to spend so much on a down jacket, but once I saw it, held it and tried it on, I was hooked. It’s a light and effective addition to my layering system and I frequently recommend it to friends and workshop participants. I recommend going with one of the darker colors. Due to the thinness of the fabric, you can see the feathers through some of the lighter colors. I believe it runs fairly true to size, but you might consider sizing up if you are on the edge between sizes in order to fit layers under it. I tend to hover between a small and medium in most outdoor tops & jackets depending on the brand and where it is in my layering system. For this jacket, I went with the medium. I probably could wear a small, but the medium allows for layering under it. 
I have also purchased a Ghost Whisperer vest which weighs even less than the jacket. It has been discontinued, although you can still find them. Having a vest with the jacket increases my layering options with super lightweight choices. The Mountain Hardwear Ghost Whisperer is also available in a version without a hood for those who prefer that configuration. Compare 7 Prices
Last updated: 2019-01-30 02:31:05
Disclosure: The author purchased this jacket. About the AuthorWanda Rice has been backpacking since the late 1980’s. She has climbed the New Hampshire 48, the New Hampshire 48 in winter, the New England 67 and is working on the New England Hundred Highest and the Four-Season 48. Wanda also teaches for the Appalachian Mountain Club’s (AMC) Mountain Leadership School, the AMC New Hampshire Chapter Spring and Winter Schools as well as the AMC NH Winter Hiking Series. She leads day and overnight trips for AMC NH year round and loves mentoring new leaders. She is a gear junkie, a self-proclaimed Queen of Gear Hacks and loves sharing her tips and tricks with others. Wanda lives in southern NH and is looking forward to moving closer to the mountains in the next few years.Editor's note: Help support this site by making your next gear purchase through one of the links above. Click a link, buy what you need, and the seller will contribute a portion of the purchase price to support SectionHiker's unsponsored gear reviews, articles, and hiking guides. The post Mountain Hardwear Ghost Whisperer Down Hooded Jacket Review appeared first on Section Hikers Backpacking Blog. from https://sectionhiker.com/mountain-hardwear-ghost-whisperer-down-hooded-jacket-review/
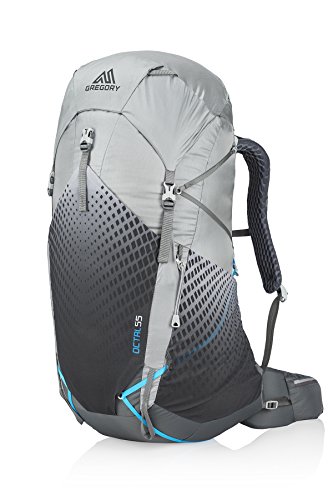
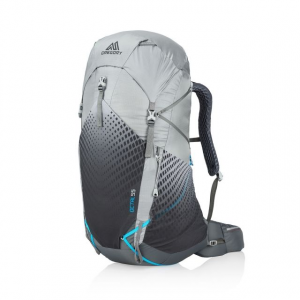
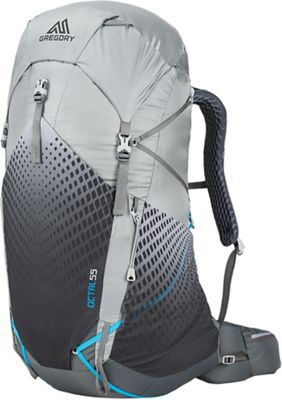
The Gregory Packs Octal 55 is an ultralight backpack with a ventilated frame that helps evaporate back sweat and keep your shirt dry when hiking. Weighing 2 lbs 10 oz, it’s also one of a very small handful of female specific ultralight backpacks today, with shoulder straps and a specially curved and padded hip belt to fit around the woman’s form. For all of their innovation, cottage backpacking manufacturers have been pretty slow to make backpacks specifically for women, with female-specific shoulder straps and hip belts. If you’re looking at the Osprey Eja or Osprey Lumina backpacks because they are women’s backpacks and have ventilated frames, I’d encourage you to compare them against the Gregory Octal 55. While it has a more conventional appearance, the Octal carries heavier loads closer to your back and core than the Eja or Lumina, making it much more responsive when scrambling or hiking uphill. Plus it has hip belt pockets and a comfortable hip belt. The Octal is also available in multiple volumes including 45 liter and 55 liter sizes. The men’s version of this backpack is called the Optic 58. Specs at a Glance:

Backpack Frame and SuspensionThe Gregory Octal is a ventilated “trampoline-style” backpack that’s optimized for effective airflow behind your back. Breathable mesh is suspended in front of the back panel creating a large ventilated space behind your back that’s designed to evaporate sweat before it can soak your shirt. The mesh is tightly stretched across the aluminum frame, hence the name, trampoline, which also serves to anchor the hip belt and load lifters. While many backpacks claim to provide foam air channels to facilitate ventilation, you really need a deep cavity behind the shoulder straps to keep your back and shirt perspiration free. The Octal 55 has a lightweight wire frame with horizontal reinforcements that help stiffen it up. The mesh trampoline is suspended from it, with a cavity that’s 1 to 2 inches deep behind it to facilitate air flow. You can feel the mesh on your back, but there’s no noticeable backwards pull to throw you off-balance when the pack is heavily loaded, and load transfer to the hip belt is really superb. Load lifters are included and anchored to the wire frame for maximum effectiveness. I was very impressed with how the weight of the pack felt “tight” and “one” with my body and movement. I was able to transfer the load through my hips, and keep the weight transfer off my shoulders. This is super important to me, because I’m not very tall and have a slim build. 
The hip belt has beefy hip belt pockets and is pre-curved to wrap around female hip bones. It’s wide enough to comfortably transfer load of a loaded pack, but not too bulky, and fits well. It’s covered with wicking mesh and has a slight lumbar pad at the rear, that’s well cushioned and hardly noticeable. The hip belt also has a pull forward cinch system that’s easy to tighten. 
Backpack Organization and StorageThe Octal 55 is a conventional top loading backpack that closes with a drawstring. It has a top lid with two pockets, one external and one under the lid for storing small items like gloves, maps, and keys. The top lid can be replaced with a speed lid that does not have pockets, but covers the drawstring opening to block out rain or dust. While the top lid is technically a floating lid, it has very short straps which make it less suitable for compressing bulky gear against the top of the main compartment, which is how floating lids are normally used. 
The pack has a front stretch mesh pocket which is good for storing layers or wet items. It’s large enough for me to fit my Crocs and a rain coat, which is my favorite use for this kind of pocket. There are also two large stretch mesh side water bottle pockets. The side bottle pockets are large enough to fit two 1L Smartwater bottles at once. They also have holster-style front cutouts, designed for use with Nalgene liter bottles , if you prefer them. Unlike other packs, the pocket and stretchy design hold a Nalgene securely in place so they never slip out, even when you bend over. While you can pull a bottle stored in the side pocket out through the holster-hole, you need to take the pack off to get it back into the side pocket. If you prefer to use a hydration system, there is a large hydration pocket in the main compartment and a central hang loop to keep it vertical. 
The hip belt has two large zippered solid pockets with large zipper pulls, so you can open them when wearing gloves. The pockets are large enough to store cell phones, a point and shoot camera, or snack bars. There are no pockets on the shoulder straps, although there is a place to hang sunglasses. External Attachment Points and CompressionThe Octal 55 has side compression straps on each side of the pack – a top strap and a bottom one – threaded in a diagonal pattern. They work well as compression straps, but the diagonal pattern and the lack of side release buckles makes it difficult to use them for holding larger items along the sides of the pack. 
However, it is possible to attach a sleeping pad or tent to the bottom of the pack with accessory webbing. This is a nice feature to have on a backpacking pack and one that’s often missing on 50-60 liter backpacks. The bottom side compression strap is threaded to come out the bottom and back of the side compression pocket and has enough slack in it to hold a pad or tent. The pack also comes with a pair of ice axe loops that can also be used as trekking pole holders. Two adjustable elastic shaft/pole holders are included along the sides of the front mesh pocket, another feature that’s left off many packs. Nice attention to detail, that. 
If you want to rig up your own external attachment points there are four webbing loops on the corners of the front mesh pocket for this purpose. Just tie some elastic cord between them, add a cord lock to help tension it, and you can attach wet clothing to the back of the pack with ease. There are additional webbing loops on the top lid that can also be used to hang a solar panel. Comparable Women’s Backpacks
RecommendationThe Gregory Octal 55 is an ultralight ventilated backpack that weighs 42 ounces, but can be lightened down to 37 ounces, if you remove its optional components. Ventilated, trampoline style backpacks are desirable because they help reduce perspiration and keep your shirt dry when backpacking. Some ventilated frames, including the Osprey Eja, can throw you off-balance because they shift your center of gravity behind your hips. That’s not the case with the Octal 55, which sits closer to your hips and core muscles where it can be carried more comfortably and efficiently. 
Gregory has done a really nice job with the Octal 55 and demonstrated that you can make a fully featured, ventilated women’s backpack that weighs close to 2 and 1/2 pounds. If you prefer a backpack that’s been designed for women, I’d encourage you to put the Gregory Packs Octal 55 on your short list for serious consideration. I’m pretty impressed with this pack and think it’s a great addition to the handful of women’s specific lightweight backpacks available today. About the Author
Beth Zimmer is an expert backpacker who's backpacked all over New England and Eastern Canada, with a long list of hiking accomplishments to her name. She's section hiked the New Hampshire Appalachian Trail, climbed the New England Hundred Highest and the New Hampshire 200 highest (mostly bushwhacks), redlined the White Mountain Guide (1440 miles), and climbed the White Mountain 4000 footers several times over. Beth also teaches GPS and off-trail navigation classes as a volunteer for the Appalachian Mountain Club and is co-chair of the New Hampshire Excursions Committee, which oversees all volunteer hiking and leadership training activities. When she's not hiking and backpacking, Beth resides in New Hampshire where she can usually be found sipping coffee and planning her next adventure.
Compare 4 Prices
Last updated: 2019-01-28 12:49:38
Disclosure: Gregory provided a backpack for this review. Editor's note: Help support this site by making your next gear purchase through one of the links above. Click a link, buy what you need, and the seller will contribute a portion of the purchase price to support SectionHiker's unsponsored gear reviews, articles, and hiking guides.The post Gregory Octal 55 Women’s Backpack Review appeared first on Section Hikers Backpacking Blog. from https://sectionhiker.com/gregory-octal-55-womens-backpack-review/
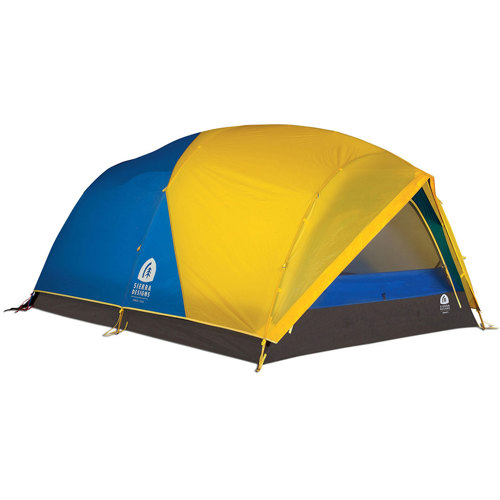
The Sierra Designs Convert 3 is a freestanding three-person tent that’s strong enough for four season winter camping and backpacking, but can also re-configured for three season use in less demanding conditions. It has a large main compartment and two vestibules, which make it a spacious, but lightweight winter tent with plenty of covered gear storage. Weighing in at 6 lbs 8 oz, fully configured, there are a number of different ways to configure the tent based on your needs. For example, you can remove the front vestibule to bring the tent weight down to 5 lbs 6 oz, making it easier to carry on winter backpacking trips. In dry desert environments, you even leave the rain fly and front vestibule at home and reduce the tent weight to 3 lbs 10 oz. The bottom line is that you get a lot of tent for your money with the Convert 3. Note: Previous versions of the Convert 2 and Convert 3 are significantly different from the current Convert models in styling, design, and architecture. You can tell them apart by their colors: the newest Convert 2 and Convert 3 tents have a blue and yellow fly, while older model Converts are all yellow. Retailers aren’t always good at updating their product listings, so it’s important to know how to tell them apart. Specs at a Glance
ArchitectureThe Convert 3 is a tunnel tent with two end vestibules. This design provides occupants with near vertical sidewalls and more headroom than a wedge-shaped tent with steeply angled sidewalls. The Convert 3 is also freestanding, which makes it much easier to set up on snow and sandy soil because the tent is self supporting. You’ll still want to stake out the tent when it’s erected to fully expand its interior and anchor it against the wind. This is one of the chief advantages of a freestanding tent in winter conditions, because you don’t have to wait for snow stakes, also called deadmen, to freeze in place before you can set up the tent. This lets you get in the tent more quickly and change out of wet or damp baselayers, so you can warm up. 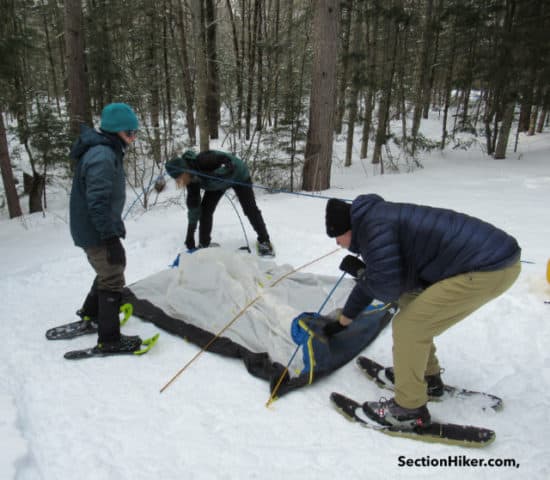
Having two vestibules and two doors is a huge luxury on a winter tent, even more so since the Convert is so light weight. Having a front door and back door also make it easier for occupants to come and go at night, while the vestibules add significant additional covered storage, close to 75% more, by volume. For instance, the main part of the Convert 3 where people sleep has 40 cubic feet of room, while the front vestibule adds 19.6 cubic feet, and the rear vestibule adds 9.4 cubic feet. That added space provides valuable room for gear storage and even cooking or melting snow, in challenging weather conditions. 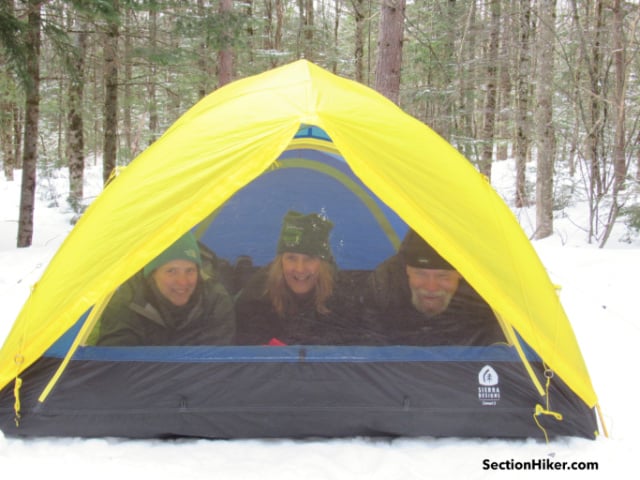
Pitching the TentSetting up the Convert 3 is fairly easy, despite its large footprint, and one person can pitch the tent by themselves in fair conditions. Two people are needed if it’s windy, raining, or snowing because the tent body and fly can become large sails if they catch the wind. The only really awkward thing about the setup process is wrestling with the the long ridge pole which is connected by hubs to two perpendicular poles for the front and rear ends. Once the poles have been anchored into their color-coded corner connectors, it’s a simple matter of inserting the middle support pole, walking around the tent, and clipping all of the inner tent hooks to the pole structure. 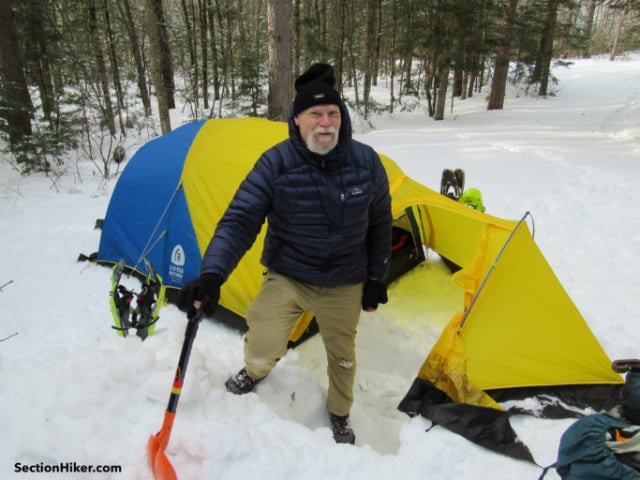
The fly is then draped over the pole structure, attached to the short awning overhangs over the front and rear doors, and then attached to the corner and side pole feet. The fly’s guy-out points have line-loc tensioners, but they’re difficult to tension when the guy line cordage is wet and frozen. This can require that you remove your gloves to fiddle with them, which isn’t optimal in winter, because wet hands can quickly become frost nip or worse. 
You can pack the tent away with the front vestibule pre-attached or zip it to the main tent in camp. It has its own pole and a side door. I find it convenient to dig out half of the vestibule in snow because it makes it easier to get into and out of the tent, while still providing a place to store backpacks under cover. If you decide not to use the front vestibule. the front door of the inner tent is waterproof and protected overhead by a short awning. 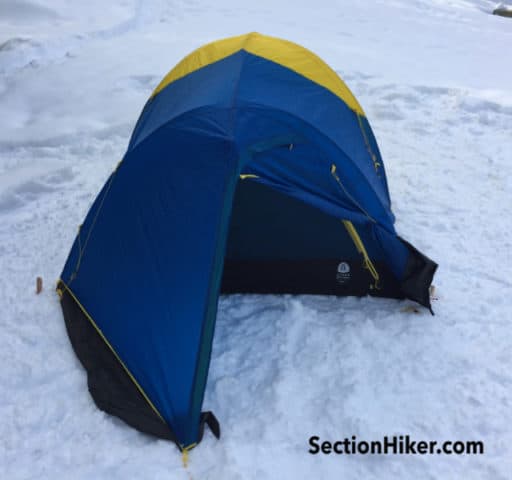
The rear vestibule is smaller that the front vestibule, but provides a second convenient exit point or gear storage area for tent occupants. This vestibule is permanently part of the rain fly and not an optional add-on. LivabilityWhile the vestibules add a considerable amount of volume and external storage to the Convert 3, the inner tent width is snug for three people. While there is plenty of interior headroom (45″) and enough length in the inner tent for tall people to stretch out (84″), the living compartment is only 69″ wide at the front door, tapering to 59″ wide in the rear. This makes it difficult to use wider 25″ sleeping pads or exit the rear doors at night without disturbing other tent mates. If you only have two people in the Convert 3, it is a palace, but adding a middle third person is a much tighter fit. That middle person is also at a disadvantage from a storage standpoint. While there are inner pockets for storage of smaller items on the sidewalls of the tent, the middle person doesn’t have anyplace to put their smaller items. A small gear loft or overhead pocket would be welcome addition for the person sleeping in the middle of the tent. Winter nights are really long and it’s nice to be able to stash your littles (eye glasses, phone, kindle, etc) where they are easy to reach and won’t accidentally be crushed. 
The front and rear doors of the Convert have a layer of mesh covered by solid fabric panels that can be zippered closed over it. When the fabric panels are unzipped, there’s good airflow through ends of the tent. But the use of the front vestibule significantly compromises airflow, which can lead to internal condensation in winter, particularly when you have three occupants (exhaling water vapor all night). Comparable Four Season, 3 Person Tents
RecommendationThe Sierra Designs Convert 3 is a freestanding, double-wall tent designed for four season use by up to three people. It is lightweight and spacious, with front and rear doors, a permanent rear vestibule and an optional front vestibule. Set up is easy and the tent packs up surprisingly small, making it easy to backpack into more remote locations. While the tent can house up to three occupants, I think it’s best used by two people who want more space than you normally find in a confining winter tent, or who want to bring a canine companion along. While this review has concentrated on winter use, the Convert 3 will also make a comfortable tent for warmer three season use without the front vestibule. Compare 4 Prices
Last updated: 2019-01-27 17:20:48
Disclosure: Sierra Designs provided the author with a tent for this review. Editor's note: Help support this site by making your next gear purchase through one of the links above. Click a link, buy what you need, and the seller will contribute a portion of the purchase price to support SectionHiker's unsponsored gear reviews, articles, and hiking guides.The post Sierra Designs Convert 3 Tent Review appeared first on Section Hikers Backpacking Blog. from https://sectionhiker.com/sierra-designs-convert-3-person-tent-review/
There is really no substitute for experience when it comes to winter hiking, backpacking, and camping. You can read about it in books and watch videos, but the best way to learn is to go out with an experienced friend who can teach you the ropes. Here are a few things I’ve picked up over the years that you can try your next time out. These are shortcuts and hacks I’ve picked up from others or invented myself that can make winter hiking and backpacking less expensive, safer, and more fun. Experiment, by all means, but bring a safety net. It’s the only way to become an expert. 1. Pre-hydrate before winter hikes by drinking a liter of water or juice before you start out.Drink a liter of water on the way to the trailhead before a winter hike. This is above and beyond whatever coffee and liquids you consume at breakfast. You’ll pee more, but you’ll stay better hydrated and warmer. You lose a lot more moisture than you realize in winter, by sweating and exhaling the moisture in your lungs. It’s also hard to force yourself to drink enough on a winter hike, so drinking extra up front will keep you better hydrated during the day. 
2. Warm up with a neck gaiter.Neck gaiters are one of the most underrated winter hiking insulation layers. If you’re feeling chilled, put one on around your neck. Major veins and arteries pass through this area and covering them up will make you quickly feel warmer. You can use a thin neck gaiter or a Reversible Polar Buff for even more effect. Neck gaiters are also an excellent way to increase your comfort inside a sleeping bag or a backpacking quilt because they prevent drafts from leaking in around your neck and upper chest. 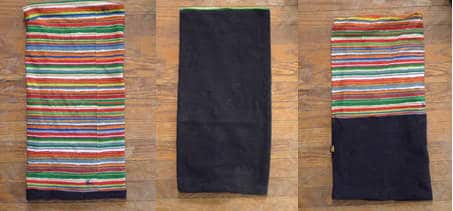
3. Wear exam gloves inside fleece gloves.Winter hikers can use up several pairs of fleece gloves on cold weather hikes because they get saturated with body sweat. You can prevent this by wearing nitrile or latex exam gloves inside a fleece glove or mitten. Your hands will still sweat, but the sweat will stay in the exam gloves and keep your gloves drier. 
4. Insulate your water bottles with wool socks.There’s no need to buy expensive neoprene bottle parkas to insulate the bottles of hot water you store inside your backpack. Wrap them up on a heavy wool sock and they’ll stay warm for most of the day, nestled together with your extra insulation and gear. 
5. Dig a front porch for your tent.With your avalanche shovel, dig a hole outside the front door to your tent, about the depth of your legs, below the knee. This lets you sit with your back inside the tent, but dangle your legs in the pit, making it easier to take off and put on your boots. Not only is this more comfortable, but it helps to prevent the snow and ice that clings to your boots from entering your tent, where it’ll cause internal condensation. A front porch also provides a good wind break for cooking and melting snow. 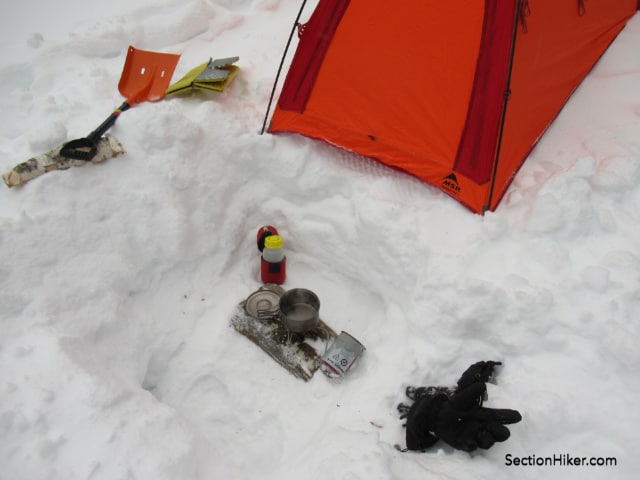
6. Wrap duct tape around liquid fuel bottles to help prevent frostbite.The fuel inside liquid stove fuel bottles is gasoline which freezes at a lower temperature than water. If you touch the metal of one of these bottles on a subzero night with bare hands, there’s a good chance that you’ll get frostbite since the cold will be conducted through the bottle’s metal walls. Wrapping the bottles in duct tape helps insulate them but is also a tactile reminder that you should always wear an insulated glove when you touch a fuel bottle. 
7. Bury your insulated water bottles at night.Snow is an excellent insulator. One way to keep your insulated water bottles from freezing at night, instead of sleeping with them in your sleeping bag, is to bury them in a small cave that you dig into the snow. Turning them upside down is also recommended. Make sure to “close the door” to the cave to keep them well insulated and mark the spot so you can find it easily the next morning. 
8. Use supermarket bags as deadmen for pitching tents.When you pitch a tent on snow, you should stake it out. But snow doesn’t provide a very good grip, so you need bury a snow stake (usually sideways) and stomp it into the snow to create a solid anchor point. Called “deadmen“, these snow stakes can take 30 minutes or more to harden in place. A faster and lighter weight alternative is to bring 9 gram plastic supermarket carryall bags with you, fill them up part-way with snow, tie them to your tent’s guyout points, and then bury them. They set up almost immediately, so you can get in your tent and out of your wet clothes faster. Be sure to chop the bags out the next morning with your avalanche shovel and pack them out to leave no trace. 
9. Bring two pairs of ski goggles for above-treeline hikes.You often need to protect your eyes from freezing mist, sun, and wind when you hike above treeline in winter. But they often fog up, especially if you’re hiking hard and perspiring, making it difficult to see. One solution is to bring two pairs of goggles instead of one, so you have a spare if yours or your partner’s become impossible to see through. I’ve used this trick to summit some challenging winter peaks that I would have had to bail on due to goggle fogging. 
10. Wear high dexterity glove liners inside shell mitts.Most shell mitts and heavily insulated winter mittens come with mitten-shaped liners. Replace these with gloves that have fingers, so you can take your hands out of the mittens to perform tasks that require more dexterity. 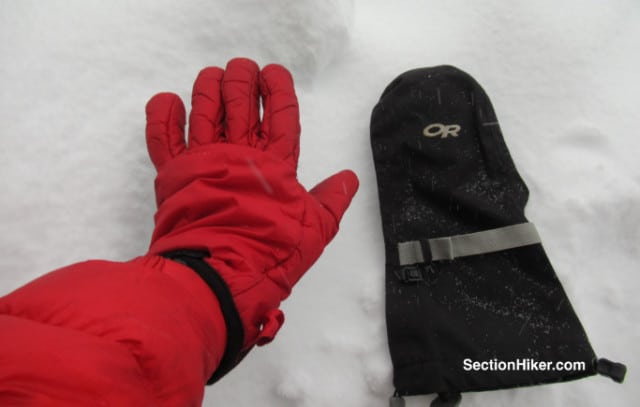
That’s just a taste of the little tricks you can use to make winter hiking safer, more comfortable, and more efficient. Stay tuned. We’ll be posting 10 More Winter Hiking and Backpacking Hacks soon. Editor's note: Help support this site by making your next gear purchase through one of the links above. Click a link, buy what you need, and the seller will contribute a portion of the purchase price to support SectionHiker's unsponsored gear reviews, articles, and hiking guides.The post 10 Winter Hiking and Backpacking Hacks appeared first on Section Hikers Backpacking Blog. from https://sectionhiker.com/10-winter-hiking-backpacking-hacks/
The new Therm-a-Rest NeoAir Uberlite is one of the hottest new backpacking products of 2019. Weighing just 8.8 ounces, the Uberlite is even lighter weight than the immensely popular 12 ounce Therm-a-Rest NeoAir XLite, and rolls up even smaller. It looks and feels like the rest of the pads in the NeoAir product line (although it’s much quieter) and has an R-value of 2, making it good for warm weather use. At 8.8 ounces, the Uberlite weighs even less than a folding foam pad like the Therm-a-Rest ZLite. It’s another remarkable product from the gear engineer geeks at Therm-a-Rest! Deadline to EnterThe deadline to enter this raffle is Tuesday, January 29, 2019, at midnight PST. Rules
To EnterTo enter this random raffle for a chance to win a Therm-a-Rest NeoAir Uberlite Sleeping Pad, complete this short 2 minute survey about backpacks, by clicking on this link. To Enter, complete this short survey about backpacks The post Raffle: Enter for a Chance to Win the New Therm-a-Rest NeoAir Uberlite Sleeping Pad appeared first on Section Hikers Backpacking Blog. from https://sectionhiker.com/raffle-enter-for-a-chance-to-win-the-new-therm-a-rest-neoair-uberlite-sleeping-pad/
When I started winter hiking I had problems with cold feet. As a newbie, I’d bought Merrell winter boots with 200 grams of insulation. I tried some tricks like putting aluminum foil and mylar under my insoles in the hope of reflecting more heat back to my feet, but that didn’t work. So I upgraded to Cabela’s winter boots with 400 grams of insulation, but my feet were still cold. I was using Blue Superfeet Insoles at the time and saw that my insoles were wet from sweat after winter hikes. I wondered, could those wet insoles be contributing to my cold feet? I decided to try Merino Grey Superfeet insoles since I reasoned that they’d be drier and warmer, even when damp. I’d been slowly upgrading my hiking shirts and mittens to wool, so why not insoles? Merino Grey Superfeet Insoles are a unisex wool topped version of the popular Green Superfeet Insole. I was impressed by how much of an improvement the Merino Grey Wool Superfeet Insoles were for me. I’d still have cold toes on really cold mornings, but I no longer had cold feet later in the day as I often did before. 
Since then, I’ve switched to women’s Salomon Toundra winter boots and now use Superfeet Hunt Merino Wool Insoles (despite the fact that they’re pink), mainly because they’re gender-specific and less expensive. Hunters are hikers too! These insoles feature a deep heel cup, and the Superfeet, high profile shape. They have a layer of felted merino wool which helps with thermo-regulation, plus closed cell foam that supports and cushions your foot. Wool is naturally inhospitable to odor-causing bacteria which is a bonus in winter boots that don’t breathe well. They also have Scentlok odor control technology to keep you hidden from your prey, and your car pool buddies will probably thank you too. If Superfeet Insoles don’t work for your feet can find other sheepskin insoles on Amazon. Some of these have no arch support and they will all compress over time, changing the fit of your footwear. There are also wool felt insoles, but most of the ones I’ve found do not have arch support and will also succumb to compression over time. Still give them a try. Regardless, take good care of your insoles and winter boots by thoroughly drying them out after you wear them. I always remove my insoles from my boots after a hike to make sure they both dry well and are ready to go for my next winter hike. About the AuthorWanda Rice has been backpacking since the late 1980’s. She has climbed the New Hampshire 48, the New Hampshire 48 in winter, the New England 67 and is working on the New England Hundred Highest and the Four-Season 48. Wanda also teaches for the Appalachian Mountain Club’s (AMC) Mountain Leadership School, the AMC New Hampshire Chapter Spring and Winter Schools as well as the AMC NH Winter Hiking Series. She leads day and overnight trips for AMC NH year round and loves mentoring new leaders. She is a gear junkie, a self-proclaimed Queen of Gear Hacks and loves sharing her tips and tricks with others. Wanda lives in southern NH and is looking forward to moving closer to the mountains in the next few years.Disclosure: The author purchased this product. Editor's note: Help support this site by making your next gear purchase through one of the links above. Click a link, buy what you need, and the seller will contribute a portion of the purchase price to support SectionHiker's unsponsored gear reviews, articles, and hiking guides.The post Superfeet HUNT Merino Wool Insoles Revew appeared first on Section Hikers Backpacking Blog. from https://sectionhiker.com/superfeet-hunt-merino-wool-insoles-revew/
What are the best water filter and purification treatment systems used by backpackers? We asked backpackers whether they preferred squeeze-style water filters, pump water filters, gravity filter systems, chemical purification or purification using an ultraviolet light. We surveyed 1275 hikers in 2019 to ask them what water filters and treat methods they prefer. We found that 80% of them use just 10 different makes and models, which we list below, together with their average satisfaction ratings on a scale of 1-5, with 5 being the most favorable.
Why does it matter what water filters and purifier methods other backpackers use? Your hiking peers have very similar needs as you. That doesn’t mean that you have to use the same water filters as everyone else, but it gives you a good place to start looking if you’re thinking about buying a new water filter or trying out chemical or ultraviolet water purification. So, don’t just take our word for it. Here are the 10 best backpacking water filters and water purification systems recommended by other hikers and backpackers in 2019. 1. Sawyer Squeeze Water Filter
The Sawyer Squeeze Water Filter System includes the Sawyer Squeeze Filter, two 32 fl. oz. pouches, a cleaning coupling and additional accessories for gravity and inline use. Like the Sawyer Mini, you can drink directly from the Sawyer Squeeze but most people squeeze untreated water through it from a soft bottle to a clean container. The filter uses a hollow-fiber membrane filter that removes 99.99999% of all bacteria, such as salmonella, cholera and E.coli and removes 99.9999% of all protozoa, such as giardia and cryptosporidium. The filter itself weighs 3 ounces. Read the SectionHiker review.
2. Sawyer Mini Water Filter
The Sawyer Mini Water Filter System includes a filter, a 16 oz. soft bottle, a drinking straw, and a plastic syringe to backflush the filter periodically. The Mini can be screwed on standard soda bottles, the included water pouch, or used with a straw to drink directly from a water source. It’s also easy to use to create an inline or gravity filter with hydration system tubing. The Mini removes 99.99999% of all bacteria, such as salmonella, cholera and E.coli, as well as, 99.9999% of all protozoa, such as giardia and cryptosporidium. The filter is made using hollow filter technology and rated to 0.1 micron absolute. It weighs 1.3 ounces. Read the SectionHiker review.
3. Katadyn BeFree Water Filter
The Katadyn BeFree Water Filter can be used as a squeeze filter or hung for group use as a gravity filter if you purchase the 3L version. It has a 0.1-micron microfilter that is EPA tested to remove protozoa (99.99%) and bacteria (99.9999%). It can filter water up to 2 liters per minute, which is very fast for this style of filter. An integrated widemouth soft bottle, available in three different sizes, 0.6L, 1 liter, and 3 liters, is easy to fill in streams and folds up compactly when not in use. Weighing 3.5 oz total, the filter alone has a life expectancy of 1000 liters. Read the SectionHiker review.
4. Aquamira Water Purifications Drops
Aquamira Water Treatment Drops use chlorine dioxide (used in municipal water treatment plants) to kill 99.9% of bacteria, viruses and cysts, including cryptosporidium and giardia. Each package of Aquamira contains two bottles, Part A and Part B, which you mix together before treating your water. The drops are effective in clear, muddy, warm and cold water and have a shelf life of five years, making them an excellent solution for international travel, hiking, backpacking, and emergency preparedness. Each Aquamira package contains enough drops to treat 30 gallons of water. Many people carry Aquamira as a backup in case their water filter breaks or for purifying several liters of water at once. Read the SectionHiker review.
5. Platypus Gravity Works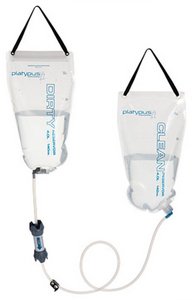
The Platypus Gravity Works water treatment system is a gravity filter that includes two x 4 liter water reservoirs, a water filter, and connecting hoses arranged in a gravity filter configuration. It’s ideal for filtering water for couples or families when you need to filter a large quantity of water quickly. The Gravity Works filter physically removes particles, protozoa and bacteria down to 0.2 microns in size, including giardia, salmonella, and cryptosporidium. Quick-disconnect valves and and a hose clamp make cleaning easy. Filtration speed is over 1 liter per minute and requires no effort once the “dirty” bag is hung.The expected filter lifetime is 1500 liters of water. The entire system weighs 10.75 ounces and stows smaller than most 1L bottles. Read the SectionHiker review.
6. Katadyn Hiker Water Filter
The Katadyn Hiker Water Filter is a pump-based filter that removes particulates, protozoa and bacteria down to 0.2 microns in size, including giardia, salmonella, and cryptosporidium. It includes a pre-filter at the hose outlet that filters to 150 microns, good for use with cloudy or sediment-filled water, which removes large contaminants before they reach the main filter and increase its life span. Quick-connect fittings permit removal of input and output hoses: the hoses also connect directly to hydration reservoirs with 0.25 in. drink tubes. The expected filter life is 1150 liters before replacement is required. The Hiker weighs 11 ounces.
7. Steripen Ultra UV Water Purifier
The Steripen Ultra is a water purifier that uses ultraviolet light to neutralize bacteria, protozoa, and viruses that can make you ill. The Ultra is USB rechargeable and fits in narrow or wide necked bottles. It’s also one of the best solutions for purifying cold water, which will create tiny holes in most filters if it freezes when the filter element is damp in cold weather, thereby destroying them. To use it, you simply dip it in a container of water and stir, until an indicator lamp signals that the water is purified, after about a 90 seconds. Weighing just 4.94 ounces, the Steripen Ultra has a UV lamp life of 8000 uses.
8. MSR TrailShot Water Filter
The MSR TrailShot is a handheld pump water filter that you squeeze with one hand to draw water up through the hose and through the filter. Clean water comes out the other end, much like a water fountain, although you can also capture it in a water bottle for future use. While the primary filter is a hollow fiber style filter, limited to bacteria and protozoa removal, the TrailShot also has a pre-filter at the end of the hose to remove particulates and organic matter. The Trailshot is best used as a single person filter for processing smaller quantities of water, because squeezing the pump is tiring for any length of time. It’s ideal for people like runners who don’t want to be burdened by carrying water bottles. Read the SectionHiker review.
9. MSR Miniworks EX Water Filter
The MSR Miniworks EX is a pump style water filter that screws onto wide-mouth Nalgene bottles and soft canteens. While the MiniWorks is heavier than simpler squeeze-style water filters, it’s a better solution for filtering turbid, cloudy, or tannic water sources like snow melt, spring thaw, or algae-infested ponds and turning them into clear and pleasant tasting water. That’s because the Miniworks is a three stage filter, with a pre-filter that removes larger solids, a ceramic filter to remove microorganisms, and by a charcoal filter to remove unpleasant odors and tastes. Weighing 17 ounces, the Miniworks has an output of 1 liter per minute and filters out contaminants down to 0.2 microns in size. The expected filter lifetime is 2000 gallons. Replacement filters are also available. Read the SectionHiker review.
10. Sawyer Micro Water Filter
The Sawyer Micro Water Filter is virtually identical to the Sawyer Squeeze Water Filter, except that the filter weighs 2 ounces or 1 ounce less than its big brother. Being smaller, the flow rate is slightly slower, but still faster than the Sawyer Mini. The Micro filter is rated for 100,000 gallons and includes 32-ounce reusable squeeze pouch, drinking straw, cleaning coupling, spare gasket, and cleaning plunger. If you already own the larger Sawyer Squeeze, there’s no real reason to replace it with the Micro.
Check out the latest price at: How to Choose a Backpacking Water Filter or PurifierMany natural water sources contain microscopic organisms that can cause illness in humans. Most water filters intended for backcountry use will remove bacteria and protozoa, including giardia and cryptosporidium from these water sources. This is usually sufficient in the United States, Canada, and the UK. Viruses, often found in international water sources, are hard to remove because they are so small. Finer grained filters called purifiers are needed to remove them. They also can be neutralized with chemical purification agents such as chlorine dioxide or ultraviolet light. There are a wide number of different water filter and purifier types available. Unfortunately, none of them are foolproof or perfectly suited for all kinds of trips and locales. They also differ in ease of use, the length of time it takes for them to process water, and whether they’re good for solo or group use. Here’s a brief summary of the different types and their strengths and weaknesses, with several examples to illustrate the available products in each category. Squeeze Water FiltersSqueeze filters are single stage filters that are good for removing bacteria and protozoa, but not viruses. They’re best used with clear water sources that are low in particulates and suspended organic matter to prevent clogging. Processing speed depends on the size of the “dirty” water bottle coupled with the filter and how much pressure the user exerts to push water through it. However, squeeze filters typically slow down with use and must be back-flushed with a cleaning syringe regularly to maintain their flow rate. Some examples: Gravity and Inline Water FiltersGravity water filters make it possible to process larger quantities of water at once using the power of gravity. A large water reservoir, called “the dirty bag” is hung from a tree with a hose leading to a water filter. The output of the filter flows out another hose to a clean reservoir, called the “clean bag.” A squeeze style, single stage filter is typically used. Gravity filters are good for couples and small groups. An inline water filter uses a similar setup, but the user suck on the output hose rather than running it to clean bag. Some examples:
Bottle and Straw Water FiltersBottle and straw filters usually use the same single stage, hollow fiber filters used by squeeze, gravity, and inline water filter systems. The user sucks water stored in a bottle or directly from the water source through the filter, rather than transferring it to secondary storage. They are best used by individuals in places where water is abundant. Some examples: Pump Water Filters and PurifiersPump water filters filter out bacteria and protozoa, while pump water purifiers can also remove viruses. They have hand pumps that force water through the filter and out to secondary storage for future use. While pump filters do require some elbow grease to operate, they usually filter water quite quickly and are suitable for use by couples as well as individuals. Most have a pre-filter at the end of the hose that you drop into the water source to remove particulates and organic matter. They can be cleaned and replacement filters are usually available. Some examples: Chemical Water PurificationChemical water purifiers are available in tablet or liquid form. The best chemical ingredient is chlorine dioxide, which has virtually no taste or color and kills bacteria, protzoa, and viruses. Chemical purification is best used by individuals rather than couple or groups because it takes anywhere from 15 minutes to 4 hours to fully purify water, far longer than other methods. While it is very lightweight, it is relatively expensive when compared to other methods. Many hikers carry chlorine dioxide as a backup to a second primary filter or purification method, as a result. Some examples: Ultraviolet Light Water PurificationUltraviolet Light is an effective form of water purification that neutralizes bacteria, protozoa, and viruses. It is best used with clear water since it doesn’t remove any particulates or organic matter. While UV purification is relatively fast, it’s not good for processing large quantities of water. It also depends on working batteries, which can run out of power. Some examples: MethodologyHow do we know what the top 10 best water filters and purification systems are? We survey our large readership to ask. If you’d like to participate in our surveys, be on the look up for the gear raffles we run every few weeks on SectionHiker, where we give survey participants a chance to win. Or sign up to the weekly, award-winning SectionHiker newsletter, so you never miss out on an opportunity to participate. We hate spam, so we’ll never share your email with anyone else and you can unsubscribe at any time. Check Out All of SectionHiker's Gear Guides!
The post 10 Best Backpacking Water Filters and Treatment Systems of 2019 appeared first on Section Hikers Backpacking Blog. from https://sectionhiker.com/10-best-backpacking-water-filters-and-treatment-systems-of-2019/
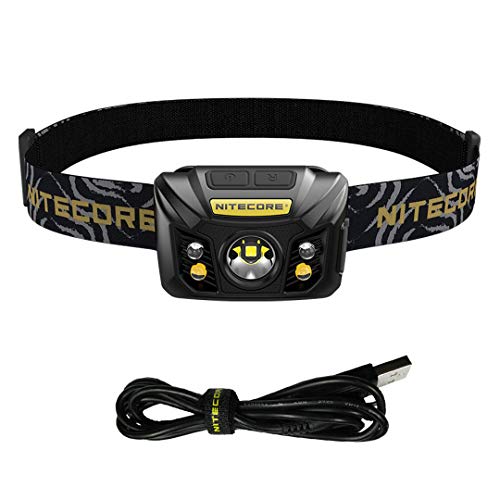
The Nitecore NU32 is a high powered (max 550 lumens) rechargeable headlamp with white and red lightning modes. It has two control buttons and fairly straightforward control logic, that cycles through its different options so you can actually remember how to use it in the field. But the feature I like the best about this headlamp is that it has a large 1800 mAh lithium-ion battery, the equivalent of 9 AAA batteries, so you have to recharge it far less often. That size battery is rare on headlamps that store their power in the headlamp assembly and not in a remote power pack. Specs at a Glance
The Nitecore NU32 is a high-powered rechargeable headlamp fitted with five LEDS including white and red lighting modes. It has a maximum light output of 550 lumens (for up to 1 hour), although the high setting of 190 lumens is also quite bright and much longer lasting (17 hours). A digital lock prevents accidental discharge when the light is not in use while a battery meter notifies you when recharging is necessary or has been completed. The headlamp has an easy to adjust elastic strap with a 60 degree angle of illumination so you can easily aim the light to where it’s needed most. Control LogicThe NU32 has two buttons on top of the light housing, a power button to control its white light functions and the other to control the red light. They both make a clicking sound when pressed and are large enough to use while wearing gloves, which is one of the things I like best about this light. 
The white light has four modes: turbo (550 lumens), high (190 lumens), mid (33 lumens) and ultra low (1 lumens) with burn times ranging from 1 hour on turbo,17 hours on high, 50 hours on mid, to 330 hours on ultra low. The turbo mode turns is self regulating, so it will begin to lower in intensity to avoid overheating the light after 30 seconds of burn time. I checked with the manufacturer and they could not explain how much the lumen output of the turbo diminishes over time or what the dimming algorithm is. I think the turbo mode is basically hype although it could prove useful in a limited fashion. I just ignore it and use the high setting when needed, which generates plenty of bright light, and has a long 17 hour burn time. Pressing the white power switch repeatedly cycles through the modes and is dead simple to use (although you can always take a photograph of the directions with your smartphone and refer if needed.) If the headlamp is on and you hold the power button down for 1 seconds, the turbo mode turns on. Pressing the power button when no action is taken for 3 seconds powers the light off. To turn on the two auxiliary white LEDS with high color rendering capability, simply hold down the power button for 1 second, which displays them on a diffused flood light pattern. These are good for reading colored maps at night in your tent. Pressing the power button again turns them off. The red light switch is marked with an R on the button. With the light off, pressing the R button will turn the red light (9 lumens) on. A second press with 3 seconds will make the red light flash. If the button is pressed after the 3 seconds, the light will turn off. Very simple. The NU32 also has the requisite special modes, an SOS and beacon. These are entered and cycles by pressing the power button for three seconds when the light is off to repeatedly cycle through the modes and off. 
Beam ProfileThe NU32 has five LEDs, the main white one in the middle and two pairs of white and red auxiliary lights in its sides. The main center light creates a focused beam, while the lower powered white and red auxiliary LEDs display a more diffused flood light pattern for close-in activities like reading or cooking. Power Meter and RechargingThe NU32 includes a micro-USB cord. To recharge the light, you pull back the small piece of plastic covering the micro-USB port and plug it to a power supply. There is a power indicator under the white light button that turns green when the light is fully charged. When the light is charging, it is red. You can also test the power level of the battery when it is not charging. With the light off, press the power button once. If the power meter blinks 3 times, it means the battery is greater than 50% charged, 2 blinks represent a battery level below 50% and 1 blink means there’s less than 10% power left. You can use the NU32 while it is charging, which is a nice capability to have in the tent at night or in camp if you run low and want to recharge while you cook dinner. It’s a fairly rare feature, so it’s a real score on such an inexpensive headlamp. 
Lock ModeThe Nu32 has a digital lock to prevent accidental activation. To lock the device you push both top buttons at once until the built-in power meter flashes. To unlock, push both buttons until the power meter flashes again. I consider digital or analog headlamps locks to be a must-have feature. The last thing you want is a dead headlamp because it turned on accidentally in your backpack. Comparable Rechargeable Headlamps
RecommendationThe Nitecore NU32 is a great rechargeable headlamp for the money with easy to use control logic, a battery power indicator, digital lock, and white and red lighting modes. It has a high capacity 1800 mAh lithium-ion battery which has the equivalent power of 9AAA batteries, giving you a long burn time, even when using the headlamp on high (190 lumens for 17 hours). The lithium-ion rechargeable battery is also good for cold weather use because it won’t freeze. The combination of a spot light and flood light beams provides maximum versatility for nighttime activities, whether you’re on the move or in camp. The NU32 is also available in multiple colored cases and straps, if that kind of thing is important to you. Besides the huge battery, I think my favorite feature on this headlamp are the two top control buttons, one for the white light and one for the red. They simplify the control logic compared to single button headlamps, while providing excellent tactile and sound feedback each time they’re depressed. Disclosure: Nitecore provided the author with a headlamp for this review. Editor's note: Help support this site by making your next gear purchase through one of the links above. Click a link, buy what you need, and the seller will contribute a portion of the purchase price to support SectionHiker's unsponsored gear reviews, articles, and hiking guides.The post Nitecore NU32 Rechargeable Headlamp Review appeared first on Section Hikers Backpacking Blog. from https://sectionhiker.com/nitecore-nu32-rechargeable-headlamp-review/
Snowshoes are heavy, weighing between four and five pounds a pair, so most winter hikers are happy when they don’t have to carry them on a winter hike. But how can you tell when they won’t be needed? This is a question that vexes many winter hikers. When you add up all the gear, clothing, hot water, and food needed for winter hiking, shedding those five pounds of snowshoes is very attractive. Hiking without them strapped to your back or feet takes less energy and is a lot more comfortable. FlotationThe primary purpose of snowshoes is to provide flotation so you don’t sink into snow while hiking. Hikers without snowshoes can plunge knee or waist deep into unconsolidated snow if they try to cross it without snowshoes. This can be quite exhausting and makes you sweat profusely, which can chill you in winter and lead to hypothermia. However, the enlarged surface area of a snowshoe deck helps distribute your weight across the surface of the snow so you don’t sink into it, you expend less energy, and sweat less. Broken Out TrailsBut how do you know if you’ll need them or not? You need to figure out whether other hikers have already “broken out” the trail you want to hike or whether recent snowfall has covered up their tracks. When hiker’s snowshoe over a trail covered with fresh snow, they compress the snow underfoot, packing it down. As more and more hikers snowshoe or hike over it, it will become firmer and firmer, and possibly even icy. It will stay this way until more snow falls on top of it or it melts out. BarebootingIf you can find a broken out trail, you can probably bare boot it. Barebooting means that you’re hiking without snowshoes or microspikes, relying just on your boot sole lugs for traction. If it’s snowed since the last time a broken out trail was hiked, you can still probably hike it without snowshoes, as long as the depth of the new snow is a few inches deep and below your ankles. Much higher and you’ll probably find it easier to hike with snowshoes for flotation. Message Boards and Facebook GroupsIf you want to avoid carrying snowshoes on hikes, it’s best to pick trails that have already been broken out and packed down by other winter hikers. If you winter hike someplace that has a well developed trail system and hiker population, try to find a message board or Facebook Group where hikers post trip reports or share trail condition information with one another. For example, I usually check a bulletin board called NETRAILCONDITIONS when I winter hike in New Hampshire or Southern Maine, which shows me which trails have been hiked recently and whether snowshoes or microspikes are recommended. Try to find something similar in the area where you hike. Snow Depth InformationIf you want to hike on a trail and can’t find any recent trail condition information for it, try to find a snow depth report for the surrounding area. NOAA publishes a snow depth report that displays snow pack depth and recent snowfall statistics. Type in a location (town and state) and it will display all of the observations it has available for the surrounding area. Some outdoor clubs and ski area also publish snow stake depths (measured on a yardstick) and recent snowfall totals, which can be helpful in guessing how much powder you’ll encounter on your hike. You’ll need to have a map handy to compare their observations with the location of your trail. Recent Snowfall HistoryNOAA also has a point forecast tool that you can use to get precise weather forecasts and recent snowfall totals. For long hikes, especially those in mountainous terrain, it can pay to start tracking daily snowfall totals for up to a week before a hike, to understand how much snow has fallen and accumulated. This is just one element of weather forecasting for winter hikes. For more on this topic, see my article on Winter Weather Forecasting in Mountainous Terrain. 
Terrain characteristicsThis discussion has assumed that you’ll be hiking on winter trails that run along at the same elevation. But what about hikes that climb up mountains or cross mixed terrain, where the snowpack can vary widely due to different terrain and wind characteristics. Here you’ll need to combine multiple sources of information to determine whether its worth carrying snowshoes, including trail condition reports, snow depth history, and track recent snowfall. Wind can also play an important rolw, blowing some areas clear of snow, while piling others with deep snow drifts. When in doubt about what to expect, it often pays to carry your snowshoes, even if you don’t need them. It really sucks when you’ve hiked for hours without snowshoes, only to discover they’re needed to get to your intended destination. Visual ObservationIf you’ve been unable to find any information about the trail you intend to hike, including weather forecasts and history, you can make an educated guess about whether snowshoes will be needed when you arrive. If the trail leaving the trailhead is broken out, there’s a decent chance you won’t need your snowshoes. It’s not always a guarantee, but a decent assumption if your destination dovetails with the hikers who broke the trail out previous. Bring Your Snowshoes to the TrailheadWhatever you decide, always bring your snowshoes to the trailhead for winter hikes. You can leave them in the car if you and your hiking partners decide to hike without them, but if you need them and you’ve left them at home, you’ll have wasted a trip. Don’t let that happen. See Also:
The post When Do You Need to Carry Snowshoes for Winter Hikes? appeared first on Section Hikers Backpacking Blog. from https://sectionhiker.com/when-do-you-need-to-carry-snowshoes-for-winter-hikes/ |

ABOUT MEHello my pleaseure to introduce myself, I am Jose Johnson. I am 26 years old from Monroe, LA. I love to got for hikings with my friends on holidays. Archives
April 2019
Categories |


 RSS Feed
